BMW Rider
Super User
I'm not sure what sort of 3D printing would work for this. I used a piece of 6061 aluminum. Should not ever be a problem again.Sounds like a good 3D Printer project. What material did you use?
I'm not sure what sort of 3D printing would work for this. I used a piece of 6061 aluminum. Should not ever be a problem again.Sounds like a good 3D Printer project. What material did you use?
I love it. You don’t by chance have a set of plans or some dimensions do you? I would not mind making one of theseThis one ended up being a bit more than one day due to some re-engineering required of the ratchet strap. Its a lifting device to help pick up a toppled motorcycle, specifically my BMW F850GSA. Sometimes road conditions lead to the bike taking a nap and lifting it back up can be a bit of an effort. Basically, the strap gets looped under the bike and hooked on somewhere secure like the foot peg, then the ratchet strap is cranked up lifting the bike back to vertical or close enough to it to be easily finished manually. There are some ready made versions available to purchase, but cost far more than what it did to make my own, and even so, why buy what I can build.View attachment 17121View attachment 17122View attachment 17123
Yes I can't say I would ever be able to justify a rotary broach myself but I think they would be cool and handy for projects exactly like yours.No, I just ground the end of a piece of 12mm alley key to have sharp edges and used my press to broach it. Took a couple runs to get it loose enough for a slip fit of the key. Not ideal, but also not a high use part, just once every 20,000 kms for valve checks. I hardly have ever needed to do any broaching, but a rotary broach would be nice to have someday.
I love it. You don’t by chance have a set of plans or some dimensions do you? I would not mind making one of these


Here is a project I have been wanting to do for a while a longer handle for the lathe chuck.
I have been doing practice runs of parts of projects I am unsure of the method or not confident especially if I have special chunk of material for project in this case I felt milling the square would be my challenge.
This is my practice run I put it in my square collet holder vertically and got a nice cut at the base of the square but the square was out a bit nevertheless good for the drill for doing jaw changes.
Its all salvage material the handle was not machined by me just cut to size, the rest I turned and milled the square in my mill
On this one I put the piece in the square collet holder and in the vice horizontally and used the end to take off the material which gave me better control using the quill dro .062 was what had to come of each side and in the end the square is off by .010 so I am happy with that it fits great. I could have done a better job on milling the base of the square but c'est la vie. I drilled and tapped a 8/32 set screw for the handle and am pretty happy with the final resu
Nice. I need to do something similar for chuck changes. My lathe did not come with one and although a 3/8" socket extension works fine, not as nice as what you have there. I have been hesitating mostly cause not too sure about cutting the flats but I think you may have inspired me!
Thanks
Cheers,


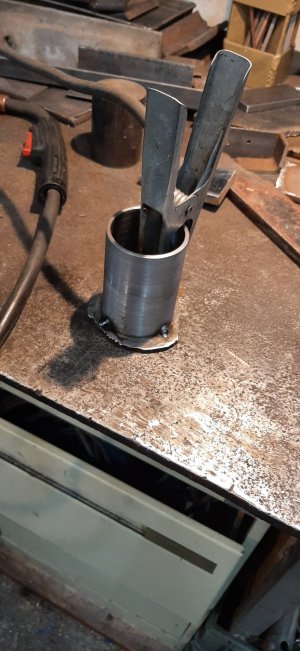
Ya I believe Mr Pete/Tubalcain has a video of making a non spillable tuna oil can. Your fix works tho, that should be very stable and not likely to spill.Cap it with a 1/2” hole in the center if it tips it won’t spill.
Cap it with a 1/2” hole in the center if it tips it won’t spill.
We must be on the same path I've tipped mine over too many times lately, the last time I didn't even take one dip out.This thread seems like a good place to post those quick projects that we all do, something to chat about.
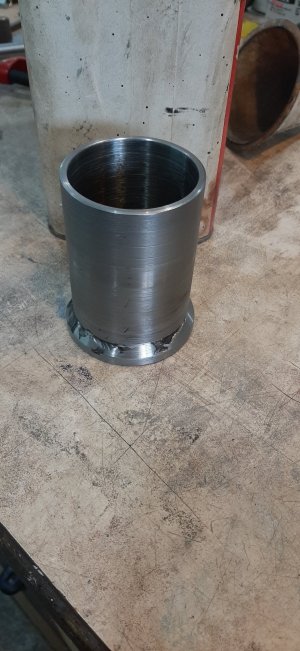
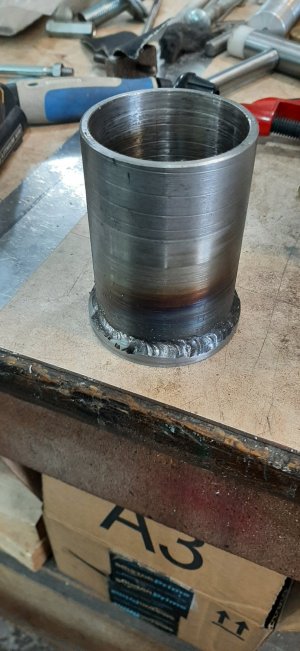
After knocking my "Tuna can" of cutting oil off the bench (usually by snagging the flux brush which stuck out) for about the 5th time this week, and reasoning that at my age, I am not about to get less clumsy, I decided to make something more substantial. A chunk of rusty pipe, more rusty 1/8" sheet and some welding, lathe, and painting, I hope to have a more stable can to have around the lathe or mill. And the flux brush won't stick out so much. I suppose a taller soup can would have been better but not as "weighty". Good chance to practice some welding too. I put paint thinner in it to test it before applying paint and found one tiny hole so was able to grind and reweld that area. Hopefully, it is oil proof now.
Now if it gets knocked over, I will just have more oil to clean up!
🙄
 This is probably how I will normally find it🙂

We must be on the same path I've tipped mine over too many times lately, the last time I didn't even take one dip out.
I laughed at this. I think one of my spills was exactly that, fill it, turn around, snag it, ......crap!