• Scam Alert. Members are reminded to NOT send money to buy anything. Don't buy things remote and have it shipped - go get it yourself, pay in person, and take your equipment with you. Scammers have burned people on this forum. Urgency, secrecy, excuses, selling for friend, newish members, FUD, are RED FLAGS. A video conference call is not adequate assurance. Face to face interactions are required. Please report suspicions to the forum admins. Stay Safe - anyone can get scammed.

Laser Engraving

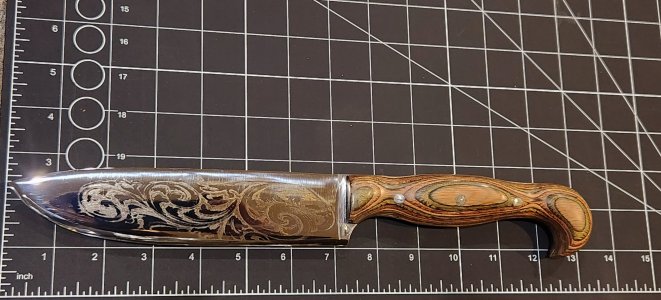
This engraving is much more visible than the first. Since I decided to run two passes at full power, it actually engraved the steel instead of just oxidizing the surface. The way the engraver fires bi directional left and right is very noticeable. I still feel the individual lines would blend together more if they were all parallel in the direction of the design.
20231122_234814.jpg
 
@TorontoBuilder you were looking at laser cutting - did you find a solution to cut out tool tray drawers?
No John, I parked that project indefinitely since I had other more pressing things to deal with.

I do have a laser cutter guy in the GTA I have used in the past and was going to ask him to cut parts and provide me a bulk discount when I do. I hope to get time in the new year for such things, because I do want to get my parts for my model teardrop trailer laser cut too....
 
For knifemaking, it occurs that you could get really creative with etching, using the laser to burn away the resist. Spend some time playing in a vector graphic software like Inkscape and burn a negative of your image on the parts you wanted etched, eh?
THIS ^^^^

Not just knife making, but marking general metal working, jewelry etc can all be done better by using a laser to burn out a mastic type resist and then using an appropriate etching solution. In fact this method would be much easier than the laser toner transfer method I've used to etch all sorts of metals.

So what is the absolute cheapest laser machine?
 
That’s a good idea @TorontoBuilder ! I think the cheapest is used on kijiii or Facebook. I think a lot of people buy these things and then they sit.

I want to engrave copper and aluminium. Resist? Spray paint?What exactly? And then … electrolysis? Acid?

I’d like to do lettering. Very nice lettering.
 
Not just knife making, but marking general metal working, jewelry etc can all be done better by using a laser to burn out a mastic type resist and then using an appropriate etching solution. In fact this method would be much easier than the laser toner transfer method I've used to etch all sorts of metals.
That's a great idea for the cermark that I'm still working with. Though it still doesn't leave a permanent mark, I have found a setting that is more difficult to remove than every other setting. In that case I I'm thinking it might act as a good resistant to ferric chloride which is what I use for acid etching.
So far I have just been using nail polish as a resident, and carving out what I wand etched. My laser engraver would be far more precise for creating a detailed stencil on a knife blade with cermark.
 
That's exactly what I want. I'd easy pay a grand for beautiful classy permanent letters and maybe a small logo on Stainless Steel. Think gunsmith logo and caliber on a barrel.
There is nothing as unsightly on a custom barrel job as crooked lettering & numbers...and it happens 99% of the time on gunsmith installs.
There is a master custom barrel maker here in Ab that made his own stamping jig and he used the same care and attention that he uses on his barrel cutting...line-up & consecutive strikes are flawless & as factory perfectly formed.
 
There is nothing as unsightly on a custom barrel job as crooked lettering & numbers...and it happens 99% of the time on gunsmith installs.

You are absolutely right. I hate that too. It takes me a day per letter to get it right. (I am exaggerating to make a point.) Even with a custom fixture I made I'm just not happy. I really want something that reflects the care and love I put into each build I do.

There is a master custom barrel maker here in Ab that made his own stamping jig and he used the same care and attention that he uses on his barrel cutting...line-up & consecutive strikes are flawless & as factory perfectly formed.

I made a custom fixture that works as well as any fixture could. But they cannot do any better than the punches themselves. I can do better than a factory barrel but that isn't saying much. It's not until you see a barrel with CNC cut lettering or CNC laser etching that you reach the quality level I aspire to.
 
There is nothing as unsightly on a custom barrel job as crooked lettering & numbers...and it happens 99% of the time on gunsmith installs.
There is a master custom barrel maker here in Ab that made his own stamping jig and he used the same care and attention that he uses on his barrel cutting...line-up & consecutive strikes are flawless & as factory perfectly formed.
I like the hand applied stamping. The little subtle misalignments. It really adds a hand made craftsman look to it. Now don't get me wrong....I'm not talking about the Grade 1 Crayola numbering that I would be applying, but hand stamped with some skill behind it. Older watches tend to have the serial number stamped. (sometimes pantagraphed) Adds character to it.
 
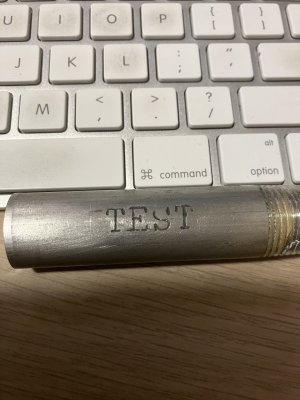
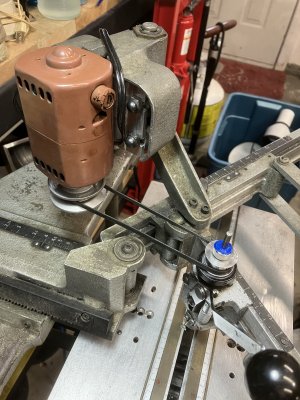
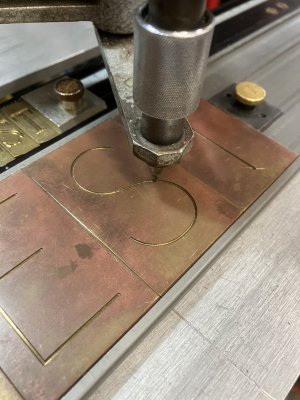
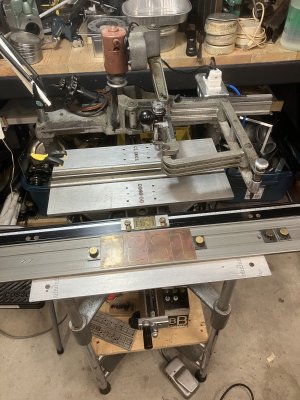
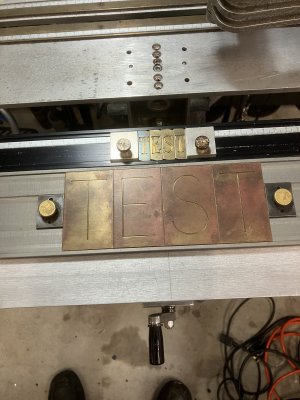
You folks are seriously a bad influence. This is a very rough test on using my New Hermes engraving machine on both a curved surface, and on stainless steel. Workpiece is a chunk of 1/2" NPS 304 stainless steel pipe. No attempt to make it pretty, just attacked it with an old 0.030" cutter. Filled in with black nail polish. The second photo is what the engraver can do if I'm even a tiny bit careful.

Video of the engraving machine I'm using:


IMG_3552.jpeg
 

Attachments

  • IMG_3553.jpeg
    IMG_3553.jpeg
    558.6 KB · Views: 9
It's really hard to make a CNC machine look like an old Engraving machine. That is the charm in the stamped/hand engraved items. CNC/Laser is cold. Too perfect.

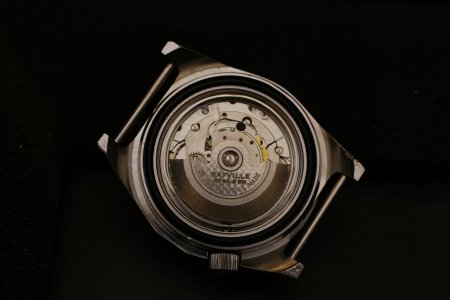
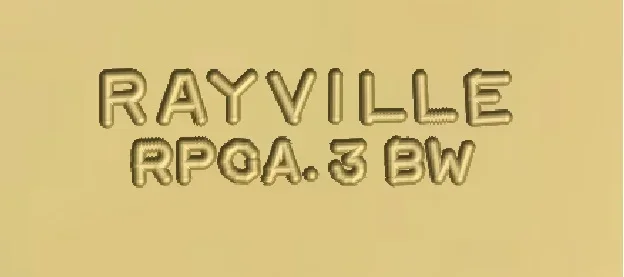
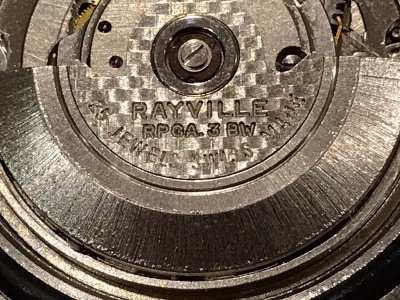
Here is an old watch with a rotor that was engraved (probably with a pantagraph) back in the day. I was asked to make a rotor with the same engraving. On the CNC it didn't look right. Too perfect.

IMG_1435.JPG
Rayville-semi-original-first-try-more-work-needed.jpg

And a few hours later after lots of work.....
Rayvile.jpg
IMG-20200412-WA0015.jpg
 
Interesting video @whydontu . What are those things you've been engraving? Do you make them? How was the master template made?
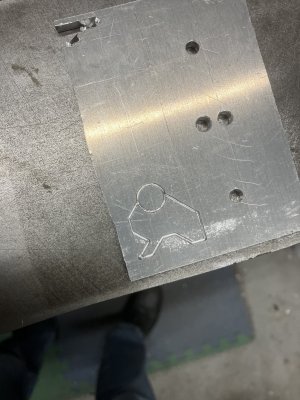
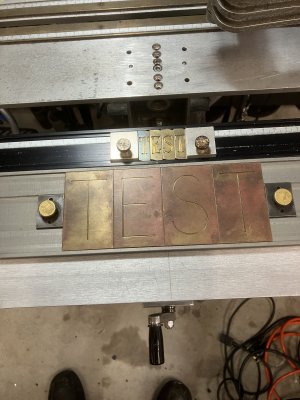
For my rotary engraver, I mostly use factory-made font tiles. For specialty stuff, I have a 3018 CNC engraver and make templates from hardboard or aluminum. This is a logo I cut on the 3018 using a scrap chunk of 1/8' aluminum, then I can use it in the New Hermes and scale to suit the desired use. 1/16" cutter at .030" depth.
IMG_3567.jpeg
 
Drop Dead Beautiful in my opinion!

I want one!
Everyone needs one.

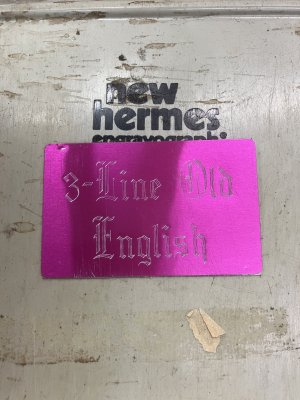
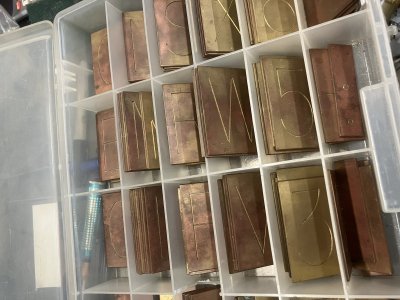
I'm having a blast with it. For most of the stuff I make I use the simple font tiles. When I bought the machine it came with a dozen different font sets, from simple block text to triple-line old English script.

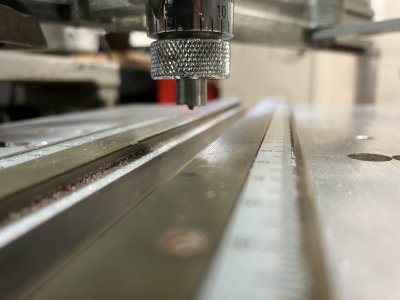
Also with cutters from 0.010" to 0.125" width, and diamond drag bits.

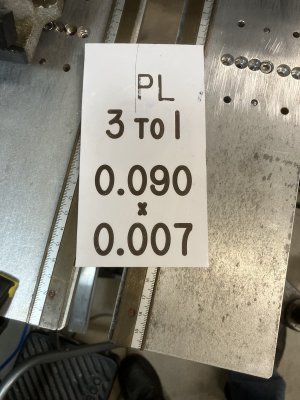
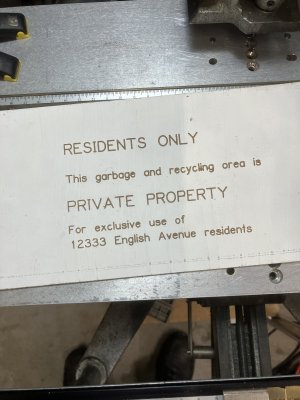
Experiments so far have been on aluminum, stainless, hardboard, ABS and PVC sheet. One of the photos is white formica sheet, using 0.007" depth of cut and 0.090" wide cutter. Does a beautiful job on making signs.

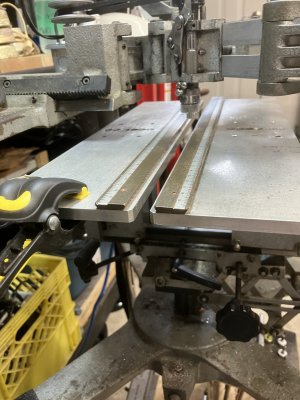
The vise I have has a pile of different jaws, from ones to hold jewelry, pens, sheet stock, and it also came with a set of cones and gearing to engrave cylinders (coffee mugs, trophy cups, etc.)

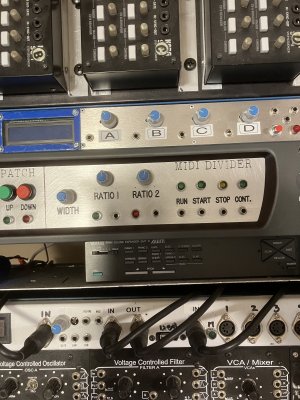
I originally bought it to engrave front panels for electronic gear, like the sample MIDI clock from my music rig. Compare the engraved panel vs. the Dymo labelled one. Except I messed up the alignment on <MIDI DIVIDER>. Figuring out how to use the engraver is a work in progress.
 

Attachments

  • IMG_3566.jpeg
    IMG_3566.jpeg
    432.2 KB · Views: 12
  • IMG_3563.jpeg
    IMG_3563.jpeg
    470.1 KB · Views: 10
  • IMG_3561.jpeg
    IMG_3561.jpeg
    414.4 KB · Views: 11
  • IMG_3559.jpeg
    IMG_3559.jpeg
    402.1 KB · Views: 11
  • IMG_3558.jpeg
    IMG_3558.jpeg
    280.7 KB · Views: 10
  • IMG_3557.jpeg
    IMG_3557.jpeg
    526.9 KB · Views: 10
  • IMG_3556.jpeg
    IMG_3556.jpeg
    424.4 KB · Views: 10
  • IMG_3555.jpeg
    IMG_3555.jpeg
    546.4 KB · Views: 10
  • IMG_3554.jpeg
    IMG_3554.jpeg
    484.4 KB · Views: 11
  • IMG_3554.jpeg
    IMG_3554.jpeg
    484.4 KB · Views: 15
  • IMG_3568.jpeg
    IMG_3568.jpeg
    532.9 KB · Views: 14
I have a 3018 CNC engraver and make templates from hardboard or aluminum.
Wait just a second here... you have a CNC engraver.. and you use it make templates for your manual engraver? No criticism I just don't quite follow. I see you are doing engraving on a round surface - that is much trickier with a CNC solution and pretty straight forward with your manual pantograph. What is a 3018 CNC Engraver??!!! I've partially answered my question here with the below article. But tell us about yours! What manufacturer? How do you program it? Pictures of course. :cool:

And what are those vase like things in your video?

 
That's a great idea for the cermark that I'm still working with. Though it still doesn't leave a permanent mark, I have found a setting that is more difficult to remove than every other setting. In that case I I'm thinking it might act as a good resistant to ferric chloride which is what I use for acid etching.
So far I have just been using nail polish as a resident, and carving out what I wand etched. My laser engraver would be far more precise for creating a detailed stencil on a knife blade with cermark.
Chris - you could try burning off nail polish with your laser. And then using the ferric chloride. ?
 
Wait just a second here... you have a CNC engraver.. and you use it make templates for your manual engraver? No criticism I just don't quite follow. I see you are doing engraving on a round surface - that is much trickier with a CNC solution and pretty straight forward with your manual pantograph. What is a 3018 CNC Engraver??!!! I've partially answered my question here with the below article. But tell us about yours! What manufacturer? How do you program it? Pictures of course. :cool:

And what are those vase like things in your video?

Long story as short as possible:

I bought a 3d printer kit, it was absolute crap and never even put it together. So ended up with a pile of stepper motors and controllers. Thought maybe I’d convert my CT129 mill to CNC, but it’s a big project so decided to do this cautiously. Found a 3018 CNC kit on Amazon for $180, figured it was worth a shot and not too much money even if it was as bad as the reviews. Works OK, but realized after using it a bit that I don’t like making things by pushing buttons. I get much more satisfaction turning handwheels, so mill and lathe will remain manual. But as I went down the CNC path, I had an opportunity to get the New Hermes engraver setup at a great price, and knew that I could part it out on eBay for 5x what I paid for it if I didn’t like using it. Turns out I love the hands-on nature of operating the engraver, and its capabilities fit in well with my other hobbies.

I get much better results on the manual engraver than the 3018 CNC, even on little simple stuff. It’s all about feel and sound, adjusting cutter geometry and projection, feeling the cutter response to DOC, and hearing the change in motor whine as I follow the template. Can’t do anything like that on CNC, it’s like the difference between a live drummer or hitting <Play> on a drum machine.

As for cutting templates on the 3018, factory templates are crazy expensive. And the manual engraver can scale from 1:2 to 1:8, so I can make up one big template using the CNC and it’s done, as long as I don’t get too aggressive with the engraver stylus even a plastic template is good for life.

No idea on the video, it’s just a YT video I found when I was first researching buying the engravers.

3018 CNC uses an Arduino-based controller running grbl. For control, I use a commercial program called ESTLCAM on a simple WIN10 PC. Does what I want without too steep a learning curve.
 
Chris - you could try burning off nail polish with your laser. And then using the ferric chloride. ?
I'm thinking that would work even better. I'm not all that confident that non burned cermark would work as a good resistant to feric chloride; and the laser engraver would most likely be powerful enough to burn off the nail polish in a precise way.
 
Back
Top