
Making progress. From the edge of the visible pipe to the flower garden curb is about 3'. Not a fan of 12' of hardpan; 5" of sandy clay and gravel and 2" of topsoil.
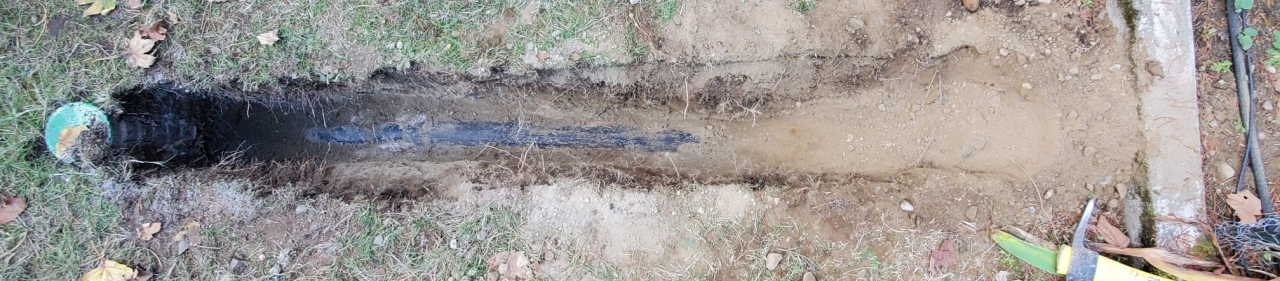

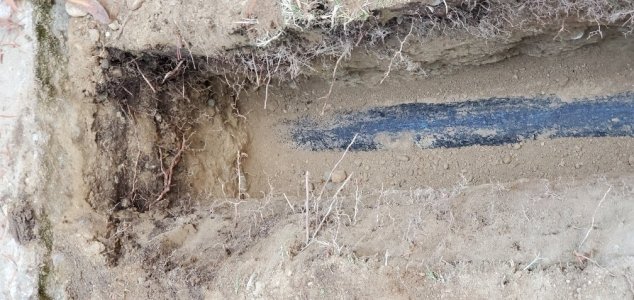

The Plumber figured that someone likely just dropped a rock onto it and then when the soil was compacted it crushed the pipe.
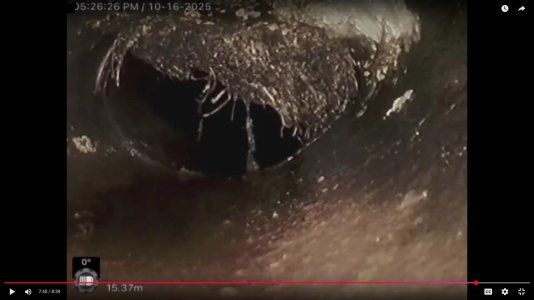

Given your description of the pipe and the age of it, I am reasonably certain that it's going to be asbestos...... very common for the time period. Use a level of caution.As I uncover more of this pipe and look again at the photo of the obstruction I'm more and more convinced this is some sort of fibreglass pipe. The outside isn't smooth like ABS. It doesn't appear to be round. The fragments hanging down as per updated photo on
Here's a snapshot of what the plumber called crushed pipe. He couldn't get his larger cutter through. Had to drop down to 2.5" and even there he figures it turned sideways and slipped under.
This is about 10' from the white PVC clean-out pipe which goes down at an angle towards the road. So my guess is I have to maybe dig another 4'.
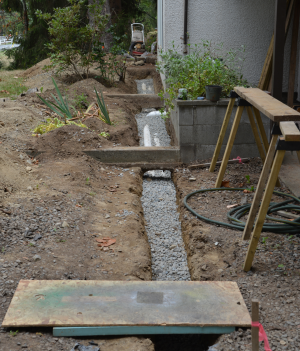
Using the camera tracking distances I still have a bit to uncover and it's looking like close to where I replaced the perimeter drain pipe.
This was both the roof drain on separate solid pipes beside the standard perimeter drain pipes with holes. No photo without the gravel but I'm guessing depth wise it's close to the top of the sewer pipe.
View attachment 71619
I guess I'll see as I dig some more.
more convinced this is some sort of fibreglass pipe.
That's a good point. I always assumed asbestos was confined to elevated temperature (insulation) purposes but they also apparently used it back in the day for water lines as wrap or part of cement composition.Given your description of the pipe and the age of it, I am reasonably certain that it's going to be asbestos...... very common for the time period. Use a level of caution.
Asbestos sewer pipe, also known as asbestos-cement (AC) or Transite pipe, was widely used for underground water and sewer lines from the 1950s to the 1980s. Although durable and corrosion-resistant, it poses a health risk because it can release hazardous asbestos fibers into the air or water when disturbed, so it should only be handled by trained professionals who use safety protocols and personal protective equipment (PPE).
Yup, that's the stuff..... common as nails in the time period.Could very well be. Very common for water use. And when its been breached, glass strands is what you typically see.
The plumber had a name for that sort of pipe although he didn't say asbestos. He figured the house from 1969 was too new for that type of pipe but he also said that if a plumber has a piece hanging around he might just use it.
Yikes. Transite I think is the term he used..
Since it's raining and now dark no digging of the sewer line. Thought I'd dig back into these differences in tool measurement.Had to set the soft limits to be past the mechanical switch in order to jog onto the home/limit switch.
Five times, each stepping 0.001" per button press. And each time the switch engaged at 0.301" moving from 0.300".
I've remeasured the probe and tweaked the value to within 0.0001"
I've remeasured tool #4 (3/8" 2 flute) and probed the top of the two 1-2-3 blocks and set Z=0.000 there using the probing utility. The cutting edges just rub the 1-2-3 blocks as they should.
Told the system to load tool #5 which doesn't have a length but left Tool #4 in place. It then went to the tool setter and measured it. Like on Friday, the system hung with the tool setter pressed. A continue button had it go back up and reset Z 0 G54 offset. And no, the tool was not in the right position for rubbing the 1-2-3 block.
So I've definitely got to look at what I screwed up in the M6-Remap code. Will also measure the tool setter again but it hasn't changed in height by over 3" so that's not the problem.
More as this mystery develops.
For a brief moment I understood a few of the posts and almost felt like I fit in......Since it's raining and now dark no digging of the sewer line. Thought I'd dig back into these differences in tool measurement.
As long as that one location in the linuxcnc.var doesn't change tool changes appear to be somewhat repeatable but not good enough. Thought maybe the backlash etc required more turns in the reverse direction and then back forward to properly load everything.
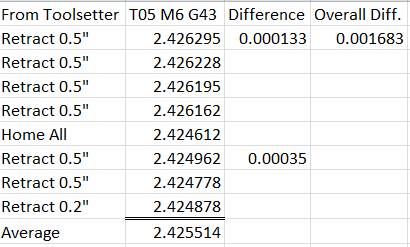
Here's 8 tries, same tool. Halfway through even did a Home All command.
View attachment 71673
So the dramatic change after the home all suggests that the home switch isn't as repeatable. Obviously the next task is to put a dial indicator onto the machine and measure to see if it ends up at the same home position.
Since it's the same tool. The same set of move to tool change position, stop. restart and move to tool measure position. Everything is the same and yet on each tool measure operation it looks like maybe even the tool measuring device has a certain amount of inaccuracy.
I'm thinking 0.00035 to 0.000133 isn't that big a deal for a machine with ACME screws and likely slightly worn nuts.
Homing is another thing entirely. Time to dig out the proximity switches I think.
When it stops raining. Pretty sure I damaged the line when I installed the perimeter drain and roof drain pipes. Now the question will be how to repair it depending on where the damage is. Rain won't stop till noon.For a brief moment I understood a few of the posts and almost felt like I fit in......
So, when you getting back to the sewer line again? 😛
For a brief moment I understood a few of the posts and almost felt like I fit in......
So, when you getting back to the sewer line again? 😛
0.000035 (3.5 tenths of a thou) is nothing
edited, more coffee is required. 3.5 ten thousands of an inch.


