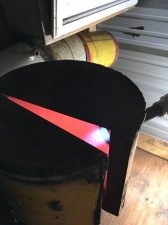
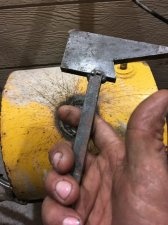
• Scam Alert. Members are reminded to NOT send money to buy anything. Don't buy things remote and have it shipped - go get it yourself, pay in person, and take your equipment with you. Scammers have burned people on this forum. Urgency, secrecy, excuses, selling for friend, newish members, FUD, are RED FLAGS. A video conference call is not adequate assurance. Face to face interactions are required. Please report suspicions to the forum admins. Stay Safe - anyone can get scammed.

Forge and foundry build

Hey guys new to the forum, but a few quick items to add to the discussion.

We sell foundry/forge materials on the west coast, Surrey BC

1. Tim Smelko very cool, but Ontario is a distance away.
2. Use Perlite, not vermiculite. 4 cubic bag of Perlite will run you about $20 at the most.
3. Those white bricks are "insulating" and have very little strength. You should think a PR2300 or PR2600. Much stroger at the higher temps. Basically you can drop something on them and they wont chip or break. Also if you think you may splash, i use non spall type bricks.
I used them in the door area of my homemade pizza oven to protect it from the elements, snow and water can do serious damage.
4. You all might think about "plastic refractory" They come in 55lb boxes and are very malleable. Once fired just as hard as bricks, but easier to form.
5. Kiln Plates - I have used a product called "tufflloor" it is a high temp refractory that cures with out needing to be fired. Once cured (12 hours) you can drive a forklift over it and no damage. I have used it in foundry floors and in my pizza oven.
6. and do try to stay away from vermiculite.

Ray
 
To the burner or to the furnace?


Sent from my iPhone using Tapatalk

Too much oxygen in a oxy propane system will extinguish the flame. For forced air burners just reduse the air pressure, and for atmospheric burners use an air choke to limit the amount of air that gets sucked into the burner.
 
If direct flame contact is to be avoided when curing any castable refractory, then how could you cure the interior of a propane forge made with castable refractory cement. I am looking into improving the strength of my forge's interior walls protecting the ceramic fiber blanket. So what, would be the best way to protect the insulation with the use of castable refractory such as morocast 60?
 
For the castable there can be a fire built inside to help cure it then the temp is increased slowly with the burner, with the fiber blanket you can paint it with a Zircon solution then its good I belive to 3000 deg it cost me about $100.00 at Ceramics Canada.
 
I've used light bulbs or a heating element from a dryer before. Slow even heat for a good while


Sent from my iPhone using Tapatalk
 
Well jumped straight into the forge in a day ( i only had a few hours or id have finnished) heres some pictures, the write up may come later, but for now key points are that it is not complete and my chipping hammer is ghetto AF (i know this):D
 

Attachments

  • IMG_0176.JPG
    IMG_0176.JPG
    153.3 KB · Views: 19
  • IMG_0177.JPG
    IMG_0177.JPG
    92.7 KB · Views: 19
  • IMG_0178.JPG
    IMG_0178.JPG
    90.6 KB · Views: 17
  • IMG_0179.JPG
    IMG_0179.JPG
    92.4 KB · Views: 17
  • IMG_0180.JPG
    IMG_0180.JPG
    124.3 KB · Views: 16
  • IMG_0181.JPG
    IMG_0181.JPG
    157.2 KB · Views: 17
  • IMG_0182.JPG
    IMG_0182.JPG
    117.9 KB · Views: 16
  • IMG_0183.JPG
    IMG_0183.JPG
    96.7 KB · Views: 17
  • IMG_0184.JPG
    IMG_0184.JPG
    80.3 KB · Views: 16
  • IMG_0185.JPG
    IMG_0185.JPG
    93.8 KB · Views: 17
  • IMG_0186.JPG
    IMG_0186.JPG
    80.9 KB · Views: 15
  • IMG_0187.JPG
    IMG_0187.JPG
    93 KB · Views: 16
IMG_0192.JPG Started by doing a quick test on day 2
No insulation on the sides and its just tacked together
 

Attachments

  • IMG_0190.JPG
    IMG_0190.JPG
    63.8 KB · Views: 16
  • IMG_0191.JPG
    IMG_0191.JPG
    108 KB · Views: 16
Side insulation and side door cut out. Its 1/2" fiber board ( dont know where my brother got it )
 

Attachments

  • IMG_0194.JPG
    IMG_0194.JPG
    70.6 KB · Views: 13
  • IMG_0195.JPG
    IMG_0195.JPG
    112.8 KB · Views: 14
  • IMG_0196.JPG
    IMG_0196.JPG
    70.3 KB · Views: 14
  • IMG_0197.JPG
    IMG_0197.JPG
    95.4 KB · Views: 14
The door is hung now i need a few rests and a door latch/ knob and of course free time to use it
 

Attachments

  • IMG_0198.JPG
    IMG_0198.JPG
    136.1 KB · Views: 11
  • IMG_0199.JPG
    IMG_0199.JPG
    128.5 KB · Views: 9
This is a fun build to watch. At some point when you get it working a vid would be great.
 
The burner that I am using for my forge is definitely oversized for the size of my forging chamber, which is 8" × 16"; but I was told that it could still be used for smaller forges at pressures as low as 5 psi, still delivering up to 100,000 btu/h. But The amount of dragons breath that I still get from the forge (1 ft), tells me the burner most likely has too much back preasure. If I increased the size of the exhaust port on the backside to at least 7 times the area of the burner's nossle would it decrease the dragons breath by allowing the burner to breath more, or would it only allow more heat to escape? What would be the best way to reduse the dragons breath that comes from the forge and still retain enough heat to reach forge welding temperature?
 
The burner that I am using for my forge is definitely oversized for the size of my forging chamber .... forge and still retain enough heat to reach forge welding temperature?
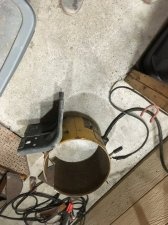
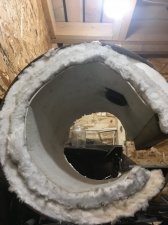
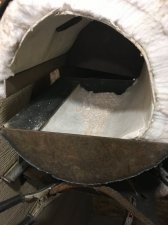
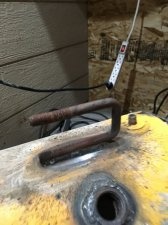
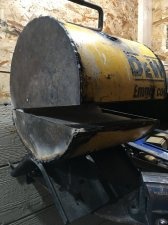
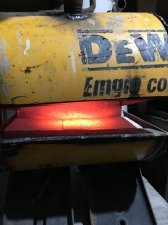
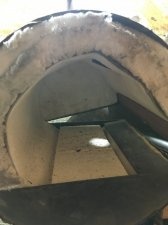
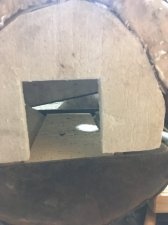
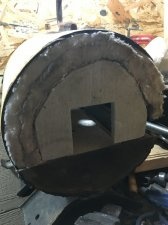
I have similar issues. It seems like opening the back more just let’s all the extra heat out.
 
What Lp psi are you running? How much air flow? Does it sound like a rocket? I tune by ear listening for the sound of a rocket, but as the heat builds it changes tunes and requires adjustment of gas pressure and air flow. Usually less as things heat up
 
The picture bofobo posted of his burner flame in message #73 looks pretty ideal. Tune your burner/forge to get that type of flame and you should minimize the “dragons breath”.
 
Back
Top