-
Scam Alert. Members are reminded to NOT send money to buy anything. Don't buy things remote and have it shipped - go get it yourself, pay in person, and take your equipment with you. Scammers have burned people on this forum. Urgency, secrecy, excuses, selling for friend, newish members, FUD, are RED FLAGS. A video conference call is not adequate assurance. Face to face interactions are required. Please report suspicions to the forum admins. Stay Safe - anyone can get scammed.
-
Several Regions have held meetups already, but others are being planned or are evaluating the interest. The Calgary Area Meetup is set for Saturday July 12th at 10am. The signup thread is here! Arbutus has also explored interest in a Fraser Valley meetup but it seems members either missed his thread or had other plans. Let him know if you are interested in a meetup later in the year by posting here! Slowpoke is trying to pull together an Ottawa area meetup later this summer. No date has been selected yet, so let him know if you are interested here! We are not aware of any other meetups being planned this year. If you are interested in doing something in your area, let everyone know and make it happen! Meetups are a great way to make new machining friends and get hands on help in your area. Don’t be shy, sign up and come, or plan your own meetup!
You are using an out of date browser. It may not display this or other websites correctly.
You should upgrade or use an alternative browser.
You should upgrade or use an alternative browser.
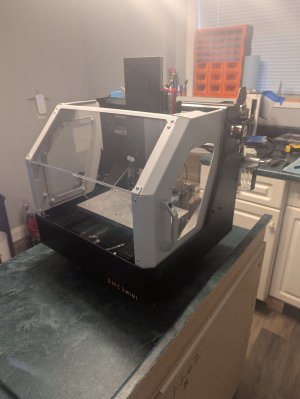
DMC2 Mini Mill - Another build and review
- Thread starter Feeop
- Start date
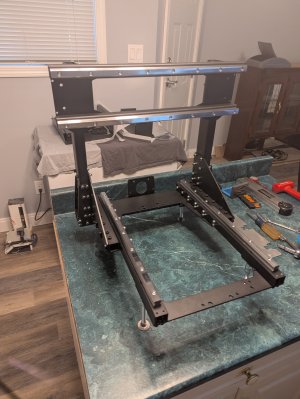
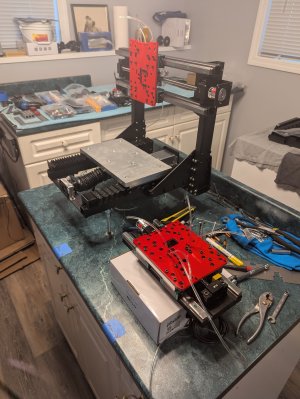
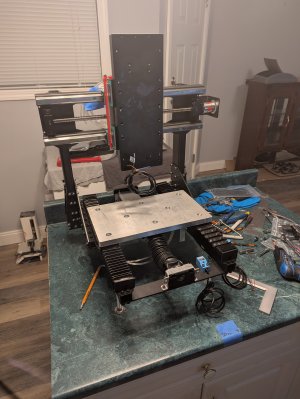
Day 1. Basic frame and X/Y linear rails, and lots of nuts and bolts.
Only one little issue.
1. Had to enlarge a couple of holes in one of the short tubes.
So far, a descent kit to assemble. Parts are well made, machined and finished. The alignment tool helps but it will require some tighter tolerances.
Only one little issue.
1. Had to enlarge a couple of holes in one of the short tubes.
So far, a descent kit to assemble. Parts are well made, machined and finished. The alignment tool helps but it will require some tighter tolerances.
Attachments
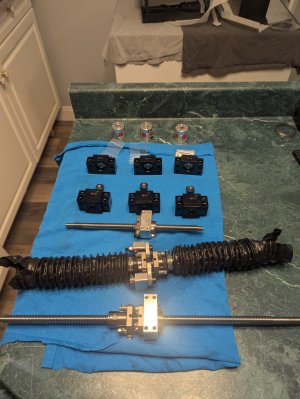
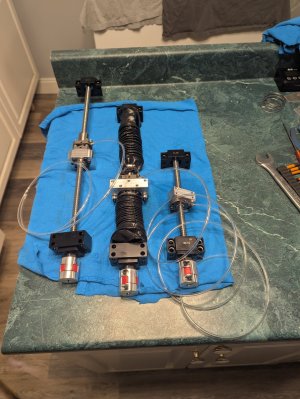
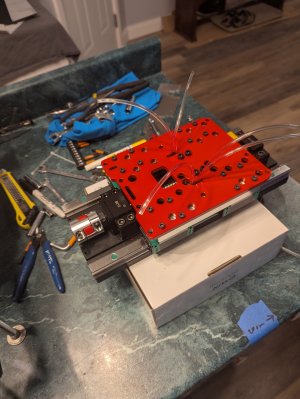
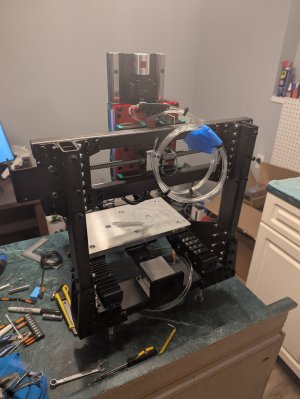
Day 2. Ball screws.
Issues.
1. I installed the oil nipples that can with the ballscrews. Wrong ones. The 4mm ones are in a bag with the oiling system parts.
2. Way covers for the Y axis are a bit fiddly, but they'll go on, just take your time.
3. The backlash system is weird (stacked flat and lock washers). I'm sure a good spring could fulfil the same function.
Otherwise, moving along.
Cheers
Attachments
So far only minor issues. Couple of holes out of alignment but a bigger drill fixed that and today I was missing the X axis mounting bolts. Fixed by a trip to the hardware store.Im currently seriously debating/looking at getting one of these. How do you like the kit so far?
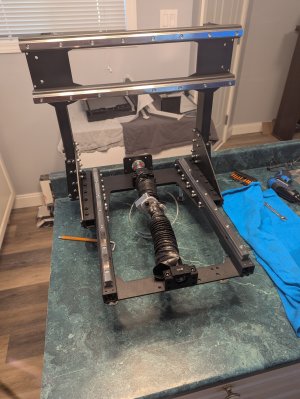
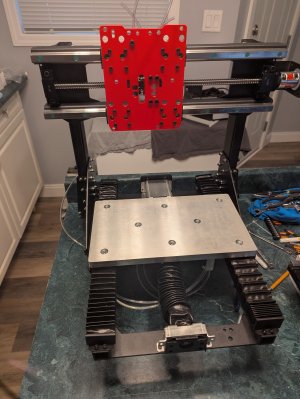
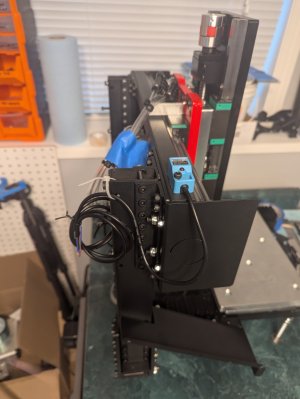
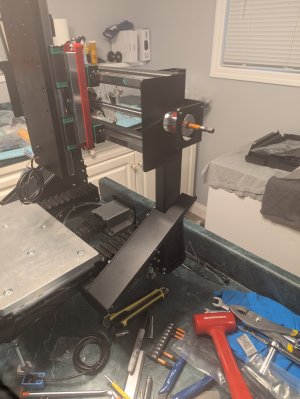
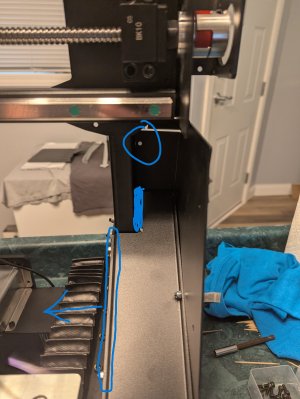
Day 3. Way covers, oil lines, bed and start the Z axis assembly.
Issues:
1. Missing X axis mounting bolts (4)M6x45
2. Zip ties to hold the way covers to the linear guides is cheap and fiddley but works (we'll see).
3. Really hard to tighten the Z axis ball screw nut once the assembly is done as per the instructions. Had to remove the ball screw nut bolts and slide it out from behind the red plate, then use a very thin walled 7mm socket to tighten. Then loosen all the red plate bolts to get the ball screw nut back in and tighten all. Need patience here.
Otherwise another stellar day of doing stuff I enjoy.
Cheers all.
Attachments
zip ties for way covers interesting, sounds like and looks like its coming along nicely for you tho. Im thinking ill be picking one of these kits up this weekDay 3. Way covers, oil lines, bed and start the Z axis assembly.
Issues:
1. Missing X axis mounting bolts (4)M6x45
2. Zip ties to hold the way covers to the linear guides is cheap and fiddley but works (we'll see).
3. Really hard to tighten the Z axis ball screw nut once the assembly is done as per the instructions. Had to remove the ball screw nut bolts and slide it out from behind the red plate, then use a very thin walled 7mm socket to tighten. Then loosen all the red plate bolts to get the ball screw nut back in and tighten all. Need patience here.
Otherwise another stellar day of doing stuff I enjoy.
Cheers all.
It does get a little fiddly at times but it's progressing ok.zip ties for way covers interesting, sounds like and looks like its coming along nicely for you tho. Im thinking ill be picking one of these kits up this week
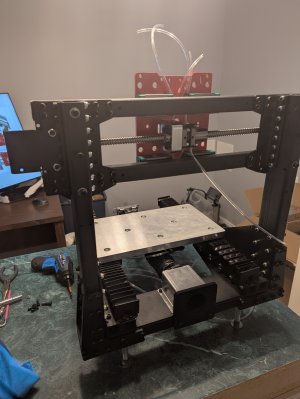
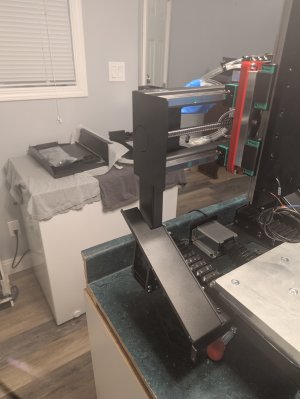
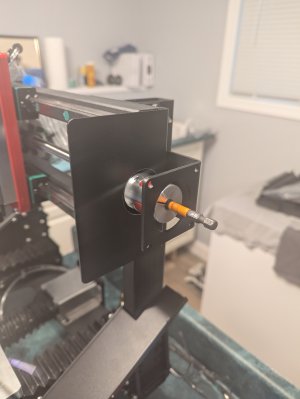
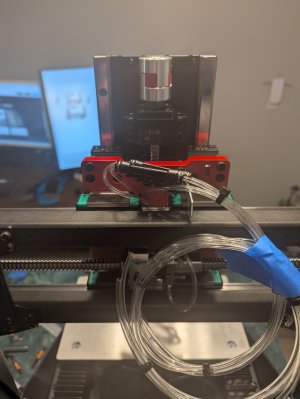
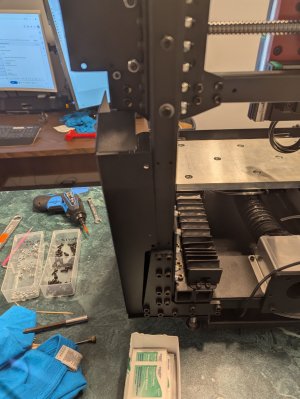
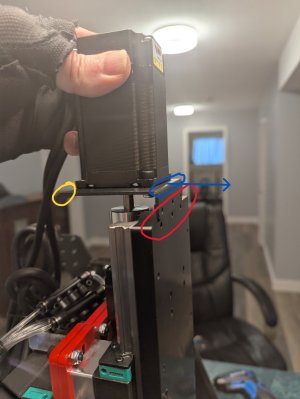
Day 4. Z axis assembly, bed level and square, oil lines
1. All went pretty well. Some places are a little hard to get a shim into but it's doable. I had to add a .002" shim to both sides of the X axis in order to get the Z & Y axis squares.
2. The oil lines are a little tight running up behind the Z axis but the will fit, just don't cut them too short cause it's a B to swap them out. LOL
3. Starting to get a little heavy to move around.
4. The last thing I was working on was the sensors for X and Y. The X one is impossible to mount with the hardware provided M4x25 & nut as I can't get the nut into the tube as there's 2 other screws in the way from the rear X axis rail mounts. Might have to remove them first. We'll see tomorrow. The sensors also need to have the mounting holes drilled out a size or 2, so take it easy. They have their own mounting screws, but cheap ones. I'm also going to glue the X sensor in place as only one screw will fit.
Tomorrow's another day. Cheers
Attachments

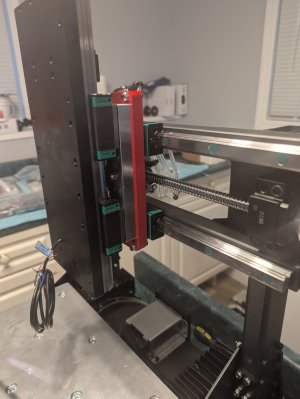
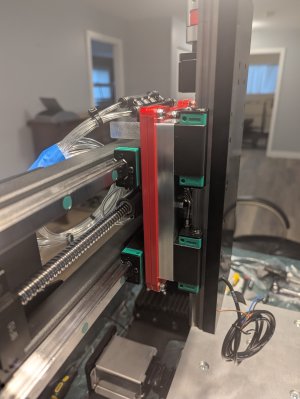
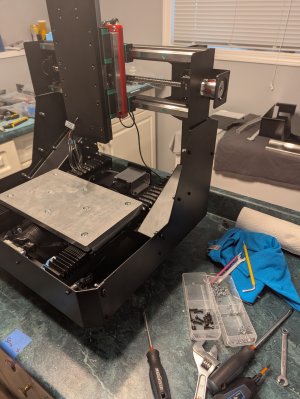
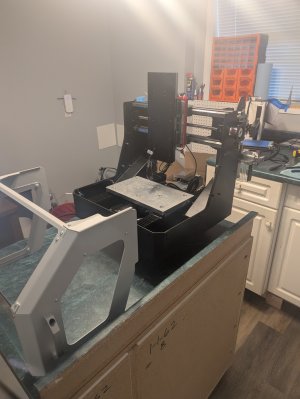
Day 5
Main assembly done, on to the outer shell.
Issues: X-Axis sensor really difficult to install bolted thru the small frame tube.
X-Axis was a little tight at the motor end, but only had to knock it a touch to the left and it runs good now.
You will have to separate the X motor coupler to get that piece in as per the instructions.
Note the added allen key to make each axis easier to move during adjustments. Works great on a cordless screwdriver, which is also a great thing to have.
Mike R has really good assembly and setup info in his post (DMC2 Mini Mill - build and review). Thanks Mike
Onward and upward.
Attachments
-
 PXL_20250309_201720271.jpg1.2 MB · Views: 43
 -
 PXL_20250309_174630209.jpg1.2 MB · Views: 39
 -
 PXL_20250309_174625191.jpg1.4 MB · Views: 36
 -
 PXL_20250309_174616339.jpg881.3 KB · Views: 34
 -
 PXL_20250309_164112295.jpg1.2 MB · Views: 37
 -
 PXL_20250309_164104167.jpg1.2 MB · Views: 43
 -
 PXL_20250309_164055150.jpg1.1 MB · Views: 51
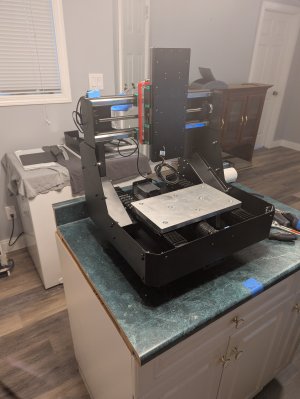
Day 6. Short day today. Need to let things dry.
Issue: Missing some wires for the buttons, so had to skip a step. Nothing major and it doesn't affect the next step.
I noticed a slight screwup after putting the lower shell on. I realized the side skirts were mounted outside the frame and should have been inside, so the lower shell can attach at the back. Too bad all the silicon on the leg nuts was wet. Oh well now my hands are waterproof. Did I mention I dislike silicone.
Oh well, keep moving forward.
Attachments
Thats the same mistake I made, but I got further along before noticing it (mention in post #11 in my thread but not clear, but you can see the misplaced plates in the pictures in the previous posts). Maybe a hint to Shariff to refine the assembly instruction on that step.I noticed a slight screwup after putting the lower shell on. I realized the side skirts were mounted outside the frame and should have been inside, so the lower shell can attach at the back. Too bad all the silicon on the leg nuts was wet. Oh well now my hands are waterproof. Did I mention I dislike silicone.
Funny how I missed that. CheersThats the same mistake I made, but I got further along before noticing it (mention in post #11 in my thread but not clear, but you can see the misplaced plates in the pictures in the previous posts). Maybe a hint to Shariff to refine the assembly instruction on that step.
If you don't like silicone, your not going to enjoy the remainder of the build. And my experience is that it still leaks after much goop. I haven't checked it again after my last round of applying silicone, but I did buy a large baking pan (18" x 24") from Costco Business center for $9 to put under the machine to catch the drips. Cheapest source of a large piece of sheet metal I could find!
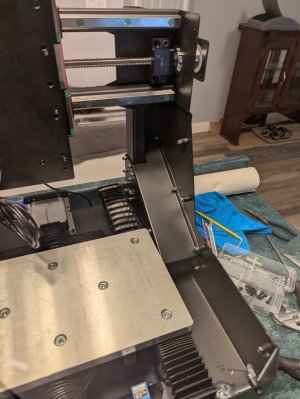
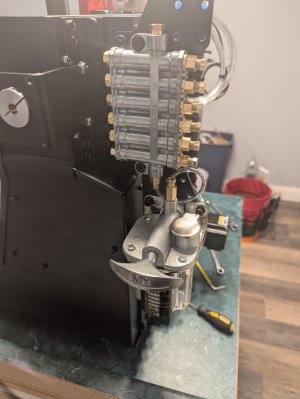
Day 7
Got a little more completed today. All the mechanical except a few heavier parts (left off till after move to final place, need more muscle).
The oil manifold needed shims & longer screws (NP) and I found it easier to attach the oil hose to both ends before installing the oil sump. So far so good, missing wires showing up tomorrow, but I discovered the Z-Axis motor mount is bent in the wrong location and doesn't fit. Word sent to Shariff, so fingers crossed. I could try to straighten it and then bend it back into position but it's such a short distance (1/16"-1/8") I think it might snap. I might have to straighten the lip and oval out the holes but I'll wait on a reply.
Now to the fun bit ELECTRICAL 😱
Keep going I tell myself.
Attachments
Nice work so far. Are you planning on running Mach3 or something else?
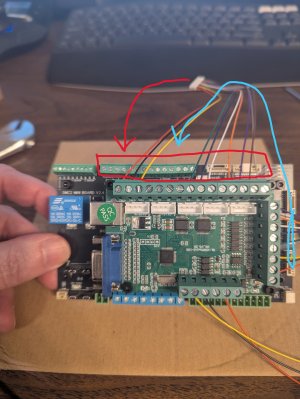
Things to watch out for on electrical if I'm remembering correctly is the instructions are all by wire colour, but the wires on my steppers and encoders were different colours than the manual. Maybe wire up just one motor and get it going (i.e. prove it works) before doing all 3. Will save you having to open everything up to redo the wiring.
Things to watch out for on electrical if I'm remembering correctly is the instructions are all by wire colour, but the wires on my steppers and encoders were different colours than the manual. Maybe wire up just one motor and get it going (i.e. prove it works) before doing all 3. Will save you having to open everything up to redo the wiring.
Thanks Mike. I was planning on just going one motor at a time and yes Mach3 since it's already there and this is my first CNC. Seems there's plenty of reference material around to support it. CheersNice work so far. Are you planning on running Mach3 or something else?
Things to watch out for on electrical if I'm remembering correctly is the instructions are all by wire colour, but the wires on my steppers and encoders were different colours than the manual. Maybe wire up just one motor and get it going (i.e. prove it works) before doing all 3. Will save you having to open everything up to redo the wiring.
Day 8
Figured I'd start some of the electrical work while I wait on the wires for the buttons. Only made it to step 2 and discovered the main board has been updated and the connectors are different. So now we pause again and wait of clarification.
Positive thoughts.🙂
Figured I'd start some of the electrical work while I wait on the wires for the buttons. Only made it to step 2 and discovered the main board has been updated and the connectors are different. So now we pause again and wait of clarification.
Positive thoughts.🙂
Attachments
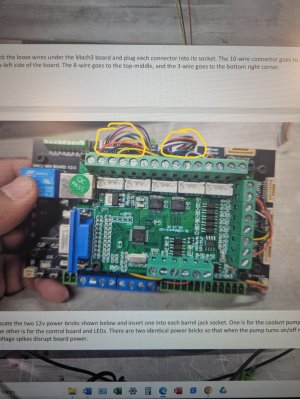
Is there no silkscreen on the old board to cross-reference to the new board?Day 8
Figured I'd start some of the electrical work while I wait on the wires for the buttons. Only made it to step 2 and discovered the main board has been updated and the connectors are different. So now we pause again and wait of clarification.
Positive thoughts.🙂
Last edited: