• Spring 2024 meetup in Calgary - tentative date Saturday, April 20/2024. Other regions are also discussing meet ups. If you want one in your area get going on organizing it! discussion
  • We are having email/registration problems again. Diagnosis is underway. New users sorry if you are having trouble getting registered. We are exploring different options to get registered. Contact the forum via another member or on facebook if you're stuck. Update -> we think it is fixed. Let us know if not.
  • Spring meet up in Ontario, April 6/2024. NEW LOCATION See Post #31 Discussion NEW LOCATION

DavidR8's shop shenanigans

Brent H

Ultra Member
Hi @David_R8 - your system hook up that you have looks really nice - you can "take it to the next level" if you want - you have most of the good parts required.

For all those looking into dust collection, the Bill Pentz site is great - lots of super information and his designs are super great as well. I have a modest cabinet shop area and I build kitchens, custom cabinets etc and then there is the houses and shops etc....in 2017 I decided enough of the crap dust and went at it.

Here is the calculations and cut sheet from Bill Pentz' spread sheets:

cyclonespreadsheetac160629_Page_1.jpg
cyclonespreadsheetac160629_Page_2.jpg
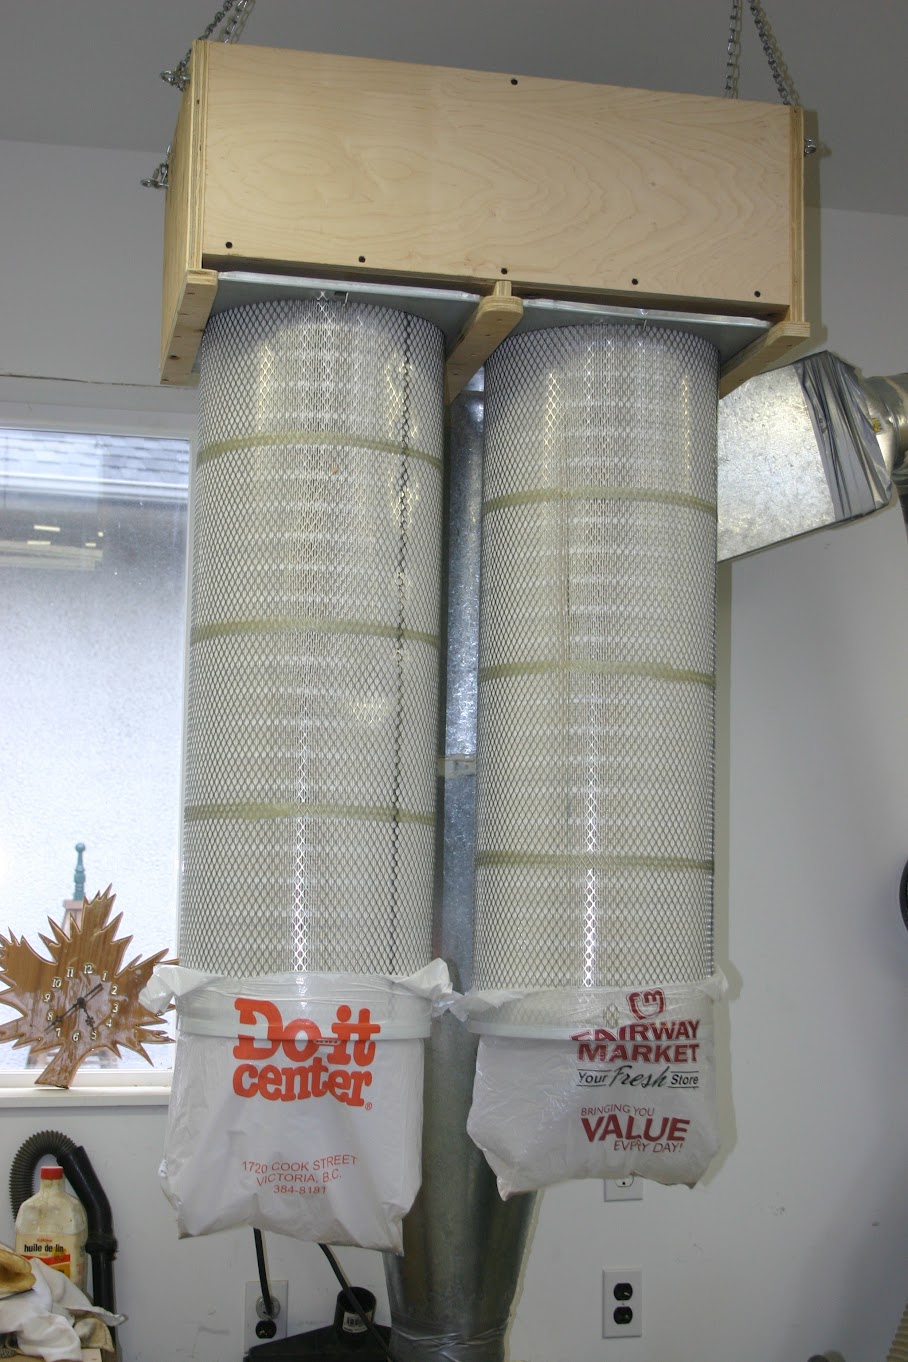
The cut sheet and spread sheet are NOT to scale and it is very important to lay out the project. you will also require and exhaust for the collector. This will take some creativity depending on your intentions. For @David_R8 you would use your pleated filter. The pleats VASTLY increase the exhaust surface area and increase efficiency over a bag filter 100 x plus. It is important to have flow as that makes the dust go. Restrict the output and you will have issues. My unit has a 6" suction port and exits to approximately 500 sqft of pleated filter. A typical busy bee bag will be about 32 Sqft at best.

I cannot find a lot of the build pics as I was going back and forth between the metal shop to roll parts and then back to the ship to weld things up. I made the majority out of 16 gauge and the flanges out of 1/8" - yes - it was a biotch to get into place. Some build pics:

The Donor blower - 3HP off a double bagger Craftex

IMG_1786.JPG

The main body showing the inner swirl plate and center draw:
IMG_1806.JPG

The main body with the inlet attached. Note the angle, length and transition from rectangle to 6" round. All kept as clean as possible for flow and to reduce turbulance:

IMG_1807.JPG

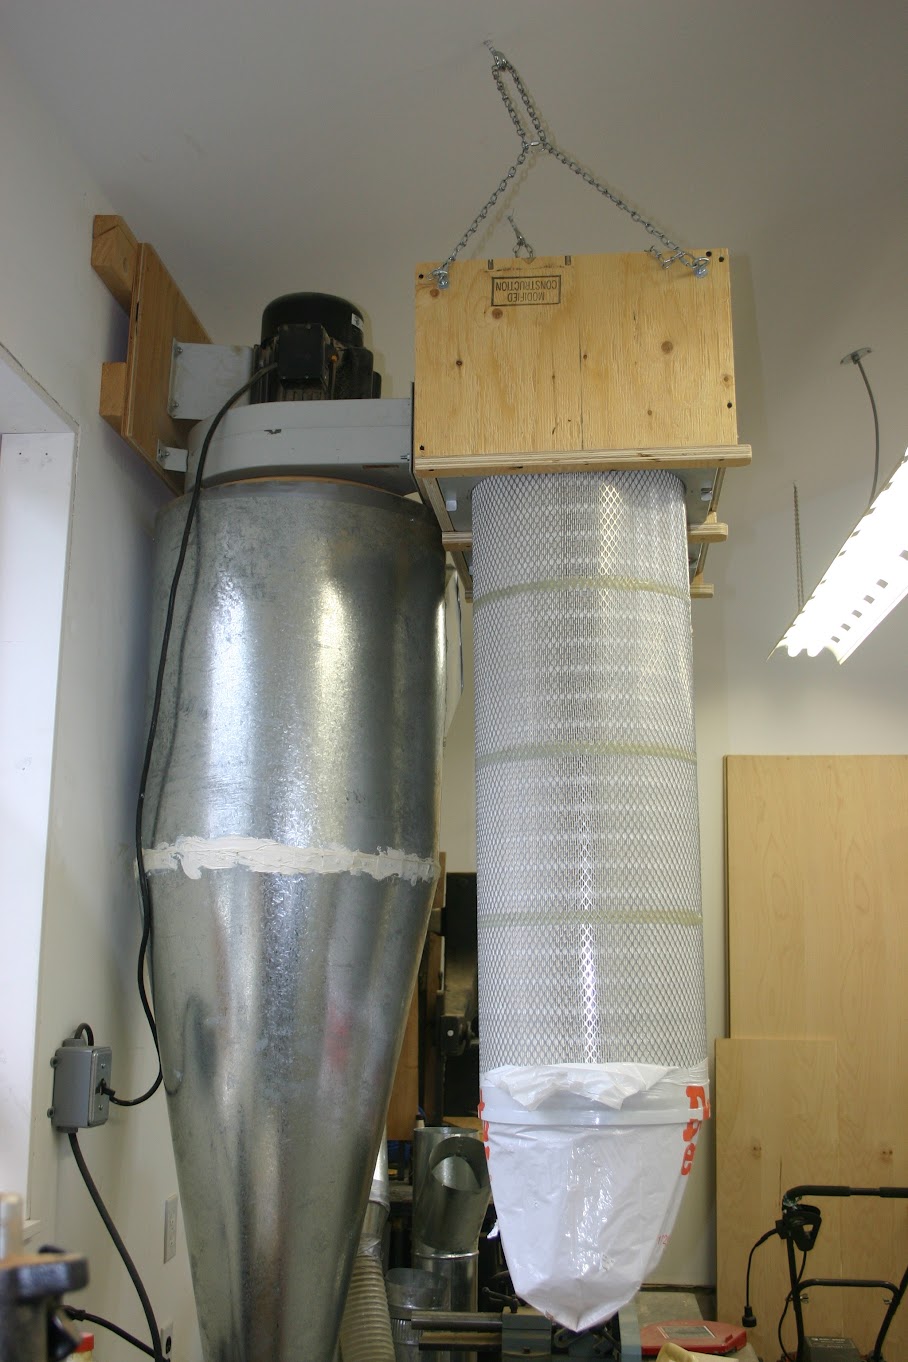
Then there was the cone, no pics that I can find and mounting it. This is how it came out and its location. It is tall - very tall and surprisingly it is out of the way - does not interfere with anything and tucks into the are behind the shop's big door. You will note the fancy exhaust and the double filter stack.

IMG_2075.JPG

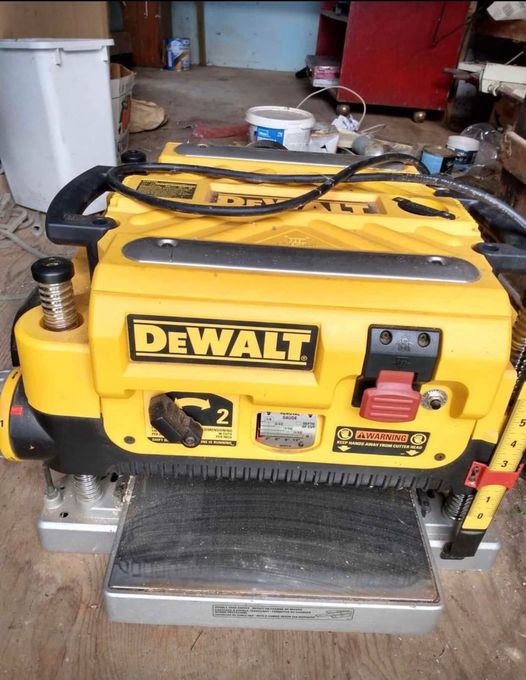
The drum lid is steel and has a gasket to seal the drum. The unit will filter out most of all the dust - even down to MDF flour. not much hits the filters unless you screw up and forget to change the drum when full. For planning material I hook up a secondary drum on the suction with a barrel swirl and that catches the planner chips first - not much back to the collector except the fine stuff.

This thing is great!

@David_R8 : Here is the dust collector port for a unisaw:

dust-port-2.jpg
 

DavidR8

Scrap maker
Administrator
Moderator
Premium Member
Yet another @David_R8 deal sccop...
A next-to-new DeWalt DW735 planer. $400
288880188_10159860639613828_1225199707198595094_n.jpg
 

LenVW

Process Machinery Designer
Premium Member
What's the length of ducting you were trying to run? The price of the 1hp at $220 is too good so still wondering if I can make it happen if I have everything close together, or maybe a system where I move the collector on a dolly and quick connect it to different machines as needed. I've seen some pretty snazzy quick connect through my preliminary research. I have less machines than you and only run them one at a time as well.
Do not spend a lot of time putting up vacuum lines in your shop. It is costly and you will be constantly cutting and refitting them. After you put up all the ducting for dust collection you need to size up the main CFM to handle your ‘inlet losses’ and ‘ducting feet’.
Your idea of using QCs and a mobile dust collector is the best choice and will be the most cost effective.
 

Brent H

Ultra Member
@Dabbler : it tucks away pretty nicely in the shop where space is mostly wasted. Fully assembled, however, it is very tall. This works well over other designs as the floor space occupied is only that of a 45 or 55 gallon drum. With Schmitt's design change for the fan motor area he may end up with some grief or having things a bit more complicated than required. I rolled the upper drum on a metal roller as well as the cone so I did not use any "jigs" to get things built up.

If you are "into the wood" and have a dust collector already, it is a great modification to strip off and use the duct collector blower assembly as your power and mount it on the top of the Pentz design. One thing that this also allows is for you to reduce the suction aperture to be more in line with the blade tips (also closer) and greatly increase efficiency.

Some folks will build the housing and then mount a motor with a store bought impeller or try and make the impeller. In my searching the impellers were pretty $$ from the USA and I was not going to fab a blower out of shite MDF or other wood with a 3 to 5 Hp motor turning a heavy disk of steel at 1750 plus RPM. When added up, even trashing a Busy Bee or Kijiji found blower was way cheaper and more efficient use of time.

Here is another design idea:

cvmax-1p-cyclone-bundle-with-filters (1).jpg

cvmax-1p-cyclone-bundle-with-filters.jpg

The first picture is the part for clearing the dust on the filters. As I stated way earlier- unless you make a mistake (been there 2 times) and don't change out the collection drum, the filters will stay really clean. When they need a good blow out (after a screw up) then you have to take things apart. The clear plexiglass design, however, will give the wood shop guy (that is not lost in thought and paying attention) time to shut'er down before chaos.
 

LenVW

Process Machinery Designer
Premium Member
Hey @David_R8 : Check this video out - Schmitt must be listening to us on Google

Good fabrication demonstration !!
He should have explained a little better how he came up with the points to layout the base and top curves. At a metal forming shop we made use of a basic ‘Plate & Sheet’ CAD program to plot out flat paper layouts of the sheet metal required for cyclones and transitions.
I thought the ‘black board’ wall in his shop was great for sketching up ideas and requirements while working on a job. Just remember to take a photo of it before you erase your notes.
 

LenVW

Process Machinery Designer
Premium Member
A good little power saw can save alot of time, sweat and aggravation.
Money well spent.
 

Susquatch

Ultra Member
Administrator
Moderator
Premium Member
Except for the colour, it looks the same as my King - even down to those flimsy orange blade gaurds. I think I paid 200 for mine too but mine had more use on it. I like my saw.

Nice find!
 

PaulL

Technologist at Large
Premium Member
The subject of dust collection is very complicated. I went the easy route as I only need to collect from a table saw, mitre saw, planer, spindle sander, and maybe my CNC router. And none at the same time. I had a 3/4 hp Delta unit on a 4" inlet Oneida Dust Deputy. It simply wasn't powerful enough to run through ducting hence the upgrade.
All of the home shop collectors are pretty much the same; single stage with either a cloth or felt bag or a pleated filter. I highly recommend a 1 micron filter which can be easily added.
I did mine a little differently - sent the "clean" outlet of the cyclone into a plenum which dumped into the filters, which then dumped into bags right under. The chips drop out the bottom of the cyclone into a pail I don't seem to have a photo of:
sPyI_YTg8GqXdWTmiWNyGD6SQZmEtI_6ew2Iw-wV5iPpXxZSDr4D8ImYyT0jk3o-3oY_35W7lt2XM7ryc63a8IYqWNWUpZbcumaed6fui1IdQDw7SgrTqU-kOdnplF0seb312Vr-pJy-tGlGro0fvprWQe4OU9V6lecWz0y9ciDm4sF-V7df2ctUS2_85ifaMdaOWmSqk5fVw8fTy3aKpU6S0FaeGuOTgxBj1B_21TtUkB5237NUIuquppKL6eSRsRxV7hcRe6UX1gEZx8U5MQ_5Dqhmnhyho_bofYmaYqjzGEoLXmB446WI82sPT18LfazjdxhqduZJVgp3I1i2_EA_HWE6fyyFxckx28lMa8xmaCE1Y67kMAdYZ81PVU-nxHy5rzeahQdjYqIX9PkANB5fG3zDSwLGoVarS588kMCPpFG1SDRePH1Gv3Rz1sa58GuZYknpAWnUWilEK20D8pbB1JcnL-IhP5QNNdS90CdQn8BkuKQNokco-V8ouuzI1YOoQdXkdMBhDs73aOLRcmbwV4ZfdD_qjxImagH6Dc2wca8WBYKSidNlFBTrzeWKMr4CclKFdYZRp4yWXat_XudFmtN2IqqpFcHkjfKEfJOjjxmROuxgFV0VHoGIoHG33gOGQ0Ny3AorOHDtXY9X_tcbTA0DZ3ZDEi2SwP8kitJo6aztPp3ovC4OhPW259_HgRXvoWODkcsOqGI99vcAd4re5J7lp-t93UhQSG1qEHzdFVhRT1sxX5YS8UvBOoTEgVpwfQdyFpp-m3vF0P4_IH2zD--J8LUMvA=w908-h1362-no
-vCTHVnWJRIYZa4Cskg_GPwi4OpRtBccgQkQsKwvYLvMCf2OwS1C7EWrxy1M9SD90WCkCUTHy0qR5MrG0iKFoHbOP_PrQnmAFo7nzJIMD105hl9iJTxZra2dUaVlZsyjEVsd_3wBOy6ts9iLTt94mk6rXxz1xilOI29ryQuPmIe9b4Vlmh2LRgD6hFY-wp_Y1WX-Jfg9BPlJAu70NdknEzHSdsoHI5JIUG4MdpuAvsm4YgaQh_tk0jk1Iw4mWyIpF6wZ3udT_eE86COu00oX0aGRhGwCM8cgFMxdtdINsDDlcnXOVpdk1I7adUUO2t1uBirbE-n4m0R3ZObITzgChVQvPkqvjWcC4nm3iEMGY2XLXIzPYGSKLJ32DGP5iYdEMWc6bM0oON_0qrs2Nd6WvpQbUH-evdR5hjytwfy6AXa-t_MgBoJSSYtmiKGnpMoxOPMTzj4nllBcXBG7oHh0sQtCnA9cAkJ2XizCCpM7FD8PqnpmOtLyXpigjtVkwENp6HOtQPxg7rKMHotAh8I1PXKqsXRcPN-uzH-nUtmrbrIfh3Fg5gSgnBAaCJrNXZ3YJSmg26rj7AQCLWR-ZgWv3edRffvz0K3O-Yz89zf_9Vyh8VEZKfbsKZ-VSlAmQpdMChJa3UOY63yGXX3Zqt_U0wmbrhDhJ1RzTiSBYWcmMozIYVV7cz9JwxkUtd-d35LyATlRFLzaBuRlDdGTzBPIHnu5IQqODeTDinPlNP24z2dAwk5AfVZtXKRrHMd1GgSwQdddu9PKsbTEYhfi8cx2mA2Toidyi_KjnQ=w908-h1362-no

The sheet metal work convinced me to never do sheet work again. I left this for the new owner at that shop. Kind of regret it. But it was well plumbed into under-floor runs and didn't warrant pulling out, especially since the new owner asked for it explicitly as part of the house sale.
Paul
 

DavidR8

Scrap maker
Administrator
Moderator
Premium Member
I made a bunch more garden fencing last weekend and it needed paint. The last batch I sprayed with Tremclad gloss black from spray cans. I had five more cans but all of them had been stored so long they wouldn't spray. No way was I going to buy more at $10 can.
Bought a Vaper brand HVLP (high volume, low pressure) spray gun at KMS for $100 and a quart of water based Tremclad for $26.
Thinned the paint; 8 oz paint, 3 oz water and went to town. Sprayed fantastic. Used half a can of paint. My Speedaire 20 gallon compressor worked like a champ.
Need to rig up a temp spray booth though.
 

DPittman

Ultra Member
Premium Member
I made a bunch more garden fencing last weekend and it needed paint. The last batch I sprayed with Tremclad gloss black from spray cans. I had five more cans but all of them had been stored so long they wouldn't spray. No way was I going to buy more at $10 can.
Bought a Vaper brand HVLP (high volume, low pressure) spray gun at KMS for $100 and a quart of water based Tremclad for $26.
Thinned the paint; 8 oz paint, 3 oz water and went to town. Sprayed fantastic. Used half a can of paint. My Speedaire 20 gallon compressor worked like a champ.
Need to rig up a temp spray booth though.
I've salvaged the paint from aerosol cans by drilling a hole carefully at the top and pouring it out. Start with a small hole (1/8) to let pressure out first. Probably not recommended shop practice but if you have a bunch of paint that will go to waste otherwise, it is something I would consider.
 

PeterT

Ultra Member
Premium Member
Back when I was spraying my RC planes I had a Billy Bob routine of a) wait for a calm day, preferably morning with indirect sunlight b) spray the parts just outside my shop passage door & immediately hang them inside to minimize dust, debris & miscellaneous cling-ons. It was a big PITA. I like painting but no way I could do this inside my shop in the presence of machines & other things that would not tolerate mist settlement.

I've seen makeshift booth's made from some simple 2x2 wood frame & clear poly (drop cloth) walls stapled on. But they don't really assemble or store or knock down very quickly, depending on your space. I commented to a buddy that I found a cheapo made in China outdoor tent for same price as aforementioned building materials. He ended up doing that & said it worked out quite well. He has some kind of sucking fan that extracts air via a dryer exhaust tube. He left the opposing tent flap open a bit is enough to allow air movement. When spraying is done, he just collapses the tent & stores it in the attic. Seems kind of wasteful to sacrifice a tent, but if you did enough weekend warrior spraying the math might work. I've heard people say a regular fan is a bad idea because its not an explosion proof motor, so there's that.
 

historicalarms

Ultra Member
I needed a "booth for spaying my powder coat inside the shop in the winter and use the biggest Tupperware tub I could find. works excellent cleans easily and the over-spray powder can be just dumped out and re-used....again, that "poverty' thing...
 

DavidR8

Scrap maker
Administrator
Moderator
Premium Member
Thanks gents. I’ve seen some clever fold up booths made from sheets of foam core and hinged with cloth hinges. Also thought about a big tub.
My challenge is the size of the pieces I spray ranged from 2’ x 2’ to furniture so I kinda need a one size fits most setup.
 
Top