• Scam Alert. Members are reminded to NOT send money to buy anything. Don't buy things remote and have it shipped - go get it yourself, pay in person, and take your equipment with you. Scammers have burned people on this forum. Urgency, secrecy, excuses, selling for friend, newish members, FUD, are RED FLAGS. A video conference call is not adequate assurance. Face to face interactions are required. Please report suspicions to the forum admins. Stay Safe - anyone can get scammed.

DavidR8's shop shenanigans

Susquatch

Ultra Member
Administrator
Moderator
Premium Member
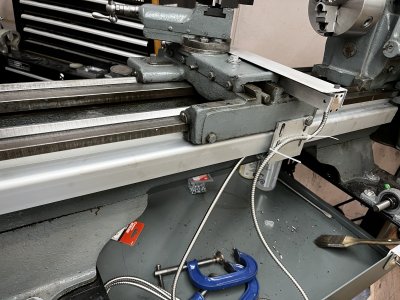
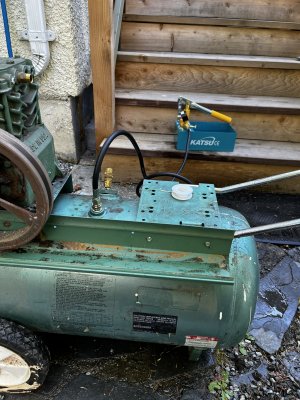
Anyway. Here's the evidence. Under the second hole is a broken tap.

There are guys who claim they have never broken a tap. I'm not one of them.

You could just add another screw by drilling right through the bracket. But looking at the assembly, I'm not sure it's needed. That's prolly why you left it. You could hide the evidence by drilling some more holes in the bracket so it looks like you just chose one of them.... LOL!

I'd use a course thread too - even if the kit came with fine.

Two other tricks I use to tap cast iron are frequent cleanout and small increments - especially in a horizontal hole. Another is an oversize hole with 50-60% thread.
 

Susquatch

Ultra Member
Administrator
Moderator
Premium Member
LOL! I was thinking of posting up last evening and asking what we were all going to do for fun after we get the DROs all installed!

D :cool:

Maybe have a shaft threading bee?

Not the walks on water BS - just for Poops and Giggles!

I'm busy planting right now, so I'm out. Besides, I don't have a working lathe dro yet. But I'd love to laugh with you guys anyway!
 

DavidR8

Scrap maker
Administrator
Moderator
Premium Member
Thinking about making the base for the mill.
Got this quote for steel from Cutter Industries. Far less than I expected.
10 ft of 2”x2” .125 wall tube ( steel ) $82.60

10 ft of 2” x 2” (steel) angle. $36.5

Plus tax
 

DavidR8

Scrap maker
Administrator
Moderator
Premium Member
Z axis scale cover is on. I was not looking forward to drilling and tapping more holes in this mega hard cast iron.
Used some double sided tape instead.
 

Attachments

  • IMG_0091.jpeg
    IMG_0091.jpeg
    789.3 KB · Views: 9
  • IMG_0092.jpeg
    IMG_0092.jpeg
    555.6 KB · Views: 9

DavidR8

Scrap maker
Administrator
Moderator
Premium Member
Making the back chip shield for the Clausing.
21” of 3/64” stainless steel is about the limit of my 24” brake! image.jpg
Cut a length of 2” angle to span the open space above the chip tray.
Mounted the stainless to the angle.
Next will be some 1” tube welded to angle iron to support the stainless.
IMG_0093.jpeg
 
Last edited:

Susquatch

Ultra Member
Administrator
Moderator
Premium Member
Z axis scale cover is on. I was not looking forward to drilling and tapping more holes in this mega hard cast iron.
Used some double sided tape instead.

That's what I should have done too. I used double sided tape to hold it in place while I marked for the drill holes. Then I had so much trouble getting the tape off that I feared I would destroy the scale. I should have just left the tape there permanently.
 

Tom O

Ultra Member
Nice machine, on another note have you tried your sandblaster yet I’ve got the same thing and was wondering what people find was the best medium for the smaller sandblaster.
 

DavidR8

Scrap maker
Administrator
Moderator
Premium Member
Nice machine, on another note have you tried your sandblaster yet I’ve got the same thing and was wondering what people find was the best medium for the smaller sandblaster.
Thanks!
I haven't tried it yet as I'm waiting to hydrotest my compressor tank. It's an old Speedaire and I'd like to have a bit of piece of mind before I push it hard.
As far as medium goes. I was planning on trying aluminum oxide.
 

DavidR8

Scrap maker
Administrator
Moderator
Premium Member
Hydro testing my compressor tank. Took it up to 300 psi for 30 minutes. No drop in pressure.

Picked up an 11 cfm @90 psi pump and 3hp motor this afternoon.
Have a line on a 60 gallon vertical tank.
I wanted to see if this tank was solid before using it at full pressure.
 

Attachments

  • IMG_0108.jpeg
    IMG_0108.jpeg
    669 KB · Views: 8
  • IMG_0107.jpeg
    IMG_0107.jpeg
    373.7 KB · Views: 8
  • IMG_0109.jpeg
    IMG_0109.jpeg
    672 KB · Views: 8
Last edited:

DavidR8

Scrap maker
Administrator
Moderator
Premium Member
Put the new compressor pump and motor on my newly pressure-tested tank.
Works great. Only runs up to an indicated 70psi so I think the gauge is faulty.
Have a new one on the way.
All of this is a test run to see if I want to get a 60 gallon tank.
 
Top