-
Scam Alert. Members are reminded to NOT send money to buy anything. Don't buy things remote and have it shipped - go get it yourself, pay in person, and take your equipment with you. Scammers have burned people on this forum. Urgency, secrecy, excuses, selling for friend, newish members, FUD, are RED FLAGS. A video conference call is not adequate assurance. Face to face interactions are required. Please report suspicions to the forum admins. Stay Safe - anyone can get scammed.
-
Several Regions have held meetups already, but others are being planned or are evaluating the interest. The Calgary Area Meetup is set for Saturday July 12th at 10am. The signup thread is here! Arbutus has also explored interest in a Fraser Valley meetup but it seems members either missed his thread or had other plans. Let him know if you are interested in a meetup later in the year by posting here! Slowpoke is trying to pull together an Ottawa area meetup later this summer. No date has been selected yet, so let him know if you are interested here! We are not aware of any other meetups being planned this year. If you are interested in doing something in your area, let everyone know and make it happen! Meetups are a great way to make new machining friends and get hands on help in your area. Don’t be shy, sign up and come, or plan your own meetup!
You are using an out of date browser. It may not display this or other websites correctly.
You should upgrade or use an alternative browser.
You should upgrade or use an alternative browser.
DavidR8's shop shenanigans
- Thread starter David
- Start date
Thrash?What thrash to undo this wall.
Sorry, typo. What a thrash.Thrash?
I somehow imagined that I could just unscrew the plywood and the framing would magically detach from the exterior wall and the post and poof, wall moved.
Nope, no magic occurred so I had to deconstruct it down to the last stud.
I ran into a snag with my shed build.
Wednesday Home Depot had 60 sheets of LP Smartpanel. Friday they had none. Nor did Lowes or any other building supply.
So my plan to get the shed done so I could move all the wood into it before moving the wall went sideways
Today I said “Sod it I’m moving the wall today.”
Ya but do you have room to get yourself in to do some work? LOLNow I have separate and dedicated 91 sq ft of metal working space and 294 sq ft if woodworking space
You made quick work of that, you hadn't even started when I was there yesterday.
The metal working side is a mess because I can’t remove the wood.Ya but do you have room to get yourself in to do some work? LOL
You made quick work of that, you hadn't even started when I was there yesterday.
But I can see the floor on the woodworking side.
I think to be fair we should insist on seeing a youtube video of the door actually swinging on the hinges. For all we know it's just set in place...The metal working side is a mess because I can’t remove the wood.
But I can see the floor on the woodworking side.
Wood that’s currently stored in 1/4 of my garage. Building this basically gives me back a quarter of my garage.What gets stored in there?
Doggggboy
Ultra Member
But, but....shouldn't there be pocket holes?
According to YouTube there should be pocket holes in everything.
Hold on, I’ll put some in!But, but....shouldn't there be pocket holes?
According to YouTube there should be pocket holes in everything.
Wood that’s currently stored in 1/4 of my garage. Building this basically gives me back a quarter of my garage.
What kind of wood is this David? Surely not 2x4s or plywood. And are you putting wood racks in there now too?
I always wanted to build a wood storage rack in my barn. Bur I never got around to it. Too many things with higher priority. I had wanted something that would handle everything from plywood to 2x12x16 - everything on end but not all leaning on each other. Been 10 years now and hasn't happened yet...... Might not ever happen......
I’m being ruthless in my wood purge so it’s strictly hardwood and some half sheets of Baltic Birch that I’m keeping as a hedge against inflationWhat kind of wood is this David? Surely not 2x4s or plywood. And are you putting wood racks in there now too?
I always wanted to build a wood storage rack in my barn. Bur I never got around to it. Too many things with higher priority. I had wanted something that would handle everything from plywood to 2x12x16 - everything on end but not all leaning on each other. Been 10 years now and hasn't happened yet...... Might not ever happen......
I’m not sure about the wood racks. Lee Valley used to carry a nice setup. Need to browse their catalogue again.
Alrighty folks, an update from the shop.
Way back in June I bought plans from Rob Cosman for his workbench. It's specifically designed for handtool woodworking. Then I got Covid, then I had to rebuild the house stairs and finally I built a greenhouse in the backyard. After buying the materials in August, I finally got started on the bench last week.
The base is built from 3/4" Baltic Birch ply strips laminated into two legs and four stretchers. The top is three layers of 1" MDF.
The top weighs 90 lbs and the base is another 90 lbs. It's really solid.
Baltic Birch strips, all cut with my track saw. I was amazed by consistency I managed to get. These are all within 1/64" of the same width.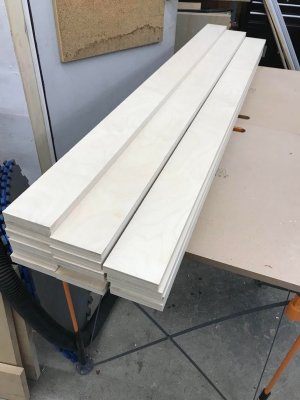
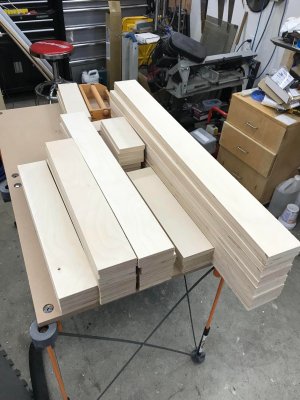
Cut to the required lengths for the glue up.
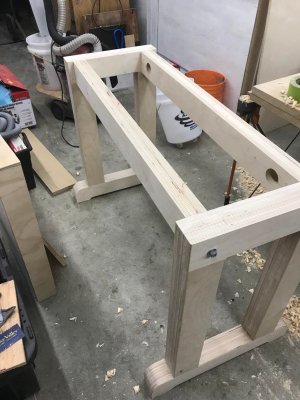
Two trestles and the top stretchers. The stretchers are secured with 3/8" threaded rod with nuts and washers.
Even with only the top stretchers it did not rack.
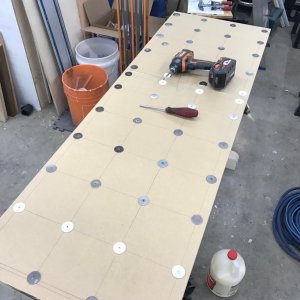
The top is glued up in stages with 1-1/2" wood screws and washers on a 6" grid providing the clamping pressure.
This was the part that I was more nervous about because it's a big area to glue and you only get one shot at it.
The bottom layer is cut to the final dimension of 60" x 20" and the subsequent layers are 1/4" over size then trimmed with a bearing bit in a router.
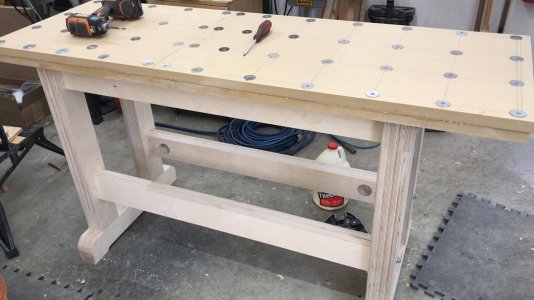
Tonight I hope to glue the final layer on the top.
Then install the vise, cut the vise chop and drill the dog holes and coat with shellac.
Way back in June I bought plans from Rob Cosman for his workbench. It's specifically designed for handtool woodworking. Then I got Covid, then I had to rebuild the house stairs and finally I built a greenhouse in the backyard. After buying the materials in August, I finally got started on the bench last week.
The base is built from 3/4" Baltic Birch ply strips laminated into two legs and four stretchers. The top is three layers of 1" MDF.
The top weighs 90 lbs and the base is another 90 lbs. It's really solid.
Baltic Birch strips, all cut with my track saw. I was amazed by consistency I managed to get. These are all within 1/64" of the same width.

Cut to the required lengths for the glue up.

Two trestles and the top stretchers. The stretchers are secured with 3/8" threaded rod with nuts and washers.
Even with only the top stretchers it did not rack.

The top is glued up in stages with 1-1/2" wood screws and washers on a 6" grid providing the clamping pressure.
This was the part that I was more nervous about because it's a big area to glue and you only get one shot at it.
The bottom layer is cut to the final dimension of 60" x 20" and the subsequent layers are 1/4" over size then trimmed with a bearing bit in a router.


Tonight I hope to glue the final layer on the top.
Then install the vise, cut the vise chop and drill the dog holes and coat with shellac.
