Tips/Techniques Cutting High Strength Steel Forging

Tips/Techniques

trevj

Ultra Member
You like inserts too eh?

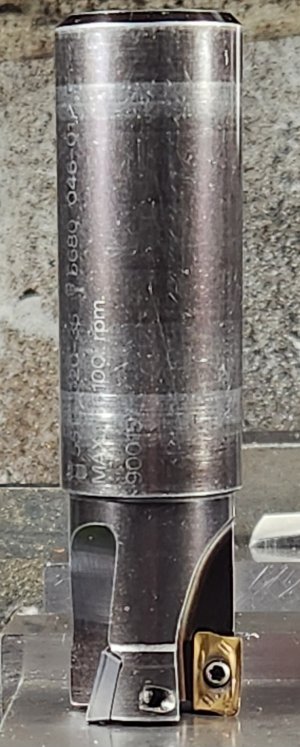
Maybe my lathe experience makes me paranoid. I wouldn't expect to get away with using inserts on high strength material with interrupted cuts. So I just figure no way will those face mill inserts cut that forging without breaking.

I'm about 1/3 done. It seems wiser to just keep going.

But if I break another endmill, I'll try a face mill with big inserts. Why not.......
You got access to a tooling supplier in your area that deals in inserts? Might be worth talking to one of the sales guys about an appropriate selection. Carbide grade, quality, coatings, and edge treatment, as well as nose radius, all can make or break some jobs.

A friendly scrap metal dealer with an x-ray fluorescence gun, could sort you out real quick on what the stuff actually is as far as an alloy at least.

The Monday deadline would likely have me reaching for the ugliest angle grinder I had on hand and start beavering away at it. Ugh.
 

Susquatch

Ultra Member
Administrator
Moderator
Premium Member
You got access to a tooling supplier in your area that deals in inserts? Might be worth talking to one of the sales guys about an appropriate selection. Carbide grade, quality, coatings, and edge treatment, as well as nose radius, all can make or break some jobs.

I have suppliers here but not really that kind of expertise. They are much better at calculating a markup and profit margin than helping me choose the right insert.

The best expertise I know of is all of you on this forum. I trust that info more than any jobber around here.

A friendly scrap metal dealer with an x-ray fluorescence gun, could sort you out real quick on what the stuff actually is as far as an alloy at least.

No time for that now, but I'll have a left over piece I can get analysed later. It would be worth knowing what it is as well as its treatment.

The Monday deadline would likely have me reaching for the ugliest angle grinder I had on hand and start beavering away at it. Ugh.

Trust me, I considered that. But after seeing how useless an abrasive disk chop saw was, I'm thinking that would be a really bad idea. A diamond blade might be another matter though.....
 

Dabbler

ersatz engineer
Given your timeline, you are doing great!

For later, I'll try to hunt down my carbide end mill that my Kinnemetal dealer assures me is designed for hardened tool steel in the range of 58-60 Rc. For a 1/2" end mill with 3/4" of cutting surface, it was almost 80 bucks, tho....

Since you will prolly be cutting hardened high tensile stuff again, it might be worth a try. I don't have any 4140 hardened to 200Kpsi to try it on.:rolleyes:
 

thestelster

Ultra Member
Premium Member
You live a charmed life. Interrupted cuts and shattered inserts go together like a horse and carriage!
I meant, never shattered an insert while milling. On the lathe, yes, (while turning a length of 2"x2" hardened stainless to round.)
 

Susquatch

Ultra Member
Administrator
Moderator
Premium Member
I meant, never shattered an insert while milling. On the lathe, yes, (while turning a length of 2"x2" hardened stainless to round.)

Isn't ALL milling basically a continuous series of interrupted cuts?

I expect that there is way more to it than that though. The difference to the nature of the load transitions between climb and conventional milling being just one of them. The start of each cut is much more gradual with conventional. To clarify, I've been conventional milling this beast end to end as well as religiously locking the ways.

I admit that I struggle with some of the conventional wisdom with this stuff though. My brain wants to understand what is happening at the granular and even molecular level. But the street knowledge doesn't go that far.
 

Bandit

Super User
Well this maybe relevant or not. When I was machining Ni-rod 55 welding material, it would round the edge of the insert, then a chip would be taken/knocked out/"removed from the edge, following this would often result in the shattering/ death of the insert. This was at speeds/feeds recommended by manufacturer . This is generly the failure mode of cutting edges, barring over feeding resulting in impact breakage, ( that knob that did not get ground off).
I was cutting splines in the material, single point cutting, interrupted cut, conventional milling The shape of the insert was as needed for the spline profile. If I was lucky, I could get one set set of splines cut before the edge was toast.. the Ni-rod 55 was not overly hard, but was sticky?, tough, did not really machine clean, chip edges were rough and ragged, though sharpe enough to cut you.
In a slight fit of frustration I raised the speed of the cutter about 3X what we had been turning at, wonders of carbide inserts, I was expecting death of the insert in very short order. Did not happen! Chips were flying 3 to 4 feet, were a light blue Color, turning to dark blue as they cooled, much thinner (to be expected), razor sharp, cut and cotterized on contact. The most amazing thing was, could now cut 10 to 12 sets of splines with the same edge. I don't remember speeds and feeds or even the insert now, funny (not) what remains after 30 years.
It sometimes seems the rates of speeds and feeds for various materials while perhaps somewhat in the ball park are not quite right for certain jobs/materials.
Maybe the face mill, get the chip color up in the blue range, though some carbide does well with chips coming off in the red range.
The draw bars are lighter now, but tougher stronger materials, I've drilled/cut a few "older"ones, no problem.
 
Last edited:

Darren

Ultra Member
Premium Member
The metallurgy is prolly very similar, they are both really strong forging. However, the one they gave me to modify looks more like this:

View attachment 46871

It's used to pull large heavy equipment like Disks or plows but also light stuff like wagons.

I'm betting thats a type of spring steel. I agree on the facemill. Start slow, low doc, and keep the feed moving. For drilling spring steel, you can get a carbide tipped concrete drill and sharpen the tip.
 

MrWhoopee

Active Member
I've never shattered an insert.

Using your 1/2" solid carbide, try 600rpm. But those sharp points will dull pretty quick and then it gets difficult to cut.
I was also going to suggest 600 rpm, basically the speed you would run HSS in mild steel.

I also prefer inserted cutters when size permits. Inserts are cheaper than carbide endmills.
I don't like the APKT/APMT inserts as much as the SEKT/SEHT, but they do the job.


Susquatch

Ultra Member
Administrator
Moderator
Premium Member
In a slight fit of frustration I raised the speed of the cutter about 3X what we had been turning at, wonders of carbide inserts, I was expecting death of the insert in very short order. Did not happen! Chips were flying 3 to 4 feet, were a light blue Color, turning to dark blue as they cooled, much thinner (to be expected), razor sharp, cut and cotterized on contact. The most amazing thing was, could now cut 10 to 12 sets of splines with the same edge. I don't remember speeds and feeds or even the insert now, funny (not) what remains after 30 years.

I had the same kind of thoughts and did try exceeding the speeds as high as 4x higher than recommended with VERY POOR RESULTS. So I didn't do that for long. You kinda know things are not right when it starts squealing like a stuck pig.

It sometimes seems the rates of speeds and feeds for various materials while perhaps somewhat in the ball park are not quite right for certain jobs/materials.

That's why I came here to ask what others thought. Obviously the standard calcs are not correct for this material. I also can't try everything but it helps to know if experienced users think it should be higher or lower and then take some "educated stabs" at it.

My overnight company is gone so I'm headed back to the shop shortly to try a few different things including a bit slower per @thestelster's suggestion.

Maybe the face mill, get the chip color up in the blue range, though some carbide does well with chips coming off in the red range.

Except for using a face mill, that's kinda where I am now. I may or may not get to trying a face mill. It depends on how long this end mill lasts. I'll keep using this one till it dies or I am done - whichever comes first.

The draw bars are lighter now, but tougher stronger materials, I've drilled/cut a few "older"ones, no problem.

Well it sure isn't lighter! It is prolly 100 pounds as I got it. But definitely stronger and harder that the one that was there originally. And now that's shortened, it is actually lighter too.
 

thestelster

Ultra Member
Premium Member
I may or may not get to trying a face mill. It depends on how long this end mill lasts. I'll keep using this one till it dies or I am done - whichever comes first.
Hey, try your facemill now to see the results. If it doesn't work, then go back to your solid carbide endmill.

No harm in trying, and it'll be a learning experience (well, if you can remember it in the future:p)
 

Susquatch

Ultra Member
Administrator
Moderator
Premium Member
Hey, try your facemill now to see the results. If it doesn't work, then go back to your solid carbide endmill.

Nah, I'm halfway through a full pass. I need to finish it at a minimum. Then I'll see!

No harm in trying, and it'll be a learning experience (well, if you can remember it in the future:p)

Yes, but right now I want the job done. It's taking WAAAAY too long as is!

And I'll forget regardless.
 

Susquatch

Ultra Member
Administrator
Moderator
Premium Member
Slower speeds didn't help.

But the good news is that I am done milling the bar with no more carbide endmill failures. Took ages, but I am done.

At this point, I am Inclined to take a skim cut for clearance and test a face mill. Kinda late to do that but I think it's the right thing to do and I'm not sorry that I kept going.

Here are a few photos.

20240419_134837.jpg

20240419_135839.jpg
 

Susquatch

Ultra Member
Administrator
Moderator
Premium Member
Before I put a face mill in there, have a look at this endmill. It finished the job, but it's toast!

20240419_143315.jpg

This is the heat doscouration on the endmill.

20240419_143623.jpg

Out in the sun.

20240419_143418.jpg

This is a KBC solid carbide 4 Flute 1/2" endmill their PN 1-326-032 made in USA ..... But its a miracle it lasted as long as it did.
 
Last edited:

Susquatch

Ultra Member
Administrator
Moderator
Premium Member
Next challenge, get a radius in that sharp corner

I think those rounded corners on the end mill already did that. If not, the face mill inserts have a radiused nose on them that should do that. Also, the milled face will point down so the corner will not be in tension. He says with hope, concern, and stupidity written all over his face........
 
Top