Clarkson Mk2 Tool and Cutter Grinder

Susquatch

Ultra Member
Administrator
Moderator
Premium Member
I decided to make them out of a couple grade 5 3/4" bolts I had lying around.

My favorite source of stock!
My favorite is grade 5 but I don't always have them.

The threads on old long bolts will usually reach down behind the Jaws. But I often use copper pipe collars and grip the threads themselves if they don't.

Sometimes I leave the root of the old spiral thread. It can be quite decorative and functional

20231027_162634.jpg

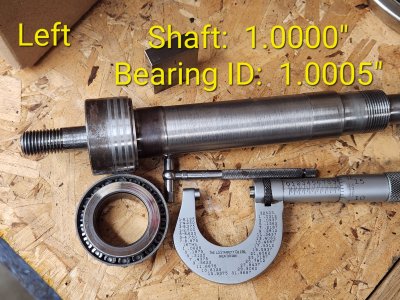
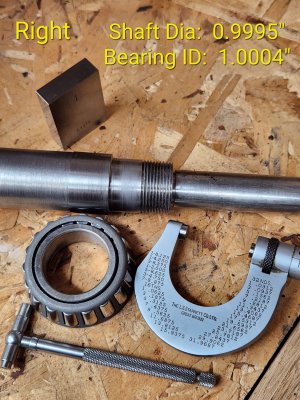
And I had to use the 3-wire method to measure the pitch diameter because I don't have the appropriate anvils for my thread micrometer.

I wonder how difficult it would be to make them?

Of course doing it this way takes longer because you have to turn some sections going away from the chuck; having to use the parting blade to groove down far enough to allow the turning tool in

Because I do this so much, I bought a round insert tool holder.

Screenshot_20231027_163640_Chrome.jpg

You can do plunge cuts with them just like parting, you can also turn in both directions, and you can rotate the insert as appropriate to get a new edge. It leaves a pretty darn good finish too. Solves that whole problem of turning behind a collar or bolt head. I use them so much I got two sizes.

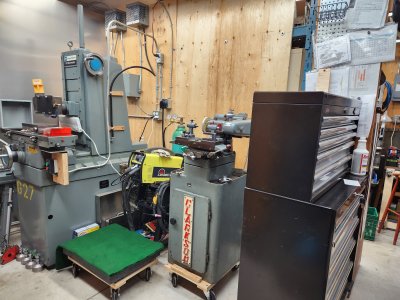
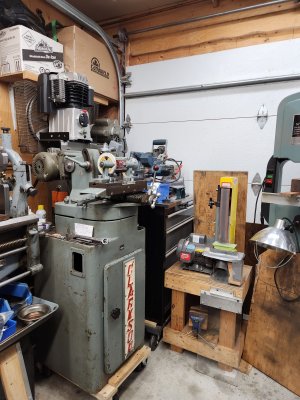
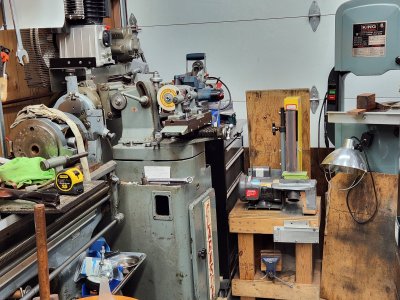
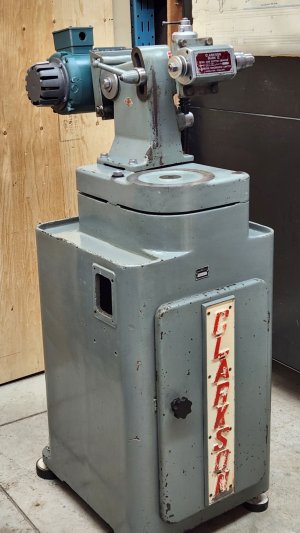
I had to make a couple of hold down t-bolts for a couple of the attachments for the T&C grinder.

Beautiful T-Bolts Stel! Love em! Well done!
 

Susquatch

Ultra Member
Administrator
Moderator
Premium Member
I chose this pot because it has a high torque (resistance) to rotate the shaft. Specifically designed to resist movement during vibrations. Not that I need that feature for the grinder, but the one I use on the lathe turns very freely, which I don't like, so I might get another one for the lathe later.

I LOVE this! It's a horrible problem. Plus, my paws don't like flimsy feeling little dials that spin instead of turning. I'll be upgrading my mill controls with one of those ASAP and I'll plan to put one on my lathe from the git go!

Can you share a link?

Just so you know, I'm quickly becoming a member of your fan club. Just think - I wouldn't even know you without this forum!
 

thestelster

Ultra Member
Premium Member
I LOVE this! It's a horrible problem. Plus, my paws don't like flimsy feeling little dials that spin instead of turning. I'll be upgrading my mill controls with one of those ASAP and I'll plan to put one on my lathe from the git go!

Can you share a link?

Just so you know, I'm quickly becoming a member of your fan club. Just think - I wouldn't even know you without this forum!
Here is the link.

I'm honored to know you and all of the other forum members. You've all opened my eyes to new insights and ideas. Before, I was oblivious; now I'm....less so.
 
Last edited:

thestelster

Ultra Member
Premium Member
Moving stuff around so that I can put the grinder on the floor. I had to get rid of the desk. But the desk held files, and supplies, and the toolbox, and the surface plate. And there was enough room on it for customers dropping off their stuff. Now that it's gone, I'm going to need some shelving, and counter space. A work in progress.

I put up a sheet of 3/4" plywood and bolted it to the industrial shelving unit behind it, so that I can attach the safety switch, wiring, and panel for the VFD. I'll be doing that hopefully this week some time.

Here's some before and after shots.
 

Attachments

  • 20231028_071242.jpg
    20231028_071242.jpg
    617.8 KB · Views: 27
  • 20231028_071337.jpg
    20231028_071337.jpg
    610.5 KB · Views: 27
  • 20231029_145503.jpg
    20231029_145503.jpg
    495.4 KB · Views: 30
  • 20231028_071003.jpg
    20231028_071003.jpg
    656.5 KB · Views: 28

thestelster

Ultra Member
Premium Member
Today I started on the electrical for the T&C grinder. I go into the sub-panel, which has almost all the breakers for the shop (garage), and lo and behold, no spaces available. Even though there are spaces, the bus-bar doesn't extend to those other spaces. So a word of advice to those setting up their shops....get a panel with considerably more breakers than you think you need.

I do have a 30amp 220v line coming from the main panel in the house, to power my tig welder. So I tapped into that outlet box. From there it goes into the safety switch (30amp 600v), but it will have 20amp fuses. Also note that you shouldn't use Slow-Blow (time delay) fuses (like you might normally use for a motor.) Instead, you should use fast acting fuses. This is to protect your VFD. The VFD will protect your motor.
 

Attachments

  • 20231103_202824.jpg
    20231103_202824.jpg
    501 KB · Views: 5
  • 20231103_192527.jpg
    20231103_192527.jpg
    432.5 KB · Views: 5

thestelster

Ultra Member
Premium Member
Getting there.

Why is it that evertime you need a fastener or Mar connector, you end up spending an hour or more, looking in every nook and crannie, and end up having to slog out to Canadian Tire to get a couple dollars worth of parts!!
 

Attachments

  • 20231104_160825.jpg
    20231104_160825.jpg
    530.4 KB · Views: 5

thestelster

Ultra Member
Premium Member
Wiring is now connected up to the VFD. Now to partially dismantle the T&C grinder, put it in position, level it, clean it up, and install the new motor.

I have to get cable glands to hook up the VFD cable into the cabinet and motor box. Hopefully I will have the grinder up and running by end of the week.
 

Attachments

  • 20231105_091105.jpg
    20231105_091105.jpg
    470.5 KB · Views: 13
  • 20231105_091405.jpg
    20231105_091405.jpg
    367.8 KB · Views: 12
  • 20231105_091015.jpg
    20231105_091015.jpg
    288.7 KB · Views: 12
  • 20231105_090943.jpg
    20231105_090943.jpg
    491.5 KB · Views: 14

PeterT

Ultra Member
Premium Member
Side question, did you mount LED headlights to your visor? is that what the 6 or so chrome looking things are around the periphery?

1699203890420.png
 

thestelster

Ultra Member
Premium Member
Dismantled the grinder cleaned it up as best as possible; placed it in position on a set of rubber levelling feet; reassembled most of it, and started to attach the new motor.

First off....Clarkson is an English company, therefore all their fasteners are British Standard Whitworth. So if you need to replace a bolt or nut, Imperial fasteners will not work.

BSW hex-head fasteners have different dimensioned heads, so your Imperial or Metric wrenches will not fit, (there are a couple that will). So, if you plan on working on British machines you either get yourself a set of BSW wrenches, or have a couple decent adjustable wrenches.

Before I started looking for a new motor for the grinder, I checked the old motor name plate, and it did not indicate a frame size. So without taking the motor off, and measuring everything as close as possible, I determined I needed a 56c frame. Well, when I went to attach the motor onto the grinder the holes wouldn't line up. I measured the new motor mounting holes vs the grinder mounting hole spacing, and of course the new motor spacing is 0.035" wider. So I set it up on the mill, and took off 0.040" from the inner edge of the 2 slots on the same side. It's on.
 

Attachments

  • 20231105_160135.jpg
    20231105_160135.jpg
    521.1 KB · Views: 6
  • 20231105_161714.jpg
    20231105_161714.jpg
    662.2 KB · Views: 5
  • 20231105_160426.jpg
    20231105_160426.jpg
    457.2 KB · Views: 6
  • 20231105_164616.jpg
    20231105_164616.jpg
    304.1 KB · Views: 6
  • 20231105_164653.jpg
    20231105_164653.jpg
    949.3 KB · Views: 6

thestelster

Ultra Member
Premium Member
I used a Belden VFD cable left over from one of the other installations. It's 10g. All that was required was 14g, but might as well use what I have. I still have to get one cable gland/cord grip/strain releif to go into the motor electrical box. I'd like to get an EMC cable gland, but those things are expensive. I'll make due with pigtailing the copper foil shield like I did at the VFD.
 

Attachments

  • 20231106_154947.jpg
    20231106_154947.jpg
    432.2 KB · Views: 5
  • 20231106_120003.jpg
    20231106_120003.jpg
    274.8 KB · Views: 5
  • 20231106_113909.jpg
    20231106_113909.jpg
    147.3 KB · Views: 4
  • 20231106_130046.jpg
    20231106_130046.jpg
    184.8 KB · Views: 5

Susquatch

Ultra Member
Administrator
Moderator
Premium Member
I think the first VFD cables came from Nedco. It's not on their website, but they brought it in for me. I have a spool here with 25' of 6g. from Anixter, which I believe they're now Wesco.

Can't hurt to give them a ring and see what they say.

Thank you!
 

thestelster

Ultra Member
Premium Member
Went out and picked up a cable gland. It's actually for TECK cables, but I managed to make it work. It was three metal prongs on the inside which grab the armoured sheath, but I wrapped the foil sheathing with a strip of copper to allow it to install easier. (Next time I'll order the proper EMC gland).

Wired up everything, adjusted some of the parameters in the VFD, and it works.

I'm going to run the motor auto tune now, and then I can continue putting everything together.

I still have to get an off/on switch. But for now I can run it off the VFD.
 

Attachments

  • 20231107_105557.jpg
    20231107_105557.jpg
    273.9 KB · Views: 11
  • 20231107_105645.jpg
    20231107_105645.jpg
    360.5 KB · Views: 9
  • 20231107_112907.jpg
    20231107_112907.jpg
    292.8 KB · Views: 11
  • 20231107_132145.jpg
    20231107_132145.jpg
    311 KB · Views: 11
  • 20231107_132756.jpg
    20231107_132756.jpg
    364 KB · Views: 11
  • 20231107_142122.jpg
    20231107_142122.jpg
    505.9 KB · Views: 14
  • 20231107_154315.jpg
    20231107_154315.jpg
    531.7 KB · Views: 14

thestelster

Ultra Member
Premium Member
Thus morning I decided to look at the spindle. There was a ton of black grease that had leaked out. I put an indicator stand on the spindle housing and measured the spindle shaft. There was about 0.0025" play. Too much I think. So I decided to take the spindle apart and have a look. The play can be adjusted by the threaded ring on the right side.

The bearings are tapered roller bearings. They came off the shaft easier than I was expecting. They should be a tight press fit, but were more like a tight slip fit. I'll measure everything, and maybe need to replace the bearings.
 

Attachments

  • 20231108_072229.jpg
    20231108_072229.jpg
    415.4 KB · Views: 8
  • 20231108_072527.jpg
    20231108_072527.jpg
    498.3 KB · Views: 8
  • 20231108_072642.jpg
    20231108_072642.jpg
    531.5 KB · Views: 8
  • 20231108_073841.jpg
    20231108_073841.jpg
    475.4 KB · Views: 8

thestelster

Ultra Member
Premium Member
I cleaned up the parts, and several observations.

1. On the right bearing side, the shaft surface and the inner bearing surface are purple...excess heat?

2. On the left bearing side, the face of the bearing and the collar which abuts it are damaged, with matching scoring.

I can't read the markings on the existing units, but the dimensions of the bearings indicate that a Timken #07100S/07210X will fit. They sell for $65 for each unit (bearing and race).
 

Attachments

  • 20231108_135511.jpg
    20231108_135511.jpg
    183 KB · Views: 7
  • 20231108_134611.jpg
    20231108_134611.jpg
    396.6 KB · Views: 7
  • 20231108_135950.jpg
    20231108_135950.jpg
    313.1 KB · Views: 8
  • 20231108_140259.jpg
    20231108_140259.jpg
    502.1 KB · Views: 8
  • 20231108_141209.jpg
    20231108_141209.jpg
    728.8 KB · Views: 7
  • 20231108_141841.jpg
    20231108_141841.jpg
    647.8 KB · Views: 9

RobinHood

Ultra Member
Premium Member
The bearings are tapered roller bearings. They came off the shaft easier than I was expecting. They should be a tight press fit, but were more like a tight slip fit. I'll measure everything, and maybe need to replace the bearings.
Mine were exactly the same: loose on the shaft. I converted my spindle to “lost oil lube”. I just drilled an oil fill hole into the top of the housing. I use a SHCS with an o ring as a plug. Add a squirt of spindle oil before use. There are labyrinth seals outside of the bearings. Adjusted the bearings so they don’t run more than warm. Works very well. No runout. Better surface finish than before.
 
Top