
-
Scam Alert. Members are reminded to NOT send money to buy anything. Don't buy things remote and have it shipped - go get it yourself, pay in person, and take your equipment with you. Scammers have burned people on this forum. Urgency, secrecy, excuses, selling for friend, newish members, FUD, are RED FLAGS. A video conference call is not adequate assurance. Face to face interactions are required. Please report suspicions to the forum admins. Stay Safe - anyone can get scammed.
-
The 2026 Calgary Area Meetup is set for Saturday May 30th at 10am. The signup thread is here! Robinhood has graciously offered to host the meetup again this year. Please note that you MUST RSVP to the notice linked above if you wish to come.
You are using an out of date browser. It may not display this or other websites correctly.
You should upgrade or use an alternative browser.
You should upgrade or use an alternative browser.
Brent Builds!!
- Thread starter Brent H
- Start date

Nice rotisserie... 😉

140mower
Don
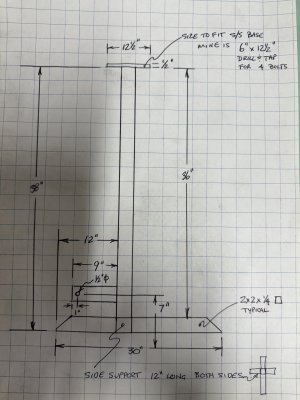
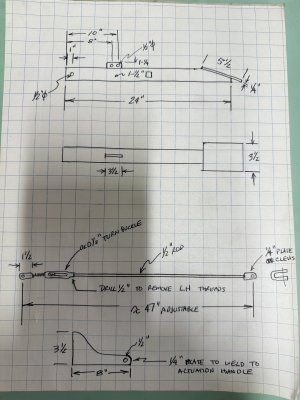
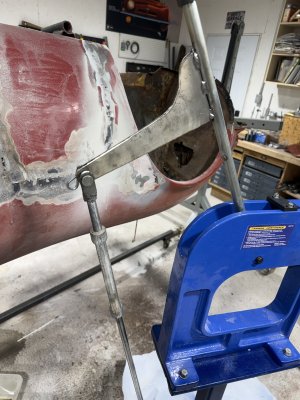
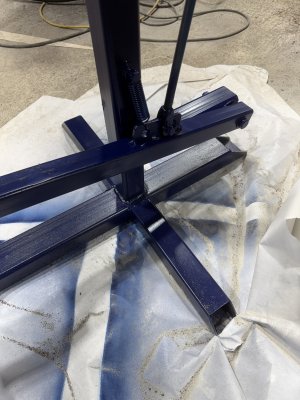
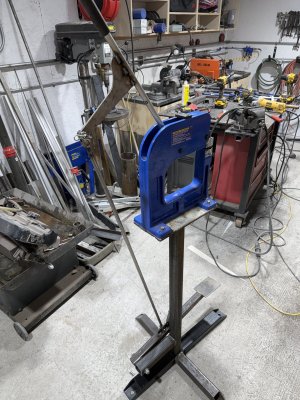
@140mower : here is the basic jist of things
View attachment 74099View attachment 74100View attachment 74101View attachment 74102View attachment 74104
I am heading out to grab some 1” cold rolled for the bead roller project (hopefully adding power feed)
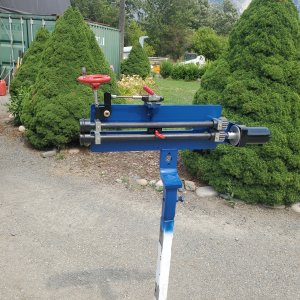
Awesome thanks.... this is what I did to power up my beadroller.... it's powered by a 12v atv winch. Unfortunately, like almost everything I do, there's no drawings aside from the twisted view inside my head....

Brent H
Ultra Member
I have same Princess Auto one you do but before I left work I was able to get a 3/4” plate of hull steel cut to the same pattern but with a 24” throat. After a few hours of looking I found my old winch and the power supply I bought several years ago. Hopefully all goes to plan.
140mower
Don
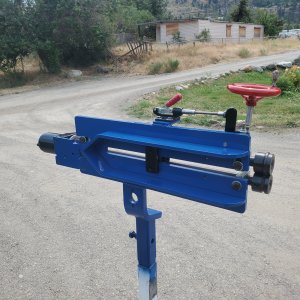
This is how I reinforced the back side of mine, but it was adding the little brace between the two that is supposed to be a fence guide that really stiffened it up. The handwheel sets the tension/depth and the toggle is a quick release that allows for repeatability. There's also a spring in there pushing the two rollers apart eliminating the annoyance of the beads dropping together and making restarts cumbersome.
Looking forward to seeing your version.
You really should put some windows in the house , plywood is hard to see through.😉Looking forward to seeing your version.
Brent H
Ultra Member
Here is the start:
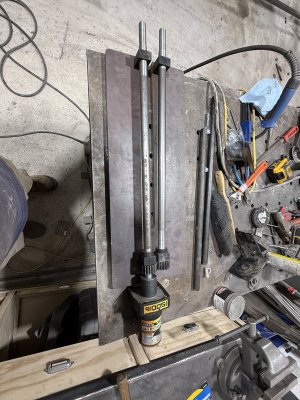
I machined 2 new shafts (1” cold rolled) and fit to the gears and blocks from the Princess Auto machine. The winch had a gear that fit into itself to engage or disengage. I machined the coupler and welded in the gear (not too pretty as it was oil impregnated) but it worked 🙂.
Lots to come….
I machined 2 new shafts (1” cold rolled) and fit to the gears and blocks from the Princess Auto machine. The winch had a gear that fit into itself to engage or disengage. I machined the coupler and welded in the gear (not too pretty as it was oil impregnated) but it worked 🙂.
Lots to come….

Brent H
Ultra Member
To be determined……. Might need a speed control…?nice what rpm does it turn at?
Brent H
Ultra Member
Had to do a fast temporary setup of the mill after moving it from the machine shop room for Opel car space. Set up the bead roller plate (3/4”) on the table and dialled it in.
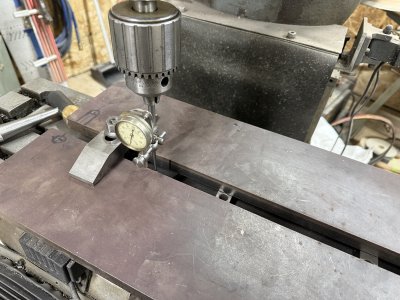
Drilled holes for the bearing blocks and a slot so the upper form die can move.
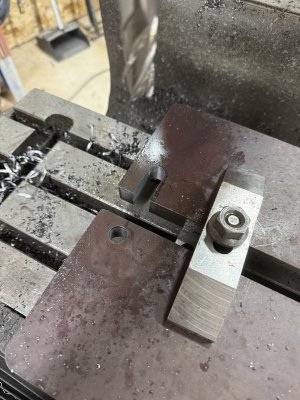
Set up in the vise and aligned everything. Welded the winch bracket on. Then did a test. The winch didn’t work - friggin argh! So took it apart and well…. Using a 1500 lb ATV winch thst was salvaged from the bush - ….. well two hours later and new bearings and grease and scrubbing rust off the brush holders …..yeh!!! It worked - whew!
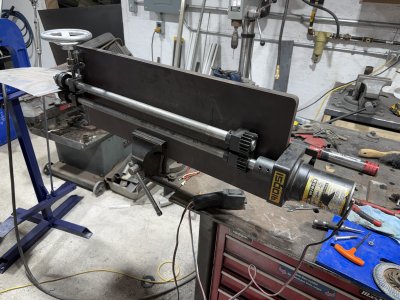
Fabbed up a pressure handle and return springa ma bob thingy. It basically brings the top shaft back up if you release pressure on the metal.
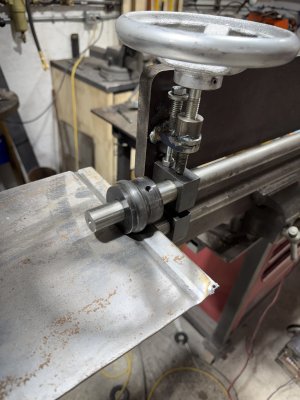
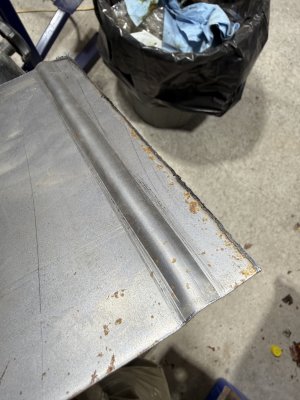
Tested with 18 gauge steel and it works great. Feed speed is nice and easy to control. I have a few relays coming Friday for foot controls so I can update after that is all set up. Basically forward and reverse at your feet so both hands can control the metal. With the 3/4 plate there doesn’t appear to be any defection when rolling. Will keep an eye on it.
Drilled holes for the bearing blocks and a slot so the upper form die can move.
Set up in the vise and aligned everything. Welded the winch bracket on. Then did a test. The winch didn’t work - friggin argh! So took it apart and well…. Using a 1500 lb ATV winch thst was salvaged from the bush - ….. well two hours later and new bearings and grease and scrubbing rust off the brush holders …..yeh!!! It worked - whew!
Fabbed up a pressure handle and return springa ma bob thingy. It basically brings the top shaft back up if you release pressure on the metal.
Tested with 18 gauge steel and it works great. Feed speed is nice and easy to control. I have a few relays coming Friday for foot controls so I can update after that is all set up. Basically forward and reverse at your feet so both hands can control the metal. With the 3/4 plate there doesn’t appear to be any defection when rolling. Will keep an eye on it.

Doggggboy
Ultra Member
So how much does this thing weigh now?Had to do a fast temporary setup of the mill after moving it from the machine shop room for Opel car space. Set up the bead roller plate (3/4”) on the table and dialled it in.
View attachment 74495
Drilled holes for the bearing blocks and a slot so the upper form die can move.
View attachment 74496
Set up in the vise and aligned everything. Welded the winch bracket on. Then did a test. The winch didn’t work - friggin argh! So took it apart and well…. Using a 1500 lb ATV winch thst was salvaged from the bush - ….. well two hours later and new bearings and grease and scrubbing rust off the brush holders …..yeh!!! It worked - whew!
View attachment 74497
Fabbed up a pressure handle and return springa ma bob thingy. It basically brings the top shaft back up if you release pressure on the metal.
View attachment 74498View attachment 74499
Tested with 18 gauge steel and it works great. Feed speed is nice and easy to control. I have a few relays coming Friday for foot controls so I can update after that is all set up. Basically forward and reverse at your feet so both hands can control the metal. With the 3/4 plate there doesn’t appear to be any defection when rolling. Will keep an eye on it.
Dan Dubeau
Ultra Member
Nice job.

I love the idea!!
Brent H
Ultra Member
Just an update on projects! Bead Roller is all working and I am making panels. This is the back part of the belly pan.
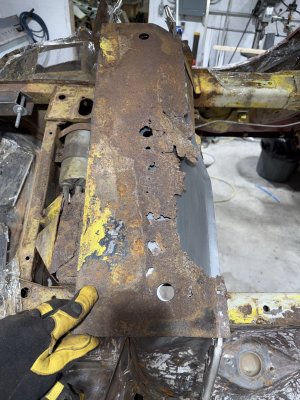
A few bendy twisty and Viola!
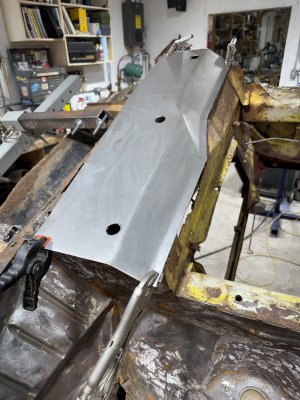
This new part will be welded onto the belly pan from whence it came!
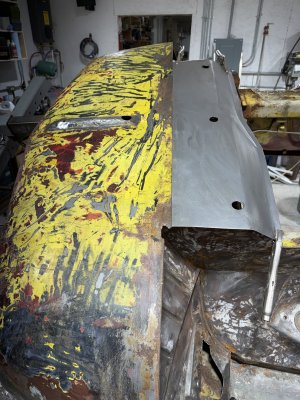
My wife says I am dabbling with abstract art in the above pic! Next was the rusted out lower part:
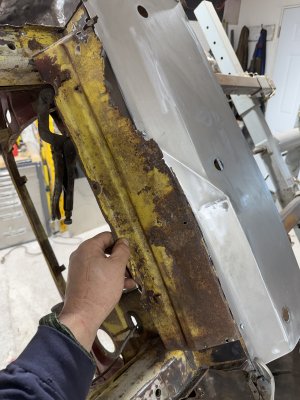
And a few bendy twisty later and throwing out the first attempt (LOL) we have this :
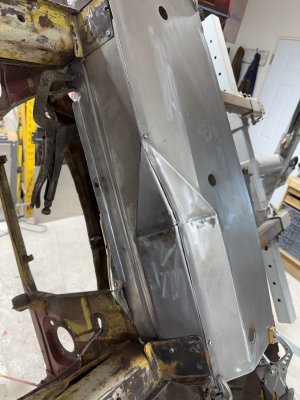
So things are progressing!!!
A few bendy twisty and Viola!
This new part will be welded onto the belly pan from whence it came!
My wife says I am dabbling with abstract art in the above pic! Next was the rusted out lower part:
And a few bendy twisty later and throwing out the first attempt (LOL) we have this :
So things are progressing!!!
Brent H
Ultra Member
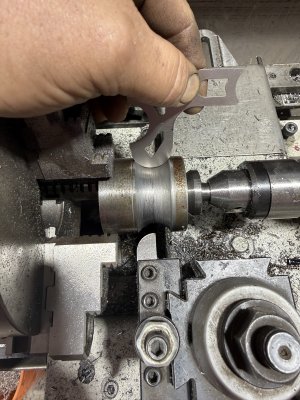
Busy times in the workshop between Christmas stuff and making stuff…. Fabbing up some bead roller dies for the Opel project - this one below is for a 1” roller: ground out 1/2” cutter profiles and Viola!
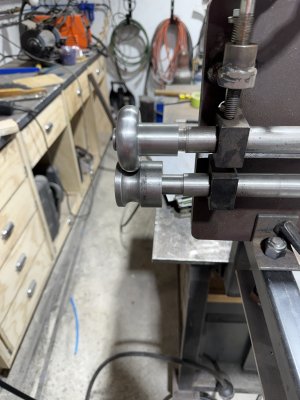
This one is a 3/4 set:
Sand blast barbecue of the Opel on the Rotisserie:
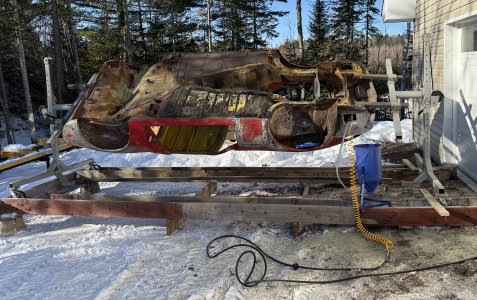
What was the battery tray
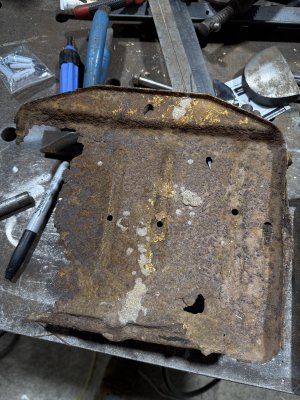
What is now the battery tray….
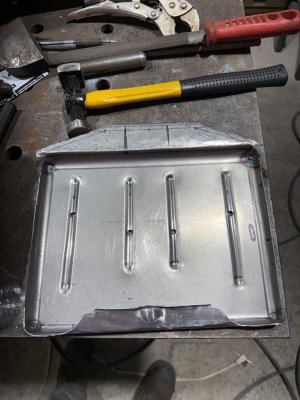
Lots more on the go, took down a good 24” diameter pine today and will mill that up soon ….. excited!!!!
This one is a 3/4 set:
Sand blast barbecue of the Opel on the Rotisserie:
What was the battery tray
What is now the battery tray….
Lots more on the go, took down a good 24” diameter pine today and will mill that up soon ….. excited!!!!