• Spring 2024 meetup in Calgary - date Saturday, April 20/2024. discussion Please RSVP Here to confirm and get your invitation and the location details. RSVP NOW so organizers can plan to get sufficient food etc. It's Tomorrow Saturday! you can still RSVP until I stop checking my phone tomorrow More info and agenda
  • We are having email/registration problems again. Diagnosis is underway. New users sorry if you are having trouble getting registered. We are exploring different options to get registered. Contact the forum via another member or on facebook if you're stuck. Update -> we think it is fixed. Let us know if not.
  • Spring meet up in Ontario, April 6/2024. NEW LOCATION See Post #31 Discussion AND THE NEW LOCATION

Bearing Housing for Griffin

Matt-Aburg

Ultra Member
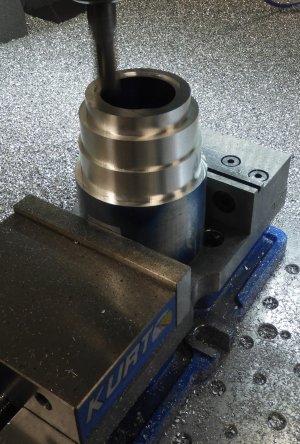
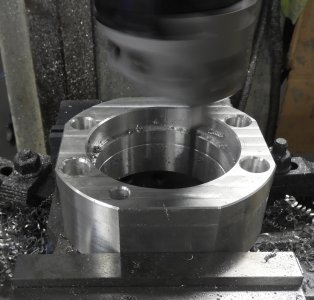
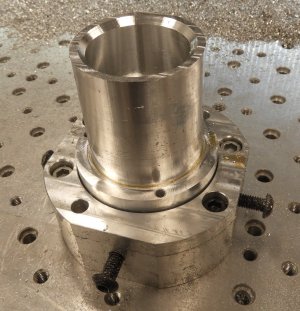
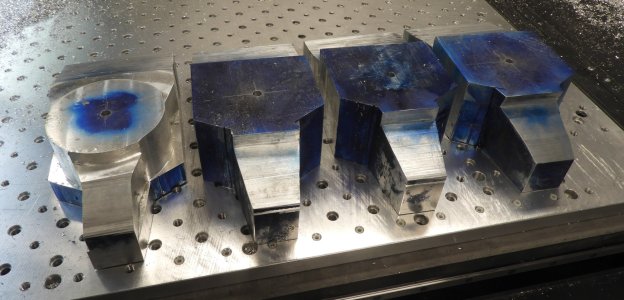
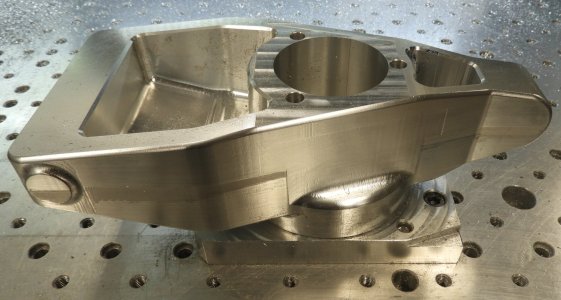
Finishing operation # 2

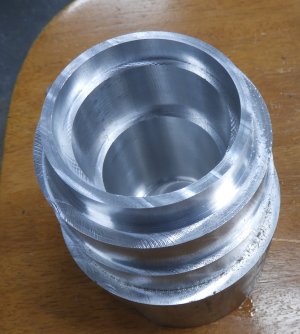
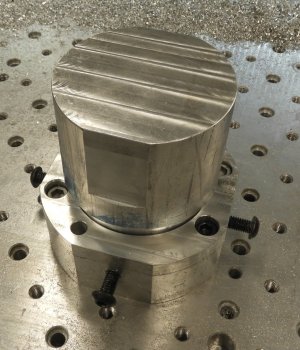
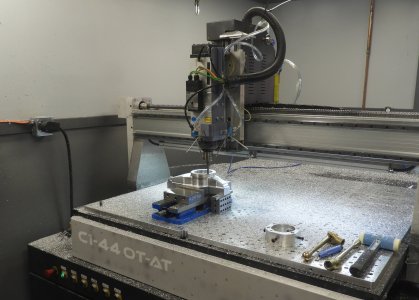
This is done on a fixture. I am thinking about re-investing my pay form this job into 4 more billets and 1 new fixture plate that will cut 2 at once....

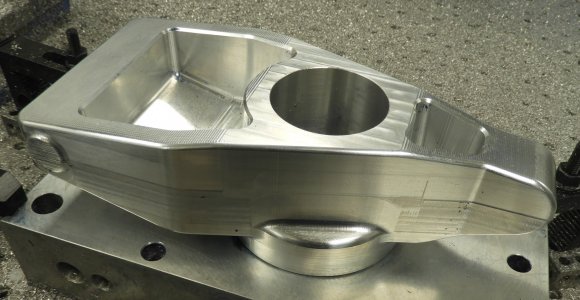
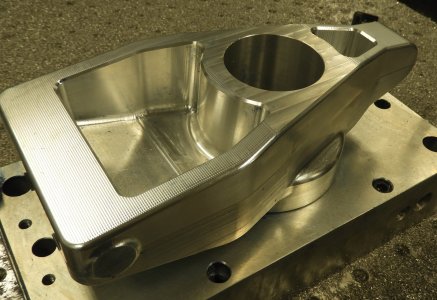
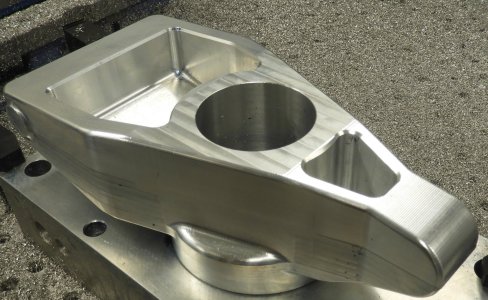
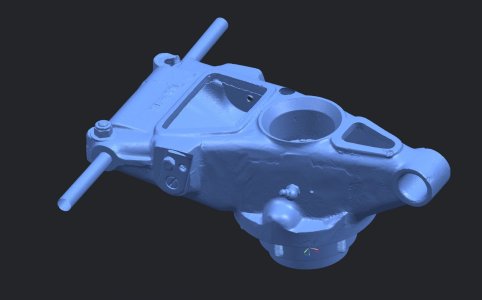
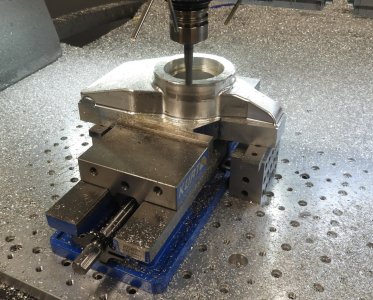
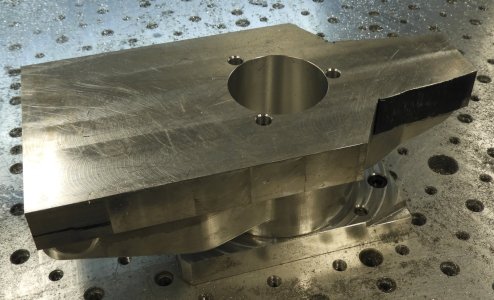
Anyway here is the almost finished product. I have side, end, and other holes to go in. Toughest will be the 6 deep 0.500 ream. I am thinking about getting my friend with real CNC's to help me out on the deep drilling....

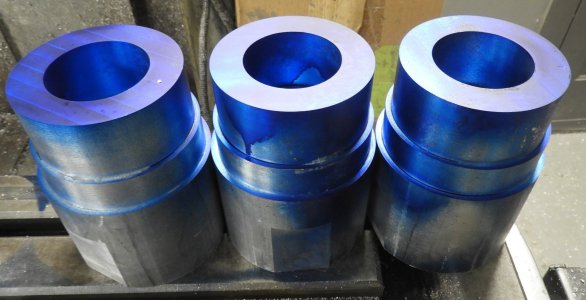
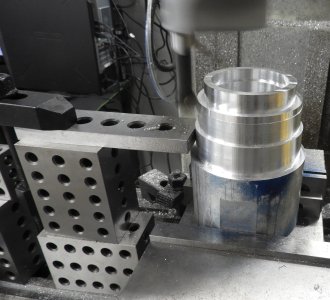
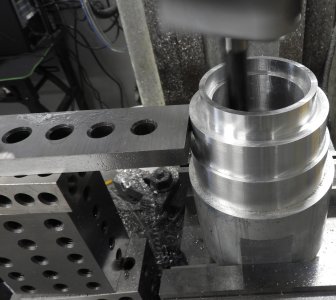
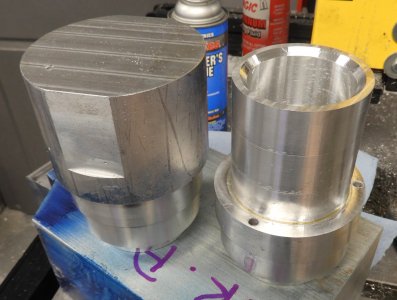
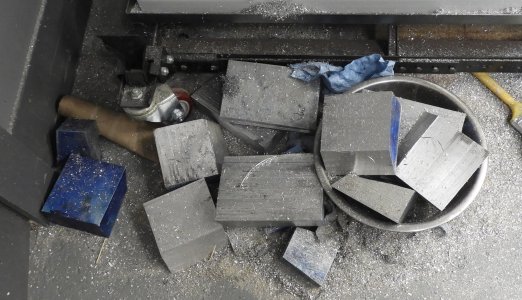
This operation entailed using a band saw to begin with. I am strongly thinking about employing it on setup 1 also to keep the solids.
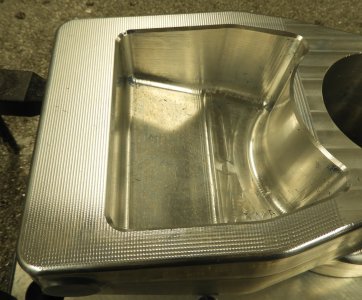
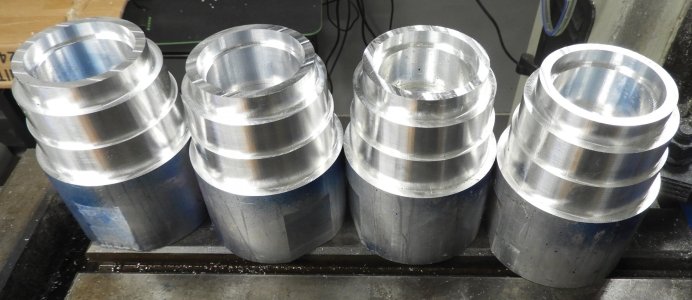
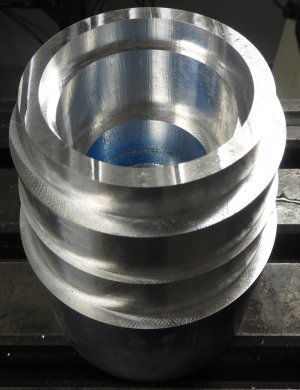
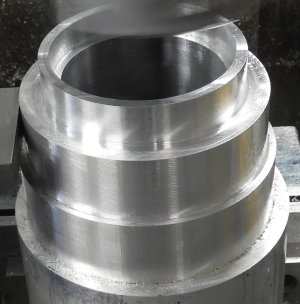
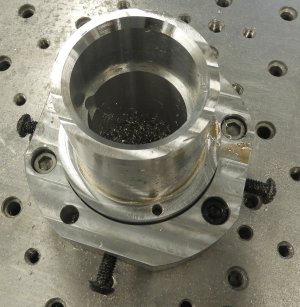
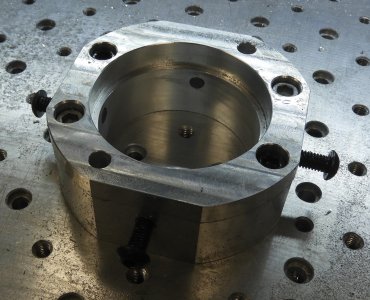
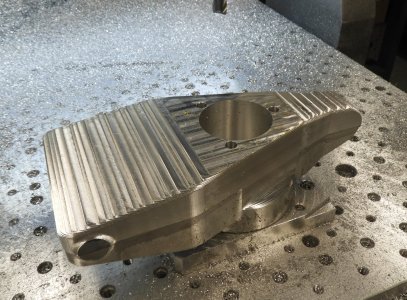
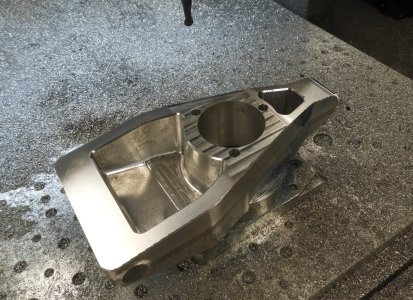
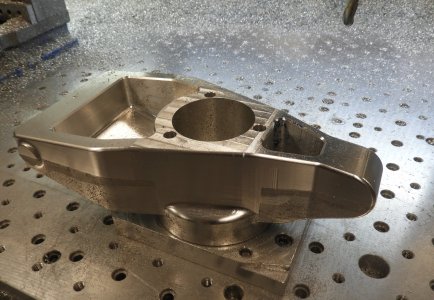
Next I finished the pockets .
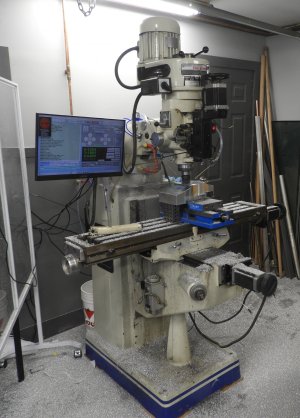
Rough, finish.... etc... This is going to change on V3 to rmove time.... I found that roughing on the router is wayyyyy faster. I can feed 1/8 deep 0.4 wide with a 3/4 endmill at 60 inch / minute... not to mention the 400 IPM rapid.

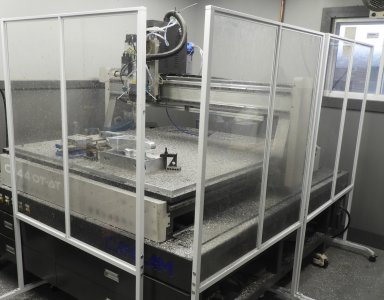
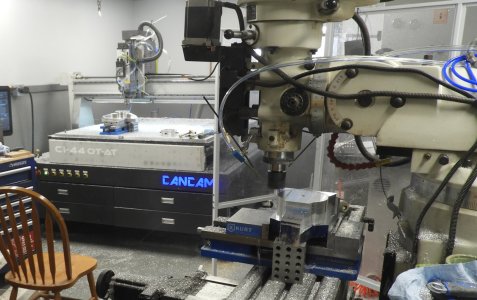
Also note my social distancing screens. These add a layer between me and a shattering 6000 RPM carbide endmill. It also keeps the chips better contained. These can still be bought, for a short while, since Covid is mostly over...


Attachments

  • DSCN1439.JPG
    DSCN1439.JPG
    468.1 KB · Views: 17
  • DSCN1440.JPG
    DSCN1440.JPG
    328.7 KB · Views: 20
  • DSCN1441.JPG
    DSCN1441.JPG
    507.2 KB · Views: 19
  • DSCN1442.JPG
    DSCN1442.JPG
    415.1 KB · Views: 18
  • DSCN1443.JPG
    DSCN1443.JPG
    470.5 KB · Views: 18

Matt-Aburg

Ultra Member
I decided to re-invest my pay to make 2 more sets. This time I am going to use the Bandsaw more on setup 1. I will not be trying to finish in two setups from top and bottom, because the matching is impossible with my equipment. I will surface cut top and bottom, but not wrap the radii until the sides operations. I have to bump the sides anyways now to get rid of the missmatch. I also have holes to put in both sides and one end... so a total of 5 ops.

Here are my billets!!!!!
 

Attachments

  • DSCN1445.JPG
    DSCN1445.JPG
    230.3 KB · Views: 12

Matt-Aburg

Ultra Member
Yesterday and today I decided to move forward with the sleeve bushings. Both lathes are down right now, but I need to show progress. These parts are roughed side 1. I finished all heights, but left stock on OD and ID for finishing. I will be fixturing up now to continue roughing side 2. Total time to rough, and semi-finish is 45 minutes each.
 

Attachments

  • DSCN1449.JPG
    DSCN1449.JPG
    273.3 KB · Views: 9
  • DSCN1448.JPG
    DSCN1448.JPG
    272.4 KB · Views: 7
  • DSCN1452.JPG
    DSCN1452.JPG
    379.9 KB · Views: 9
  • DSCN1455.JPG
    DSCN1455.JPG
    621.3 KB · Views: 9
Last edited:

Matt-Aburg

Ultra Member
I have moved the bushings along. The OD's and long ID were completed yesterday. Note that I am using boring head on both OD and ID.... I also completed the tooling required to cut side 2. That will be a continuation. For now, progress is moving along. Improvising without the lathes working.... still need to get this job done and delivered on time.
 

Attachments

  • DSCN1462.JPG
    DSCN1462.JPG
    509.9 KB · Views: 10
  • DSCN1464.JPG
    DSCN1464.JPG
    437 KB · Views: 10
  • DSCN1468.JPG
    DSCN1468.JPG
    452.6 KB · Views: 10
  • DSCN1467.JPG
    DSCN1467.JPG
    547.4 KB · Views: 10
  • DSCN1469.JPG
    DSCN1469.JPG
    466.2 KB · Views: 9

Janger

(John)
Administrator
Vendor
DINE fine boring head
Matt - great project and posts. A few questions of course.
You have Cnc so I’d like to know your thinking on using a boring head. better concentricity? will that give better results than say a 3/4” EM with a boring op and then a spring pass? the casting has a bunch of paper(?) marked holes. what are those?
 

Matt-Aburg

Ultra Member
Matt - great project and posts. A few questions of course.
You have Cnc so I’d like to know your thinking on using a boring head. better concentricity? will that give better results than say a 3/4” EM with a boring op and then a spring pass? the casting has a bunch of paper(?) marked holes. what are those?
Boring is necessary for two reasons. First is surface finish, Circular interpolation leaves little steps, bumps. I am showing a extremely blown up picture to show you. Bottom diameter is clearance dia... so circular is good enough. Note the difference.

Second, is to control the size and location 100 percent. I clock the hole and bore finished so everything is aligned. Also, the top bores on both sides are most critical. I did buy a Dine FBH for use on the Router. I have not got there yet. The convention boring head for the Bridgeport you see is only running 85 RPM with a feed-rate of 0.75 IMP. I had to buy a Dine system to be able to spin at least 1000 RPM on the router... This is coming up soon... I just roughed second side and have a few little details before it goes to the next part. So far, 1 hour to rough side 2. I will be boring the OD also for side 2... Future, much will be lathe, with Dine only for finish bore (critical sub micron level).

What you see on the casting are markers for the 3D scanning I did to reverse engineer this product.
 

Attachments

  • DSCN1466.JPG
    DSCN1466.JPG
    318.1 KB · Views: 8
Last edited:

Matt-Aburg

Ultra Member
I never did put the scan data up. I made a V1 of the part that was very close to the scanned part. On V2, I changed it with approval to make manufacturing more friendly.
 

Attachments

  • scan1.JPG
    scan1.JPG
    115.8 KB · Views: 11
  • scan2.JPG
    scan2.JPG
    126.3 KB · Views: 11
  • scan3.JPG
    scan3.JPG
    164.2 KB · Views: 10
  • scan4.JPG
    scan4.JPG
    152.8 KB · Views: 11

Matt-Aburg

Ultra Member
I have semi finished side 2 of the sleeve bushings. I will need to outside bore the long OD and then finish bore the critical ID;s with the micron capable Dine boring head. I have a much better fixturing solution on its way... Note to my education... finish boring the fixture in a vice was incorrect. It became oblong after releasing the vice. For roughing fixture... I ended up opening it by a couple thou...
 

Attachments

  • DSCN1507.JPG
    DSCN1507.JPG
    542.8 KB · Views: 7
  • DSCN1505.JPG
    DSCN1505.JPG
    391.7 KB · Views: 8
  • DSCN1504.JPG
    DSCN1504.JPG
    596.6 KB · Views: 8
  • DSCN1506.JPG
    DSCN1506.JPG
    564.3 KB · Views: 8
  • DSCN1503.JPG
    DSCN1503.JPG
    614.8 KB · Views: 11

Matt-Aburg

Ultra Member
I am onto making the next group. I still have side an end operations on the first two. I am hoping to really pull ahead with these and get the deep drilling (6 inch deep x 0.500 ream) over to my friend with 3 CNC's next week. I would like to do all 6 pieces while the fixture is up on his machine. He is not busy so time to get her done.

On these photos, I have used a bandsaw to take off 10 pounds of each block. I also put in starter hole on the drill press. Here are the 4 pieces lined up.
 

Attachments

  • DSCN1509.JPG
    DSCN1509.JPG
    523.9 KB · Views: 13
  • DSCN1508.JPG
    DSCN1508.JPG
    338.3 KB · Views: 13

PeterT

Ultra Member
Premium Member
Thanks, often times I see the object in a purple blue color. Is that some kind of spray on detection coating or the beam itself or..?

1675987162247.png
 

Matt-Aburg

Ultra Member
Two machines at once... It is very noisy out in the shop.
 

Attachments

  • DSCN1510.JPG
    DSCN1510.JPG
    391.4 KB · Views: 13
  • DSCN1512.JPG
    DSCN1512.JPG
    533.7 KB · Views: 13
  • DSCN1513.JPG
    DSCN1513.JPG
    681.5 KB · Views: 15
  • DSCN1514.JPG
    DSCN1514.JPG
    493.2 KB · Views: 17
  • DSCN1515.JPG
    DSCN1515.JPG
    460.2 KB · Views: 16

PeterT

Ultra Member
Premium Member
Maybe you mentioned elsewhere but what CNC system are you running on the Bridgeport/clone? Did you do the stepper/conversion yourself?
 

Matt-Aburg

Ultra Member
Maybe you mentioned elsewhere but what CNC system are you running on the Bridgeport/clone? Did you do the stepper/conversion yourself?
The Bridgeport clone came in already modified from CNC Masters out of sunny California. This machine is called the "Supra". I bought that machine about 12 years ago. It is a bit slower that the router, but it can cut steel. The control is their software on a dedicated computer just for it.
 

Matt-Aburg

Ultra Member
New Fixture for side # 2

I am making a new fixture to suit the router table. The other one was made for the Supra mill, and is too thick. I need to thin down on my setup or I am limited to short tools. I am going to start the back in a moment. The front will be completed while attached directly to the table.

1676327072581.png
 
Last edited:

Matt-Aburg

Ultra Member
I am 1 part away from completing the 6 total housings. I still have the sleeve bushings to continue after, with new tooling and using the DINEX boring system (on the router).

Here is the one I finished yesterday. I ran the final program starting at 1:30 am till ??? (because I turned the lights out and went to bed !). This is by far the best one so far. I changed up how I was finishing the top slightly angled surfaces. Now I bump them at a 0.02 step over with a 0.500 ball cutter... Very little handwork required on this part. I hope the one that's being machined ends up the same, so my customer will get them on time (a slight dusting required).

I have made these pictures in order to show what is done on each operation.
 

Attachments

  • DSCN1519.JPG
    DSCN1519.JPG
    419.3 KB · Views: 7
  • DSCN1520.JPG
    DSCN1520.JPG
    630.5 KB · Views: 5
  • DSCN1521.JPG
    DSCN1521.JPG
    673.1 KB · Views: 5
  • DSCN1523.JPG
    DSCN1523.JPG
    774.1 KB · Views: 7
  • DSCN1525.JPG
    DSCN1525.JPG
    858.1 KB · Views: 7
  • DSCN1527.JPG
    DSCN1527.JPG
    513.3 KB · Views: 8
  • DSCN1529.JPG
    DSCN1529.JPG
    335.6 KB · Views: 7
Last edited:

Janger

(John)
Administrator
Vendor
The ball mill finishing made it look great Matt. They're not paying you enough that's for sure. :> but that's not entirely why you're doing this! Labour of love clearly.

Show us another picture of the fixture without the part? I don't follow how it works.
 
Top