• Spring 2024 meetup in Calgary - date Saturday, April 20/2024. discussion Please RSVP Here to confirm and get your invitation and the location details. RSVP NOW so organizers can plan to get sufficient food etc. It's Tomorrow Saturday! you can still RSVP until I stop checking my phone tomorrow More info and agenda
  • We are having email/registration problems again. Diagnosis is underway. New users sorry if you are having trouble getting registered. We are exploring different options to get registered. Contact the forum via another member or on facebook if you're stuck. Update -> we think it is fixed. Let us know if not.
  • Spring meet up in Ontario, April 6/2024. NEW LOCATION See Post #31 Discussion AND THE NEW LOCATION

Bearing Housing for Griffin

Matt-Aburg

Ultra Member
Well the perfect storm has just hit. I am going to have to work triple time to close as much shop stuff as possible. I got the order for two of these housings. I will need a lathe for part of the work too, which is in-process. These parts are made out of 6061 Aluminum. I need to make 2 of each. For the critical bores in the bushings, I will be using the DINE fine boring head. I just ordered material and the boring head.

To begin with, here are screen shots of the parts. All yellow surfaces are critical, blue is clear, brown is tapped.
 

Attachments

  • bushing-blank.JPG
    bushing-blank.JPG
    168.6 KB · Views: 6
  • body-top.JPG
    body-top.JPG
    104.1 KB · Views: 8
  • body-bottom.JPG
    body-bottom.JPG
    116 KB · Views: 7
  • bushing-top.JPG
    bushing-top.JPG
    96.9 KB · Views: 6
  • bushing-bottom.JPG
    bushing-bottom.JPG
    77.9 KB · Views: 5
  • body-blank.JPG
    body-blank.JPG
    128.2 KB · Views: 5

Matt-Aburg

Ultra Member
This picture is of the two parts assembled.

The original part was scanned and cut very close to the casting. We are making these parts because the casting failed always at the same place. Modifications were made to the V1 part that forever resolved the cracking issue. On the first version, a lot of time was spent picking out details that meant nothing. I proposed to simplify the part. I drew with larger radii so practically no picking would be required. This is version 2.
 

Attachments

  • housing-full.JPG
    housing-full.JPG
    118 KB · Views: 3

Matt-Aburg

Ultra Member
Time to cut. I have programmed for 4 hours and it is time to rough side 1. Material is ready. Just got to go get my deposit, and some coffee from Tim's.
 

Attachments

  • DSCN1414.JPG
    DSCN1414.JPG
    371.3 KB · Views: 13
  • rough-1.JPG
    rough-1.JPG
    207.4 KB · Views: 13

Matt-Aburg

Ultra Member
Machine almost ready. I need to finish hooking up the computer. I now have a touchscreen to change offsets much simpler. I also need to a have chip screen to go up to protect the rest of the computer. This will be re-purposed cardboard for now. I also have a couple plexiglass partitions to keep the shit from spaying all over the shop. I intend to hog on the supra and finish on the router.
 

Attachments

  • DSCN1415.JPG
    DSCN1415.JPG
    318.5 KB · Views: 17
  • DSCN1416.JPG
    DSCN1416.JPG
    392.4 KB · Views: 17

phaxtris

(Ryan)
Premium Member
Premium Member
So your building the sleeve and the arm ? I thought you may have just been machining the sleeve, but now I see a big ol' chunk of aluminum sitting there

And when you say for a Griffin, so you mean a Griffin helicopter?
 

Matt-Aburg

Ultra Member
So your building the sleeve and the arm ? I thought you may have just been machining the sleeve, but now I see a big ol' chunk of aluminum sitting there

And when you say for a Griffin, so you mean a Griffin helicopter?
Sorry, I misspelled the name of the automobile. Here is the history. Only 200 original cars were built. This part also fits on other British sports cars, and so could be adapted to suit. A man here in town rebuilds these classic cars from the ground up.

What is common on all these vehicles is the rear bearing shock housing fails, always at the same place. I have also attached a photo of the original part. I decided to make this run out of two parts because the ID and distance between bearings is critical along with concentricity. I figured my ability to control the ID, concentricity, and surface finish would be much better on a sleeve. I will be able to check, and polish the ID as required. In the end these two parts get green Loctite, three SHCS and two 3/16 split pins with red Loctite.


Attachments

  • original.JPG
    original.JPG
    270.8 KB · Views: 16
Last edited:

Matt-Aburg

Ultra Member
Much beefier, see the original had cracked due to poor design for locking threaded rod... that's the failure point.
Area where hub goes through is thicker than original casting... solid material 6061.
 

Attachments

  • original.JPG
    original.JPG
    270.8 KB · Views: 8
  • end.JPG
    end.JPG
    136.4 KB · Views: 8

Matt-Aburg

Ultra Member
Isn't the TVR the evolution of the Griffith?
Trevor Wilkinson founded TVR in the late 1940s in Blackpool, initially making various 'specials' before introducing its first series-production model in 1954. Dubbed the TVR Sports Saloon, most were sold in kit form. It was the Grantura, however, that earned TVR its popularity. Introduced in 1958, the Grantura received a multi-tubular spaceframe chassis with Volkswagen trailing-link independent suspension and attractive fiberglass coachwork. The adequately sized engine bay could accommodate a variety of engines including those from BMC and Ford. The 1.2-liter Coventry Climax FWE unit was popular with those intent on racing.

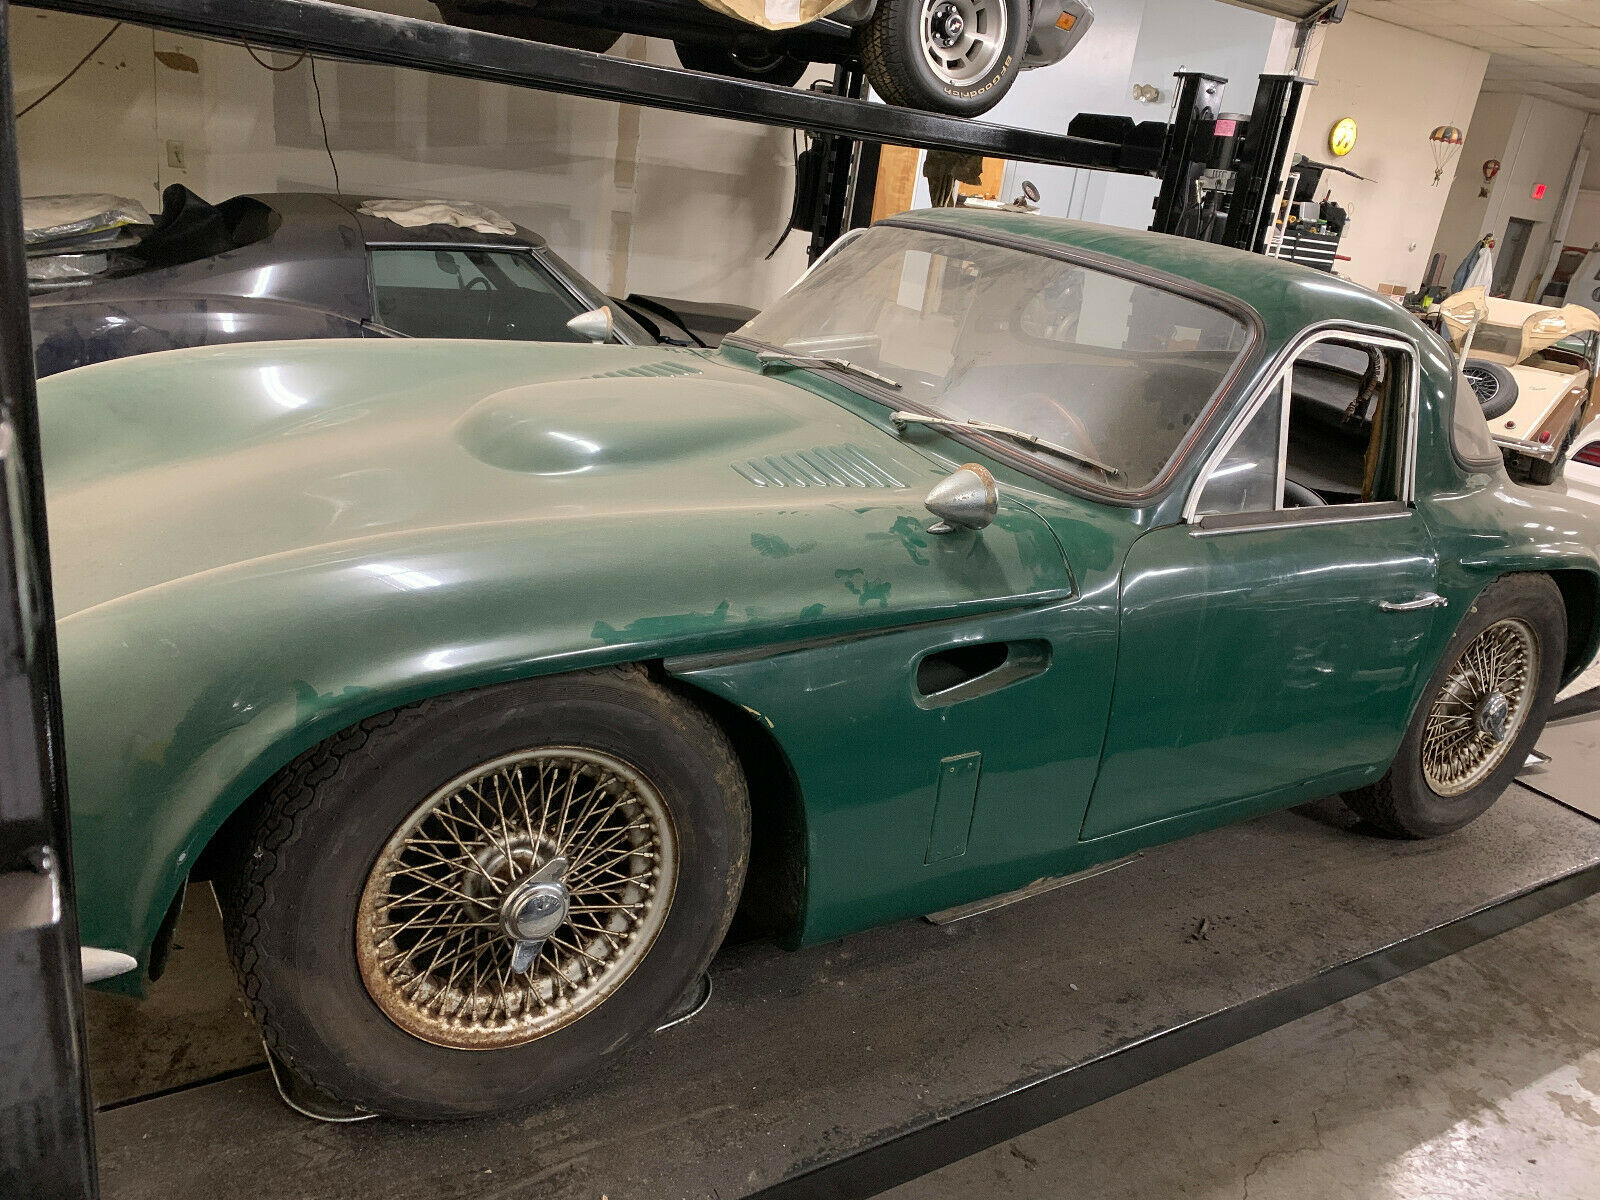
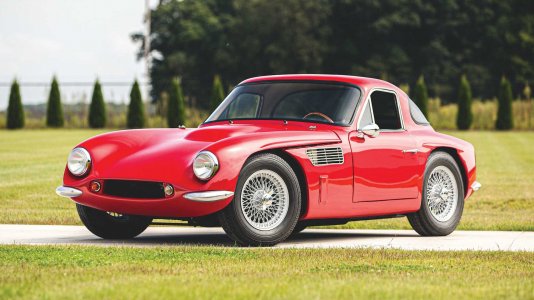
An American dealer named Jack Griffith was, perhaps, inspired by Carroll Shelby's successful implementation of the 'big engine/small car' formula, adopted the same concept of the MKIII Grantura. A prototype example was shipped to the United Kingdom and after gaining approval from the factory, entered production towards the close of 1962. Like the Cobra, the Griffith offered exciting motoring and nearly all examples were exported to the USA.

The Griffith 200 was sold in the UK as the TVR Griffith and in the United States as the Griffith 200. The Griffith 200 was powered by a 289 cubic-inch Ford engine and had many similarities to the TVR Grantura MKIII. The engine produced around 200 horsepower and some believe this is the source of the name '200'. A HiPo engine boosted horsepower to 271.

The cars sat atop of a short wheelbase, had a lightweight body skin, and a very powerful engine. Zero-to-sixty took just under five seconds, all for around $4000. It is believed that just under 200 (192 Series 200) examples of the Griffith 200 were produced.

Before the company ceased operations, the Griffith Series 200 was followed by the Griffith Series 400 and the Griffith Series 600. TVR paid homage to the original Griffith when, in the early 1990s, introduced the TVR Griffith - the first true use of the name 'TVR Griffith.

Links below..


Attachments

  • original-griffith-200-in-auction.jpg
    original-griffith-200-in-auction.jpg
    158.1 KB · Views: 6

Tom O

Ultra Member
I had a 58 Chevy I got down to 6 seconds for 0-60 mind you it took a 327 with offenhauser spreadbore manifold, 202 heads, Holley 650 double pump, mild cam, Acell dual point, and Mcloud clutch powering a Muncie 3 speed.
 

Matt-Aburg

Ultra Member
Roughing operation # 1

During this setup 0.3 was taken from the bottom of part. The pocket were roughed to plus 0.06. The 2.5 hole was blasted through using a helix cut. I left 0.125 / side for finish (boring from the top). Tomorrow I will be roughing side 2. After roughing is complete, I will check the tram before finish boring. At this point the second part will go on the Bridgeport CNC and the first part will go onto the the router for finishing from side 2.

Here are todays photo's.
 

Attachments

  • DSCN1421.JPG
    DSCN1421.JPG
    530.2 KB · Views: 17
  • DSCN1422.JPG
    DSCN1422.JPG
    322 KB · Views: 17
  • DSCN1423.JPG
    DSCN1423.JPG
    437.2 KB · Views: 17
Last edited:

Matt-Aburg

Ultra Member
Roughing operation #2

During this setup the workpiece is flipped 180 about X axis from first setup. First op is to skim the face to cleanup. Next is to rough the C-bore. I then finish the Bore to size. Next is to rough the piece with basic 2D profiles to blast the material off. Final is semi finish to plus 0.1. I will be finishing this setup on the router starting Monday. Second piece is being blasted now. I should only have to semi finish tomorrow. (1prt)
 

Attachments

  • DSCN1428.JPG
    DSCN1428.JPG
    564.6 KB · Views: 8
  • DSCN1429.JPG
    DSCN1429.JPG
    428 KB · Views: 4
  • DSCN1430.JPG
    DSCN1430.JPG
    424.9 KB · Views: 4
  • DSCN1431.JPG
    DSCN1431.JPG
    374.7 KB · Views: 5
  • DSCN1433.JPG
    DSCN1433.JPG
    408.1 KB · Views: 7
  • DSCN1434.JPG
    DSCN1434.JPG
    470.2 KB · Views: 8

Matt-Aburg

Ultra Member
Finishing operation # 1

I finally wound up this setup just now. Operations in this order below.
Finish flats below hub diameter, Cbore in hub ID and depth, and face the X minus end (LH side of part) all to zero.
Semi finish to 0.02 with 1/2 ball cutter and 0.03 stepdown.
Finish to zero with 1/2 ball cutter.
Spot drill.
Drill 8 upper holes at 1/8, 3 lower holes at 9/32.
Spiral upper eight holes, 0.75 deep.
Drill two locator holes with 0.250 endmill 1/4 deep.
Chamfer bottom of Cbore diameter.

This now gets roughed side 2 using a fixture on the CNC bridgeport. It will be finished on Router for side 2.
 

Attachments

  • DSCN1438.JPG
    DSCN1438.JPG
    351 KB · Views: 9
Top