• Scam Alert. Members are reminded to NOT send money to buy anything. Don't buy things remote and have it shipped - go get it yourself, pay in person, and take your equipment with you. Scammers have burned people on this forum. Urgency, secrecy, excuses, selling for friend, newish members, FUD, are RED FLAGS. A video conference call is not adequate assurance. Face to face interactions are required. Please report suspicions to the forum admins. Stay Safe - anyone can get scammed.
  • Several Regions have held meetups already, but others are being planned or are evaluating the interest. The Calgary Area Meetup is set for Saturday July 12th at 10am. The signup thread is here! Arbutus has also explored interest in a Fraser Valley meetup but it seems members either missed his thread or had other plans. Let him know if you are interested in a meetup later in the year by posting here! Slowpoke is trying to pull together an Ottawa area meetup later this summer. No date has been selected yet, so let him know if you are interested here! We are not aware of any other meetups being planned this year. If you are interested in doing something in your area, let everyone know and make it happen! Meetups are a great way to make new machining friends and get hands on help in your area. Don’t be shy, sign up and come, or plan your own meetup!

Alexander Deckel SO Clone

Susquatch

Ultra Member
Administrator
Moderator
Premium Member
As many will know, I finally bought a tool grinder. This thread will document getting it working.


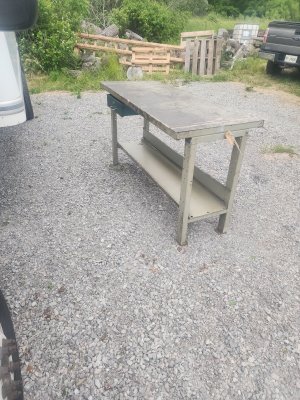
The cabinet is mostly crap. I suppose it's possible to fix it, but that won't happen for quite some time - if ever.

The cabinet was filled with 3 bags of crushed glass. Probably a vibration damper.

I managed to get the grinder into my shop alone by removing it from the stand. It was only held on with two 3/16 Machine screws.

It came with NOTHING - not even one lonely collet. I asked if they were hiding someplace, and the guys who were helping me said they disappeared ages ago. I believe that cuz it's quite badly rusted. I doubt it's been used in 20 years. Not all the adjustments seem to work, and some might even be broken. I won't really know till I can study it. It's also got about 5000 coats of paint on everything.

Note - the big doors at the college were wide open with fans blowing air out. That means the humidity in there was BAAAD.

Here are some initial photos:

As advertized:
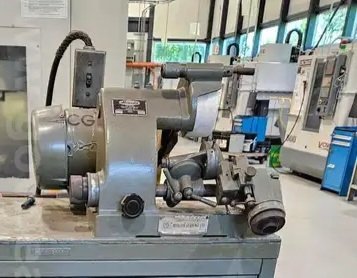
6545_84_6d69e64f-038f-4b10-b87e-416a0d003163(1).jpg

I removed the motor and drive belt to lighten the load a bit. The motor runs fine as is - very fast at 3450rpm, but quite smooth and low vibration.

I lied, it did come with one badly worn wheel. I removed the shield to take a look at the stone. I think the little arm is a diamond wheel dresser. The shaft on the right is the motor mount.
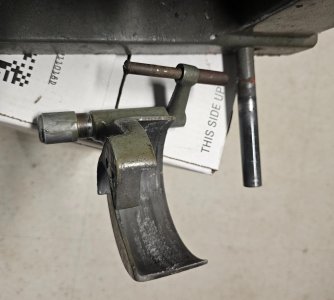
20250717_163218.jpg

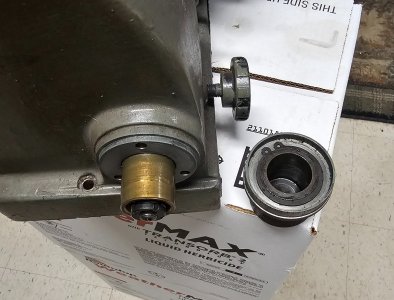
Here is the wheel and a bunch of rusty shafts. You can see that the collet holder is rusty too.
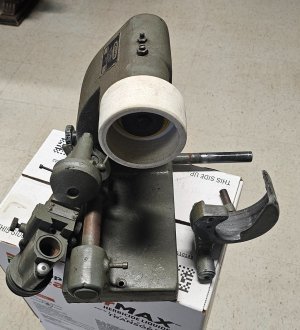
20250717_163134.jpg

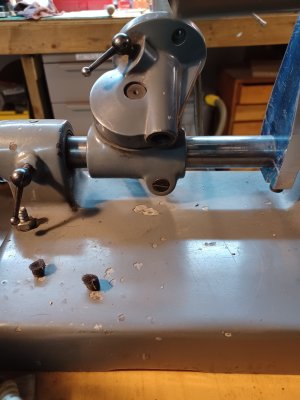
I couldn't fully articulate the parts. They might be frozen or I might have missed a lock.
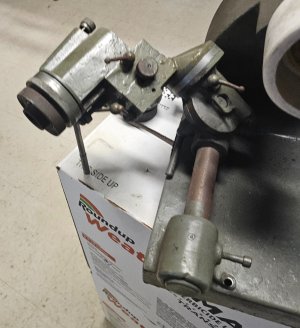
20250717_163604.jpg

I do not know if this is broken or just something amiss.
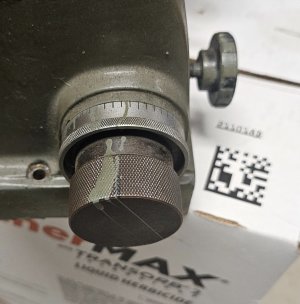
20250717_163410.jpg

20250717_163418.jpg

Gotta love that awesome paint job!
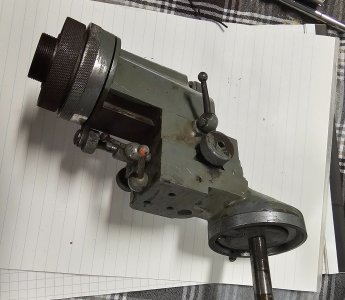
 
IMO it's still a bargain.
I'll send you a link to zip file of manuals, parts breakdowns etc.
AFAIK all fasteners are imperial eventhough Alexander reportedly made them under license from Deckel.

The only official handle missing is the one replaced by a SHCS. That locks the main rod from turning and moving in/out along Z.

I would soak everything in WD40 overnight, then dismantle and dump into your favourite rust remover. No wire wheels please!
 
Woods Creek Workshop on Youtube did a good series on restoring a Deckel SO, not the same machine but very similar. Blondihacks also did a series on a Kuhlmann, again not same but similar. When I did mine both were very helpful.
 
The Deckel S0 is exactly the same unit as the Alexander except it was metric vs imperial hardware. I didn't like some of his approaches to getting it apart but the overall process and result were repsectful to the quality of the machine.

6 parts. @Susquatch These are worth your while watching.
 
Last edited:
The Deckel S0 is exactly the same unit as the Alexander except it was metric vs imperial hardware.

That's funny. I just assumed the Alexander would be metric. I became more and more flummoxed as each fastener I touched turned out to be Imperial.

I'll try and watch them tomorrow. Everything is drenched in wd40 for tonight. Doesn't seem to be touching whatever paint they used. It's horrid. They painted slides, dovetails, handles, everything. Sheesh.
 
WD40 made zero difference last night. Tonight I will try something a bit more aggressive on the old paint that covers this thing inside and out.

I watched a number of the videos that others have suggested. Extremely painful for me.

I successfully removed the main collet holder assembly.

20250718_162007.jpg

I feel pretty confident that it's many subcomponents will yield to paint remover and my stubbornness.

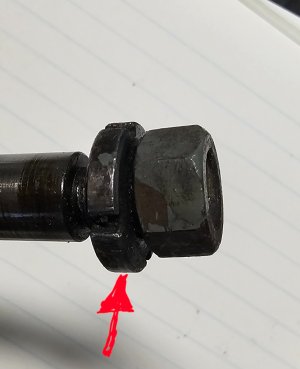
The shaft threaded washer was a bit of an issue though.

20250718_162147.jpg

Even after removing the nut, that threaded washer (lock collar?) didn't want to turn easily. I had the impression that it is a friction fit component. I'll try paint remover on it first and then study other info before I try tapping it.

I have taken the hippocratic oath on this project - and I'll "do no harm". Yes, I know that's not an exact quote, but it is the plan.

The remainder is an issue. It is frozen to the shaft. I'm thinking I'll have to make some tools..... The true joy of my life!
 
I successfully removed the tightening bolt from the lower shaft clamp today. What a chore. Took me all day. With a clue from @Martin w's video, it turns out they painted over a set screw that holds the main screw in place. Even after scraping away the paint, the set screw didn't want to move. Although it takes a 1/16 allen wrench, the key slips. No metric or imperial key fits it as is. On a hunch, I ground down a 5/64 key to a scooch over 1/16 (probably 7/128) which held. I don't know if the set screw or my wrenches are out of spec. But given I prolly tried 8 different 1/16 wrenches, it's most likely an out of spec set screw. So I'll replace that with a proper set screw when I reassemble it. The screw also had to be worked back and forth like you would use a tap to keep it going 1/4 turn at a time. Even so, it complained the whole way squeeking slowly along. Once out, the clamp screw was easily removed along with two of the crappiest looking washers anyone could imagine. The screw needs some serious cleanup and some thread chasing. I might have to make a new one

With the tiny bottom lever removed, I should have been able to unscrew the lever for the second adjustment body above it. But that was not happening. The upper lever won't clear the body of the grinder so it can't be turned. The problem is that the lower adjustment body won't turn on the shaft even though the clamp is removed. I examined it every which way of Sunday with no reward.

At this point I was beginning to get quite frustrated so I put it all aside for tomorrow and drafted this note instead.
 
I feel some responsibility for your pain :-(
Give me a call when you want to disassemble more, it will help if you refer to the numbers on Fig 11 or 13 in the manual for clarity.
 
I feel some responsibility for your pain :-(
Give me a call when you want to disassemble more, it will help if you refer to the numbers on Fig 11 or 13 in the manual for clarity.

Don't feel responsible Gerritt. It isn't anybody's fault that some college genius painted this thing with a 6" wide brush on a 30 ft fiberglass pole.

The biggest problem is the combination of rust and paint. The actual machine appears to be in pretty good shape.

I'd like to get S moving so I can clean the paint and rust on the bar.

I have all the fasteners removed that hold S to the bar. But it won't move because of paint and rust. I want to separate S from U so I can make a tool to move S. But I can't separate S from U because the lever C2 won't rotate clear of the main casting.
 
But I can't separate S from U because the lever C2 won't rotate clear of the main casting.

Got them apart. Might have broken my do no harm rule though. I just rotated the part on the bar by tapping it VERY GENTLY with a plastic mallet. The lever rotated easily after that and S & U are now divorced.

But......., turns out I didn't rotate S on the bar after all. S is solidly glued to the bar so I actually rotated the bar. To do that, I must have also rotated the fine adjustment wing.

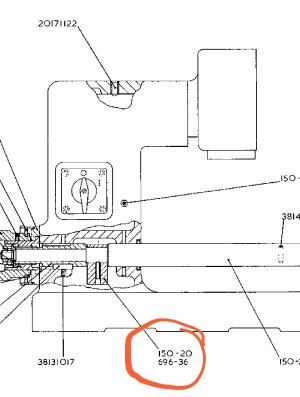
Screenshot_20250719_114639_Adobe Acrobat.jpg
 
The allen head screw on far right of bar should be loose so the main bar can rotate
To remove handle C2, C1 must be removed.tbere is a screw on opposite end of C1 shaft to undo. Probably painted over. Main shaft lock is on left of my photo
 

Attachments

  • 17529416969913967424730456388054.jpg
    17529416969913967424730456388054.jpg
    1.1 MB · Views: 18
I find that gentle heat and liquid wrench can be very affective, along with gentle tapping.

My favorite too. I tried that and also tried freeze on the bar. No joy.

I think you are one or two notes behind.

To remove handle C2, C1 must be removed.tbere is a screw on opposite end of C1 shaft to undo. Probably painted over.

Yup, I already did all that. In my previous note, I said I got it all apart but can't move S on the bar.

Main shaft lock is on left of my photo

Yup, mine is not a lever anymore it's a machine screw. It was removed. But I put it back with just a few turn so I know where it goes.
 
Last edited:
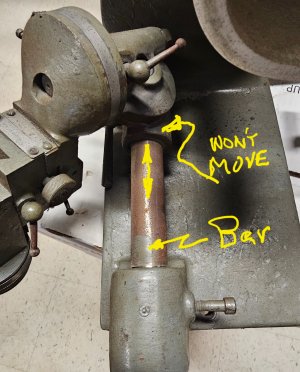
Here is where I am now.

20250717_163353.jpg

All the parts are off except part S. It is frozen solid to the bar.
 
Back
Top