• Scam Alert. Members are reminded to NOT send money to buy anything. Don't buy things remote and have it shipped - go get it yourself, pay in person, and take your equipment with you. Scammers have burned people on this forum. Urgency, secrecy, excuses, selling for friend, newish members, FUD, are RED FLAGS. A video conference call is not adequate assurance. Face to face interactions are required. Please report suspicions to the forum admins. Stay Safe - anyone can get scammed.

You still on the fence to get a 3d printer?

John and I were talking about printers the other day, and this may have prompted the thread! He asked if I got the donor printer going yet, and I haven't had much success, yet.

I mused about just buying a Qidi pro 4. They've had a bump or 2, but handled them with integrity. It has all the features of my 'perfect printer'... I almost bought one on Black Friday, but they were out of stock in Canada in the places I looked. I can wait - too much to get done and too little spare time. (but perhaps soon).

-- It is 3* the price of an A1, at 799$ with free shipping.
 
Last edited:
info re Orca slicer for A1. Listen to me just throw'n down the buzzwords LOL

 
Listen to me just throw'n down the buzzwords LOL

What? You are throwin down buzzwords? From my altitude, it's all Greek. I don't hear any buzzing at all. I'm just getting further and further from wanting one. I can't process any of your buzzwords, let alone translate G-Code to F-Code from my refrigerator. I think all our Sovol is melted.
 
Don't be intimidated. You don't need to know G-code. It runs behind the scenes. That's the Slicers job, to convert your CAD model STL type format into a G-code file format that particular printer understands so you just Slice & Print. I'm simplifying of course but that's the most basic workflow. Or easier yet if you download a model but most of my needs are self induced madness.
 
Don't be intimidated.

Sure Peter. I'll just drink the coolaide and everything will be ok.

Can you do me (us) a favour? In 6 paragraphs and preferably MUCH less, can you explain what G-Code is?

Same for Slice Code.

Same for STL Code.

It all doesn't sound very plug'n'play or user friendly to me.
 
Sure Peter. I'll just drink the coolaide and everything will be ok.

Can you do me (us) a favour? In 6 paragraphs and preferably MUCH less, can you explain what G-Code is?

Same for Slice Code.

Same for STL Code.

It all doesn't sound very plug'n'play or user friendly to me.
G code are the commands the printer uses to move the print head around. You need never concern yourself with them.
It is extremely plug and play now.
If you have the model from thingiverse then you open it in the slicing application. Slice it, and save the resulting file.
Send that file to the printer.
Wait for it to be done

That’s basically the workflow
 
I'll botch it up because I am a 3DP novice. Others can chime in, but here goes. Specific to your own part design
- you draw something in 3D cad which has its own part format (Solidworks is different than Fusion etc). Export as an .STL which is a common file format that 3D Slicer programs prefer
- open the Slicer program, import the .STL file. Orient the part(s) to bed, specify color, resolution, infill, ie 3DP specific job stuff. Or in many cases just accept defaults. Anyway you click 'slice'
- Save as whatever 'print' format corresponds to the printer. Maybe to a thumb drive or maybe wifi to printer depending on hardware
- Print

STL is a common 3DP source format but some Slicers also support STEP maybe others. There are pros & cons but I'm not there yet. I think generally these are faceted or mesh renditions of native cad formats which are typically NURBS based (I'm getting into weeds).

If you download a file it presumably comes preformatted to your machine, so no cad steps, just load & print.
<typed as David posted, his description is better>
 
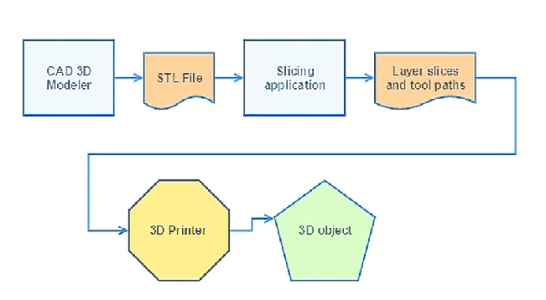
@Susquatch it's basically this:
1736791799991.png
 
Sure Peter. I'll just drink the coolaide and everything will be ok.

Can you do me (us) a favour? In 6 paragraphs and preferably MUCH less, can you explain what G-Code is?

Same for Slice Code.

Same for STL Code.

It all doesn't sound very plug'n'play or user friendly to me.

"STL code" doesn't exist/is not a term. An STL is the file format/extension of your 3d model. ".STL". Almost every CAD program out there can save a model as an .stl file. That's it, that's the extent of the knowledge you need to know about that.

"slice code" doesn't exist/is not a term. "Slicing parameters" would perhaps be a better more accurate term. A "slicer" is the software program (cura, Bambulab, etc) you load your 3d model (stl file) into. It's job is to take the parameters you specify such as infill density, perimeter lines (shell thickness), layer height, print temp, bed temp, etc and generate the "G code" that the printer then uses to drive itself. Don't be alarmed about all the parameters. Most are simply default based on your material selection, and you can get as in depth, and hands off with those as you like. Have a part that needs to be strong? make it a denser infill, with a thicker wall/shell etc....You can use slider bars to change these parameters (or input text), and see a visual representation of your printed part change in real time on the screen.

"G Code" is the language of code that the printer (and almost ALL CNC machines) uses to drive itself to the specified coordinates in order to print your part. If you understand the Cartesian coordinate system (I am assuming you do based on your engineering background...) , all g code is, is essentially a simple text file of instructions telling the machine where to go, how fast to do it, and what to do when it get's there. That basically it. For the 3d printer interface and workflow, you don't even touch/look at the gcode, or even need to know what any of it means. The slicer handles ALL of it. I'd probably throw out a guess that over 90% of the worldwide printing community couldn't read a line of Gcode and tell you what it means. It's knowledge thats simply not needed to print parts. Aside from my initial curiosity, I can't tell you the last time I actually looked at the gcode for a print file let alone edited it.

I made a living programming CNC machines in part for about 20 years. Using a variety of software from mid/high end CAM packages, to notepad, or simply punching it in at the control. "programming" a 3d printer is about as simple an operation as there is. It really bears zero resemblance to industrial CNC programming, and absolutely ZERO prerequisite knowledge of Gcode, or other programming language is required. The slicer handles all the Gcode production based on the slicing parameters you select, and creates the file in the background in real time. All you have to do is save it to a memory stick, insert it into the printer, then select it from a list and hit go (wifi connectivity even bypass' that step). Slicing a 3d model to print really couldn't be any simpler. IMO the 3d printer community has done an absolutely fantabulous job of streamlining the entire workflow, and to be honest, if they ever got a hold of the industrial side I would have been out of a job years ago lol. If there is an Ontario get together this year, I will bring mine, and my laptop and give a demo.

That all being said, generating the models to print in CAD can absolutely be a challenging process for some, but that's the same as it is for machining. The difference being you can actually print stuff that you couldn't physically machine. Cad is another can of worms altogether, but there are some very simple programs out there like tinker cad. My kids 10/12 are starting to pick that up. It's pretty basic, but it's capable of creating models to print, and saving as an .Stl.

6 paragraphs...phew....Hopfully adressed your questions. I tried to be direct and concise. Not easy for me, as I tend to get ranty, rambly, and wordy trying to make a point sometimes......:D. You should see all the stuff I cut out.......Cheers!
 
Here's the basic process:
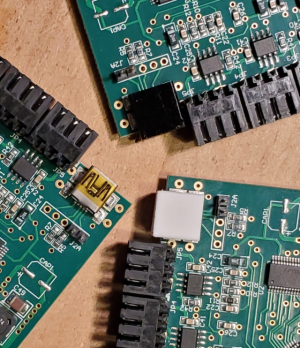
1. Need a cover for the USB connector while spraying conformal coating over the entire PC boards. Masking tape was originally used but very tedious.

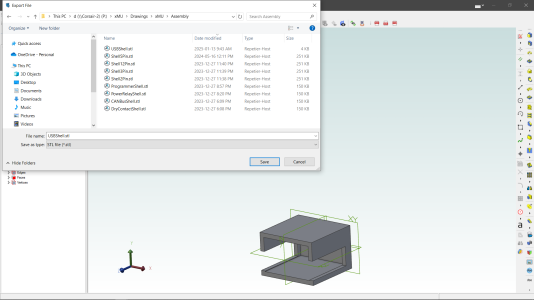
2. Draw up a slip on cover and export as an STL file
1736790546860.png

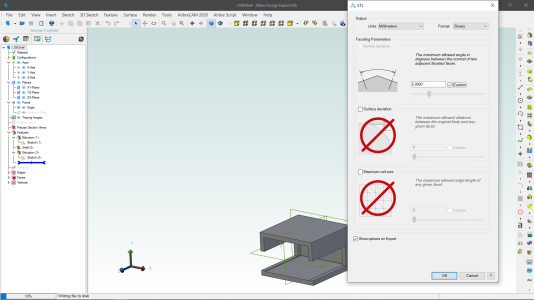
Setting the parameters of the STL file. Notice that one custom value maximum allowed angle. That's the part that makes round stuff a bit faceted but results in faster prints. Not important for this one with square edges. But if you see a print that doesn't appear very round this is why.
1736790631412.png


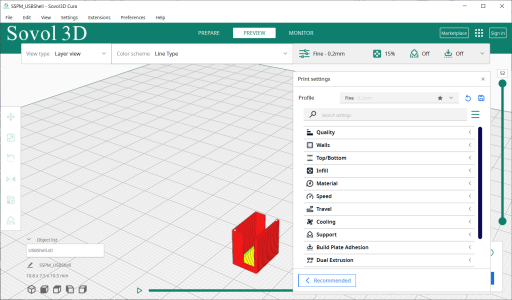
3a: Run whatever program that imports the .stl file and slice it with whatever parameters suit the job. In this case it's the SOVOL slicer. This is the hardest part of 3D printing where you may not know what is best. But there are defaults for each print quality that work well enough. And that get's then saved as a .gcode file for import into your printer.

1736790983551.png


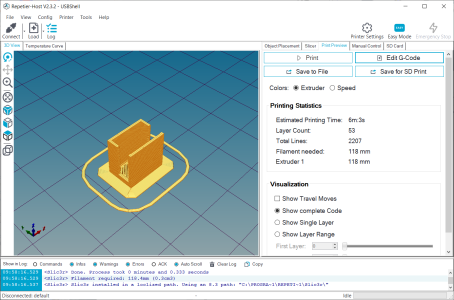
3b: Or the Repetier slicer (which is now old). Also save as .gcode for import into your printer.

1736791121248.png


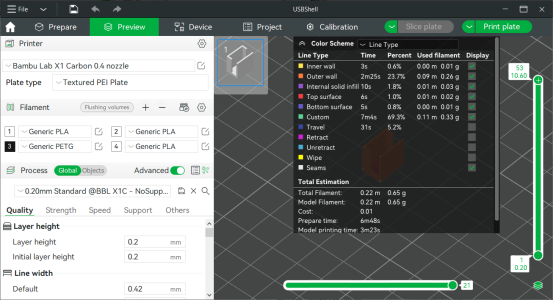
3c: Or if you have the Bambu you import it directly into the user interface and slice.
1736791358255.png


At this point all three systems, if connected to your printer can directly print. Or you can save to a MicroSD card and use SneakerNet to walk it over to the printer and use the printer front panel user interface to select the file and start printing.

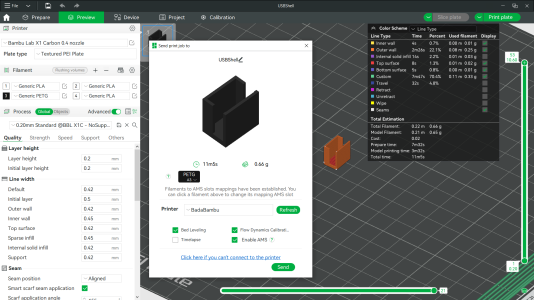
For 3c: One clicks on the Print Plate tab on the top right and then select some more printing parameters like bed leveling etc.
1736791776903.png


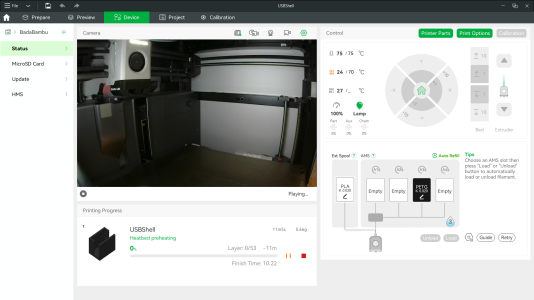
And then the file is sent over the cloud in this case to the printer which heats up the bed, sets up the filament etc. and finally starts printing. The Bambu X1C comes with a camera and an interior light so I can watch it remotely as I'm doing now.

1736791924557.png


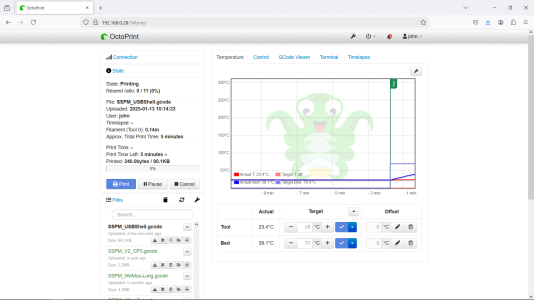
For 3a and 3b: I used a Raspberry Pi and OctoPrint software to connect to the 3D printer USB port. From there I could remotely download and print. Just drag and drop the file onto the user interface and tell it to print.

1736792206890.png


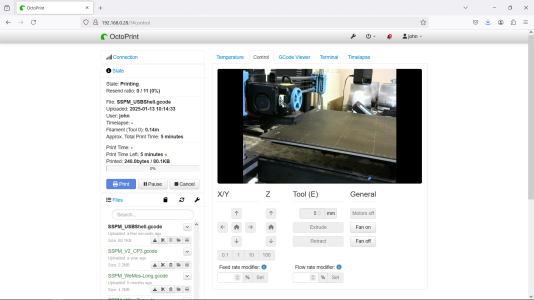
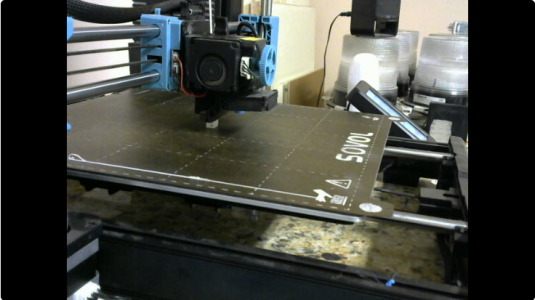
I have a camera on the Pi3 and can look at the print.
1736792350035.png


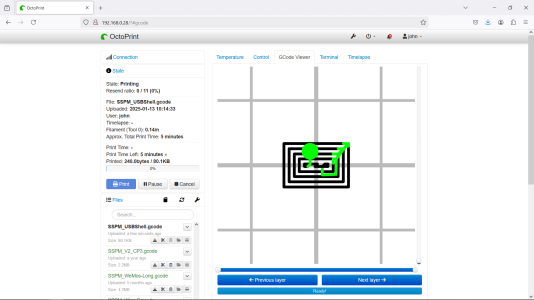
And I can even watch the progress on a per layer basis while it's printing.

1736792394033.png


The SOVOL is busy doing this with PLA filament as that's what's loaded. The Bambu is using PETG and I now know that I have to select the object to print, right click and way down at the bottom of a long drop down menu is change filament type. I select PETG in the 3rd Slot and now the Bambu knows which one of the slots in the AMS filament feeder to use.

I'll post a photo of the finished prints when they are done.
 
Wow! You guys are all amazing. What I didn't understand from David got explained by John. What I didn't understand from John got cleared up by Peter, what I didn't understand from Peter got cleared up by everyone else. All you guys are amazing. I gotta say that so many voices is greatly reassuring. Especially amid so much confusion, conflicting information, and sadly..... problems

I think this post probably should get flagged somehow for the benefit of others. "3D printer software explained in simple terms". I'm gunna bookmark it for myself for sure. I might even print this thread out and put it on the coffee table to digest slowly and meticulously.

And maybe, (just maybe) a 3D Printer will show up in the Susquatch Den in the near future. That would be so cool.

Thanks Guys!
 
Back
Top