• Scam Alert. Members are reminded to NOT send money to buy anything. Don't buy things remote and have it shipped - go get it yourself, pay in person, and take your equipment with you. Scammers have burned people on this forum. Urgency, secrecy, excuses, selling for friend, newish members, FUD, are RED FLAGS. A video conference call is not adequate assurance. Face to face interactions are required. Please report suspicions to the forum admins. Stay Safe - anyone can get scammed.
  • The 2026 Calgary Area Meetup is set for Saturday May 30th at 10am. The signup thread is here! Robinhood has graciously offered to host the meetup again this year. Please note that you MUST RSVP to the notice linked above if you wish to come.

Tips/Techniques What are you printing today?

Tips/Techniques
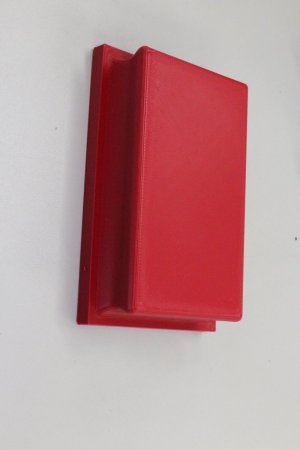
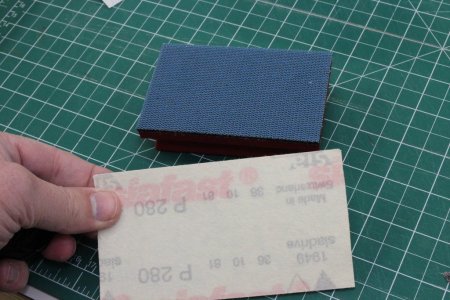
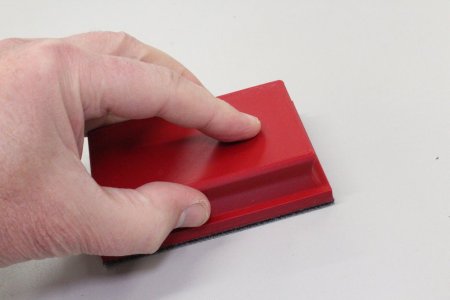
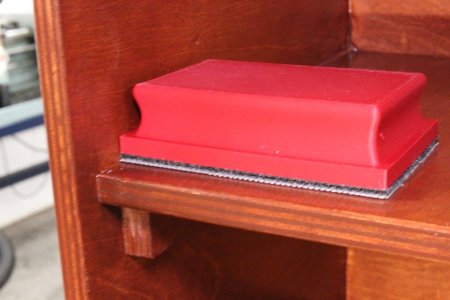
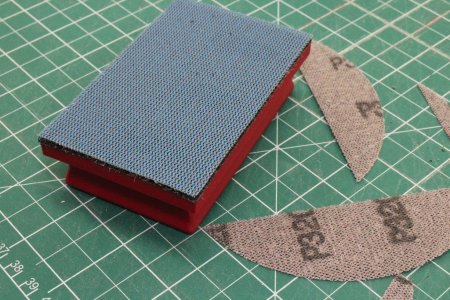
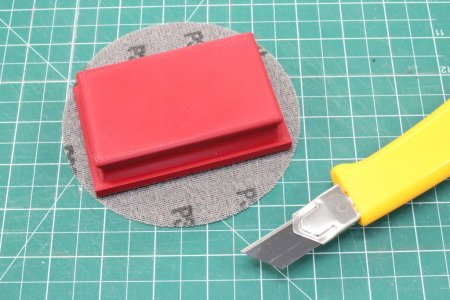
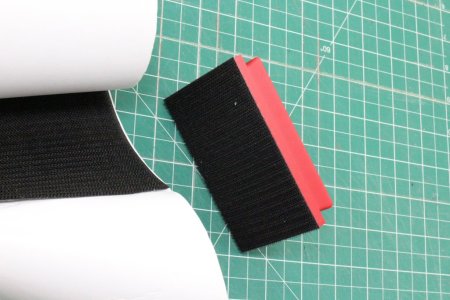
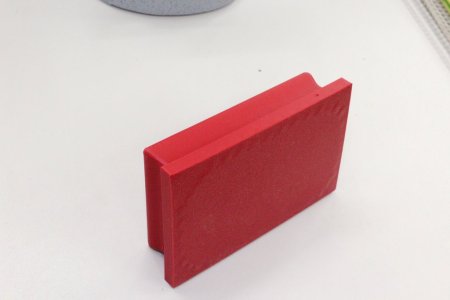
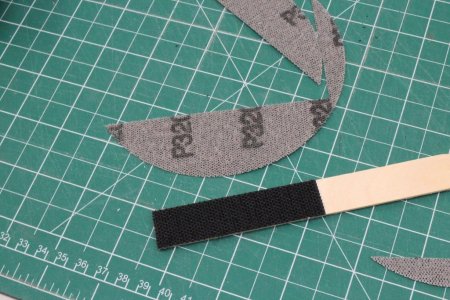
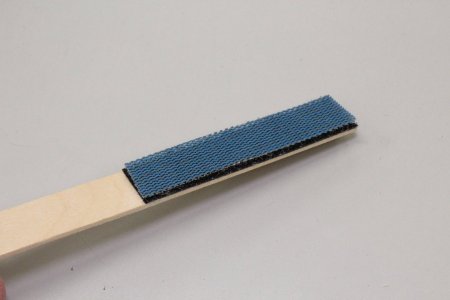
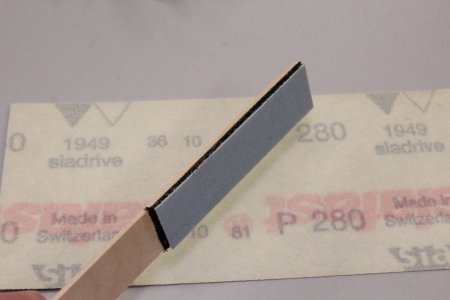
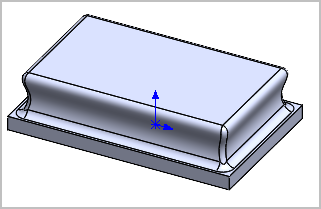
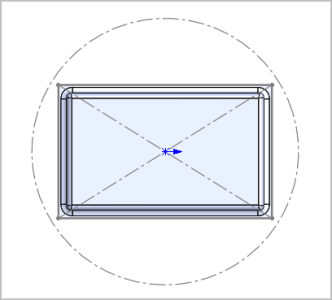
I made this rectangular 4.0"x2.5" sanding block to take advantage of 5" diameter orbital sander discs or the (2.75x16?) long board sheets, both of which are commononly H&L (hook & loop) backed. The 4" wide velcro came from Amazon, it has a very aggressive adhesive. I profiled a bit of finger grip on the upper grip block & made it slightly smaller in perimeter footprint so the sanding base can get tight into corners. The whole thing should be waterproof so wet sanding shouldn't be a problem.
 

Attachments

  • 09-30-2026-003.jpg
    09-30-2026-003.jpg
    55.5 KB · Views: 3
  • 09-30-2026-010.jpg
    09-30-2026-010.jpg
    150.9 KB · Views: 3
  • 09-30-2026-009.jpg
    09-30-2026-009.jpg
    63.9 KB · Views: 3
  • 09-30-2026-008.jpg
    09-30-2026-008.jpg
    99.5 KB · Views: 3
  • 09-30-2026-007.jpg
    09-30-2026-007.jpg
    206.1 KB · Views: 4
  • 09-30-2026-006.jpg
    09-30-2026-006.jpg
    147.3 KB · Views: 3
  • 09-30-2026-005.jpg
    09-30-2026-005.jpg
    120.3 KB · Views: 3
  • 09-30-2026-004.jpg
    09-30-2026-004.jpg
    47.9 KB · Views: 3
Use up the scraps for mini sanding sticks. Come in handy here & there. I use these on the lathe sometimes too, but velcro is kind of a mushy conforming feel. If you require flat, dont use velcro. Better to use a hard backing board & abrasive paper bonded with spray adhesive unless its already PSA sticky back.
 

Attachments

  • 09-30-2026-011.jpg
    09-30-2026-011.jpg
    172.4 KB · Views: 1
  • 09-30-2026-012.jpg
    09-30-2026-012.jpg
    64.5 KB · Views: 1
  • 09-30-2026-013.jpg
    09-30-2026-013.jpg
    74.4 KB · Views: 1
Great , I really didn't want to buy rapidchange atc
Don't expect it to work with a Bridgeport etc. It really relies on having a spindle running from a VFD. As in the ubiquitous 1-3kw water cooled ones from Asia. The spindle will stall in the 'nut block' to tighten or loosen. Fine with one of those spindles, not so fine with non-slipping motors.
 
Don't expect it to work with a Bridgeport etc. It really relies on having a spindle running from a VFD. As in the ubiquitous 1-3kw water cooled ones from Asia. The spindle will stall in the 'nut block' to tighten or loosen. Fine with one of those spindles, not so fine with non-slipping motors.
I know. I am making a cnc router... I sortta started on printNC version, then added a ton, so I can mill aluminum.
 
I made this rectangular 4.0"x2.5" sanding block to take advantage of 5" diameter orbital sander discs or the (2.75x16?) long board sheets, both of which are commononly H&L (hook & loop) backed. The 4" wide velcro came from Amazon, it has a very aggressive adhesive. I profiled a bit of finger grip on the upper grip block & made it slightly smaller in perimeter footprint so the sanding base can get tight into corners. The whole thing should be waterproof so wet sanding shouldn't be a problem.
Got that one posted somewhere Peter?
 
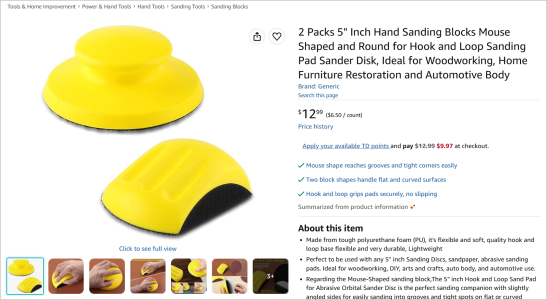
There is a cheapo set on Amazon but I dont care for their rectangular profile block, reminds me of a computer mouse with weird topside finger depressions. Autobody stores sell better quality ones but wheres the fun in that. I have a couple at the ready with diifferent grit/type paper.

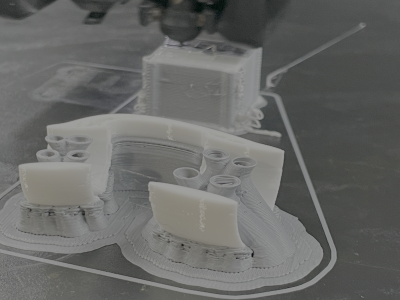
One thing I noticed & this happens occassionally. Printed a red PLA with flat side down, came out perfect. Flipped to my newish spool of White, exact same Bambu filamant, exact same print file. It had some distortion lift on the corners. WTF. I was going to play with with infill pattern or other settings but I tried flipping on edge with support. Seems like a counterintuitive way to orient the part but now the bottom is actually flat. Just a tiny bit of support straiations on one side of the handle block due to the curvature but not noticeable. I have printed much larger things with little to no distortion so not sure whats going on here. the White is a relatively new roll, maybe something up with this particular roll or color additive maybe?

1791047930581.png
 
There is a cheapo set on Amazon but I dont care for their rectangular profile block, reminds me of a computer mouse with weird topside finger depressions. Autobody stores sell better quality ones but wheres the fun in that. I have a couple at the ready with diifferent grit/type paper.

One thing I noticed & this happens occassionally. Printed a red PLA with flat side down, came out perfect. Flipped to my newish spool of White, exact same Bambu filamant, exact same print file. It had some distortion lift on the corners. WTF. I was going to play with with infill pattern or other settings but I tried flipping on edge with support. Seems like a counterintuitive way to orient the part but now the bottom is actually flat. Just a tiny bit of support straiations on one side of the handle block due to the curvature but not noticeable. I have printed much larger things with little to no distortion so not sure whats going on here. the White is a relatively new roll, maybe something up with this particular roll or color additive maybe?

View attachment 87678
I've started to always dry the rolls when they are new. I've had rolls from some suppliers show up unprintable until I dry them and then throw them in the dry boxes.
 
Ya my thought as a possibility too, but both my red & white rolls were in their own sealed ziplock with handful volume of dessicant method. The beads were all orange indicating no moisture, so I dont think that was the issue. I've read where this can happen on relatively large but thin footprint pieces especially if there is a smaller more pronounced featur on top which this kind of is. Maybe like the centered printing on top for a portion of area can localize heat on the shape below & adverse implications? Thats what the slicer is supposed to figure out dammit LOL. Also I read if the infill pattern is too consistent or too light a % relative to shell. Thsi one kind of goes around for me because Ive printed parts with default 15% with som issues, increase density to say 30% (purely because I needed that for other reasons) & issue resolved. But in this case red at 15% was better than white at 15%, all parameters identical. Red is about 30% roll remaining vs white at 90%. A mystery. This is actually teh first time I printed white but I didnt think color factored at all
 
Ya my thought as a possibility too, but both my red & white rolls were in their own sealed ziplock with handful volume of dessicant method. The beads were all orange indicating no moisture, so I dont think that was the issue. I've read where this can happen on relatively large but thin footprint pieces especially if there is a smaller more pronounced featur on top which this kind of is. Maybe like the centered printing on top for a portion of area can localize heat on the shape below & adverse implications? Thats what the slicer is supposed to figure out dammit LOL. Also I read if the infill pattern is too consistent or too light a % relative to shell. Thsi one kind of goes around for me because Ive printed parts with default 15% with som issues, increase density to say 30% (purely because I needed that for other reasons) & issue resolved. But in this case red at 15% was better than white at 15%, all parameters identical. Red is about 30% roll remaining vs white at 90%. A mystery. This is actually teh first time I printed white but I didnt think color factored at all
I agree bed adhesion can be hit and miss. But maybe it was just cleaning?? The bed was slightly contaminated and you printed in the exactly same place as the last print? I have an old cleaner spray bottle full of IPA which I spray on the bed and then wipe down with a cloth. Still sometimes that does not do it and I have to wash in the sink with dish detergent, hot water, then try again with IPA. Even then sometimes I have to resort to a layer of gluestick.
 
I'm consistent with my pre-clean every print & I always allow it to do the full calibration each print. Actually I saw the print in progress when the base was done & it was already on the first 30% of upper handle segment, the base was 100% intact everywhere so I thought I had the issue licked. Its almost like it sat on the hot bed for too long but this is a small print compared to many I see that much much taller
 
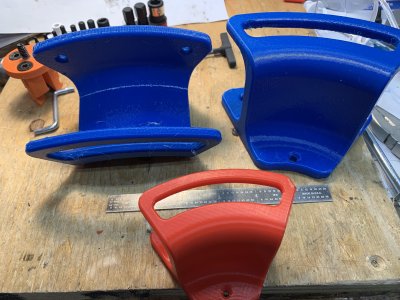
Today extension cord hangers. Default size in red. 200% in blue with 0.8mm nozzle. Note the coarseness of the layers. I’ve found printing with 0.8mm nozzle results in stronger prints too.
 

Attachments

  • IMG_8983.jpeg
    IMG_8983.jpeg
    2.3 MB · Views: 7
in blue with 0.8mm nozzle. Note the coarseness of the layers. I’ve found printing with 0.8mm nozzle results in stronger prints too.
Ive been meaning to try 0.8mm, I should add one to next order. The print time decreases so if surface finish isnt a big issue, should be a good option. Now is this on your A1 (mini maybe?) slinger?
 
Nope. The blue prints were on my Prusa MK3S and with a 0.8mm nozzle the print time is still ok. The red print was on the Prusa MK4. Both are bed slingers... I have the A1 mini setup to print PLA - so I tend to use it less.
 
So this is almost completely OT, cos theres no metal or mechanics involved at all....

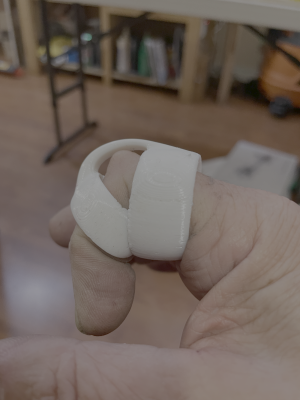
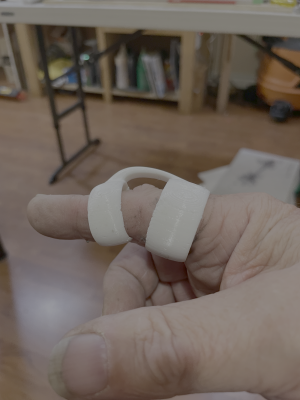
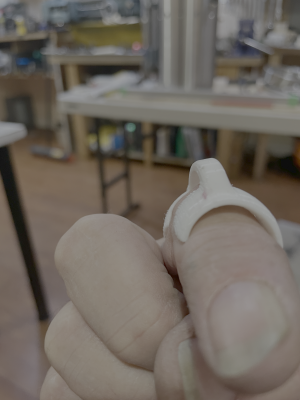
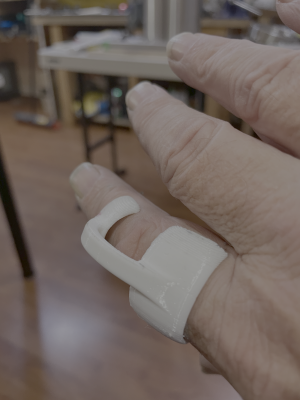
I have a painful bump on my index finger (a ganglion cyst) that is excruciatingly nasty if I knock against something, which seems to happen several times every day.

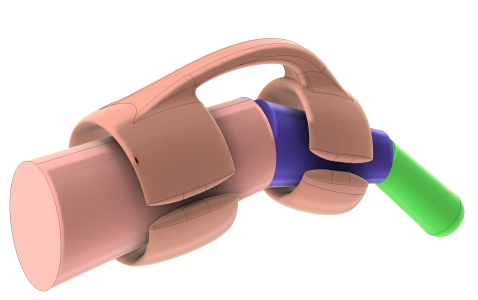
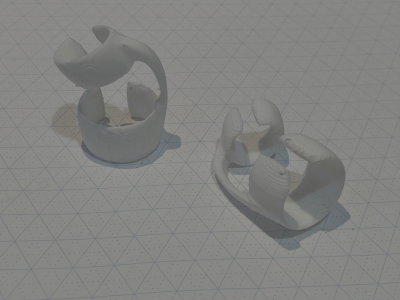
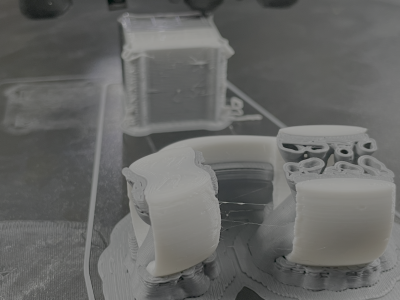
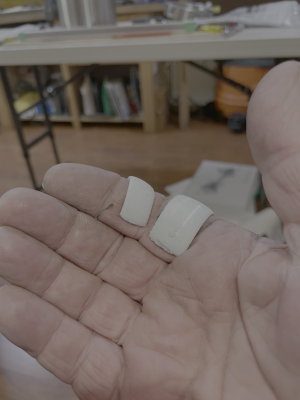
This is a finger guard, designed in F360 to fit my index finger. I'll let the pictures do the talking. It really works well. It is very comfortable and I can wear it full time. The TPU is the 95U soft version which keeps its shape well and provides just the right stiffness to keep it in place without rotating.

Modelling the shape in Fusion (Design tab, not Form tab) was a challenge because the base geometry (my finger) is not a geometric shape. So since I do not use a 3D scanner, I modelled a finger parametrically, then designed the guard to fit the finger model. If anyone is interested I can post the Fusion video.

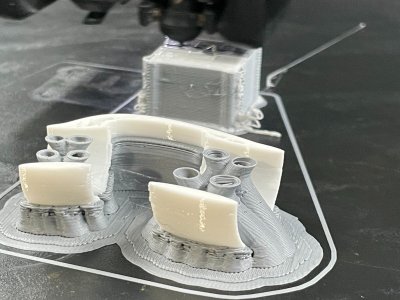
Printing is tricky. The support material is Bambu PLA Matte and the TPU95 is Elegoo. Bed adhesion is always a problem with TPU on the PEI plate, so unless you want to rip the PEI film off the steel a barrier bed adhesive is a really good idea. The TPU is fully supported by a raft and Organic-Hybrid support with 0.0 mm gap.

Pix....

Screenshot 2026-10-12 at 3.35.03 PM.png

IMG_7841.pngIMG_7842.pngIMG_7846.png
IMG_7832.jpeg

🙂
 

Attachments

  • IMG_7837.png
    IMG_7837.png
    4.3 MB · Views: 4
  • IMG_7843.png
    IMG_7843.png
    4.3 MB · Views: 4
  • IMG_7844.png
    IMG_7844.png
    4.4 MB · Views: 5
  • IMG_7845.png
    IMG_7845.png
    4.4 MB · Views: 5
  • IMG_7832.png
    IMG_7832.png
    4.4 MB · Views: 6
Last edited:
Good idea! My spouse smashed her toe and I just asked if she needed one of these? She says no but great idea anyway.
 
I have a painful bump on my index finger (a ganglion cyst) that is excruciatingly nasty if I knock against something, which seems to happen several times every day.

My bride has two of those on her right index finger too. They have been operated on twice without much success. They are too afraid of severing a nerve or a tendon. Her's is so bad that she doesn't use the finger other than to point at me for something I did or didn't do. It doesn't bend anymore.

If I had that, I think I'd have a hackcidental encounter with the blade on my table saw.
 
Back
Top