• Scam Alert. Members are reminded to NOT send money to buy anything. Don't buy things remote and have it shipped - go get it yourself, pay in person, and take your equipment with you. Scammers have burned people on this forum. Urgency, secrecy, excuses, selling for friend, newish members, FUD, are RED FLAGS. A video conference call is not adequate assurance. Face to face interactions are required. Please report suspicions to the forum admins. Stay Safe - anyone can get scammed.

Welcome to Westwood Metalworks, What is he building in there?

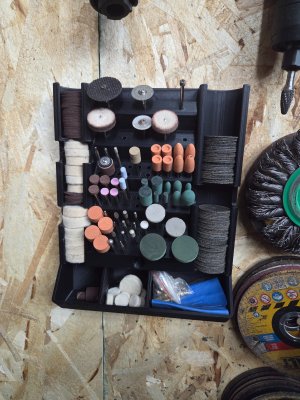
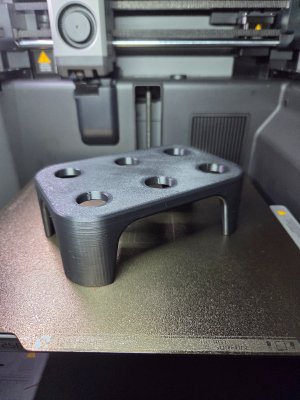
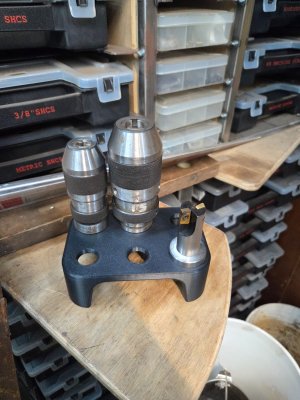
Designed and printed this guy yesterday. Just under 9 hours, and my first print with petg. Came out pretty good, and will be nice to organize some of my frequently used rotary tool bits.

Wow Dan! That's VERY impressive. So much to look forward to!

Why PTE?

How many spools of Fillament did that take?
 
Wow Dan! That's VERY impressive. So much to look forward to!

Why PTE?

How many spools of Fillament did that take?
I wanted it black, and only had black petg left. Petg stand up a bit better than pla, but for this pla would have been fine too. Plus I wanted to try petg out as ive never used it before.

it only used about 300g, so just under 1/3 of a spool. I wanted to use a .6, or .8 nozzle to speed things up, but couldn't find them......need to print a printing tools organizer next.....

I could probably shave off another 50g if I shelled out the back a bit, but I wasn't worried about it.
 
Your organizer looks great. I like the idea of at your finger tips. I print almost exclusively in petg now. I use pla for some things still, mostly better colour choice. Other than that petg is a little less brittle and stands up to higher temps, has a better price point in volume. It does need to be dried some times. One of the tricks I have been using for functional prints is more perimeters, top and bottom and less infil. Max infil is usually 15 for me. I’m at that point of needing everything in easy reach. Your shop layout is really looking amazing. Best use of space 4 sure.
 
Thanks. The shop is always a work in progress. Little things like this help fill in the blanks and keep stuff close by, visible and at my fingertips so I'm likely to use them. Stuff goes to die in drawers or cabinets sometimes lol.

So far i like the petg. This printed extremely flat and stable compared to what I would have expected from pla. Im looking forward to printing some casting patterns from it, as ive never got flat parting lines like this from pla before.
 
That's awesome Dan! Great way to store the consumables, mine are scattered under my bench and always seem to go missing.
when I brought my tools home from my last job, most of my rotary tools were just tossed loosely in a crappy jobmate tray set I got from crappy tire. I never had a good spot to put that here, so they've just been tossed here there and everywhere ever since then. It was driving me nuts whenever I needed to use it, so I had to do something about it lol. I still have individual sets of burrs and diamonds and others I'll keep together, but this helped wrangle in all the stragglers from various places. Everything needs a home.....

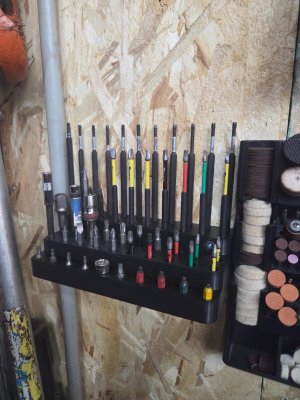
Now I'm working on one for 1/4" hex bits...
 
Finished last night around 11:00. Petg again. I really like this stuff......

Beautiful Dan! I love it. I might try my hand at something similar after I get my P2S.

I have a fairly complete set of WIHA bits and tools that I keep in the bottom of a small but really old fishing tackle box. Very unsatisfactory. Something like that would be perfect. I might bug you for the files when that day comes.

One question. Why PETG instead of PLA?
 
Beautiful Dan! I love it. I might try my hand at something similar after I get my P2S.

I have a fairly complete set of WIHA bits and tools that I keep in the bottom of a small but really old fishing tackle box. Very unsatisfactory. Something like that would be perfect. I might bug you for the files when that day comes.

One question. Why PETG instead of PLA?

Thanks. Why PETG? I'm lazy. Going back to the other day when I printed the other tool holder I just wanted it black. The only black I had was ASA or PETG, so I went with PETG to try it out. This was the same deal. TBH though, I'm liking this PETG. Flawless prints. I read it's a bit more hygroscopic than PLA, so the next few weeks will tell the tale as it sits in the AMS and absorbs water. I'll be printing a few more organizer trays for various things from that roll, so I'm interested in seeing how it handles absorbing moisture over that time.
 
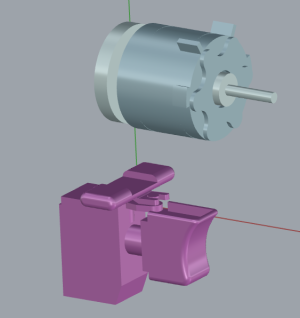
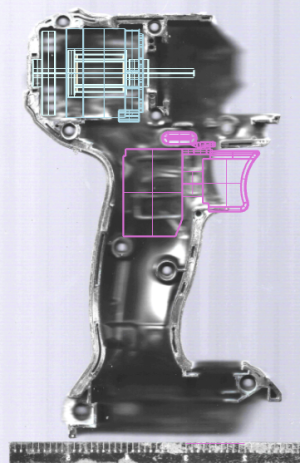
Did some quick cad work on a new project tonight.

1771979913622.png


1771979939622.png

A couple more important things to model up and I will get to printing housing parts to test fit. Then I'll make a new rotor for it to fit the new application. I'm falling down the rabbit hole on this one so it may not work out....Already checked ready set cut to have my lamination steel cut and it's much cheaper than I thought. Should be doable....I hope. If not I hope I at least learn something....

I have a few power tool ideas rolling around so If this works it's going to be awesome. I only wish I could find Makita blue PETG filament in Canada without having to order it from overseas.
 
Last edited:
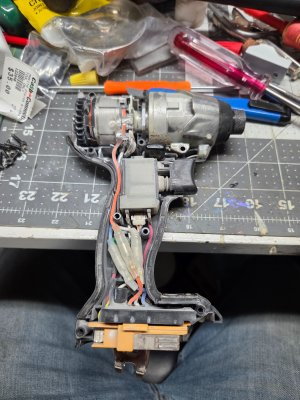
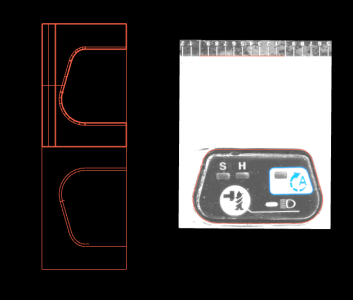
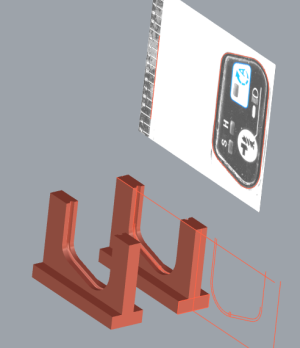
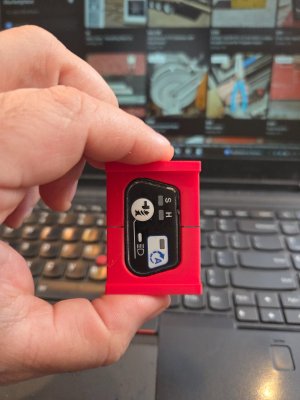
Work continues on the custom 18v tool again. This is button insert for the speed control. I first scanned it, then scaled the scan properly in CAD. From there it's a simple matter of tracing the profile, and comparing to some measurements of the actual insert to get it right. Then I just extruded the shape, and printed it in the orientation in which it will print with the housing to test fit.
1772296996366.png
1772297032727.png

<20 minutes later I have my parts off the printer ready to check fit.
20260228_113845.jpg
20260228_114201.jpg

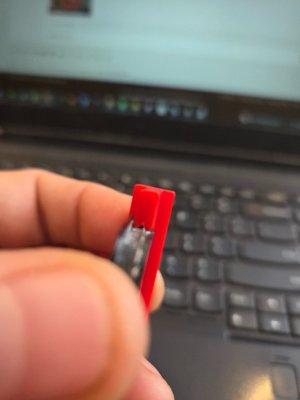
As you can see, there's about a 0.015" gap that might need some attention. It closes up with pressure, so I might just leave it to tighten up the insert when the clamshell closes.

I have a bit more modeling to do on the rest of the components, and their nests, and will do some more isolated test fits like this before having a go at a complete housing. Saves filament doing it this way vs printing a bunch of housings over and over to get it right. The makita battery interface (the yellow part) I have isn't the same as a model I've previously downloaded, so that's another thing to model and fit test too......Just discovered that now.

Nothing about this build makes financial sense thus far.....😀
 
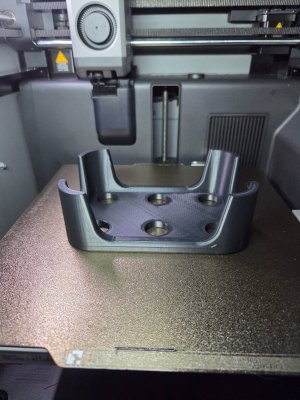
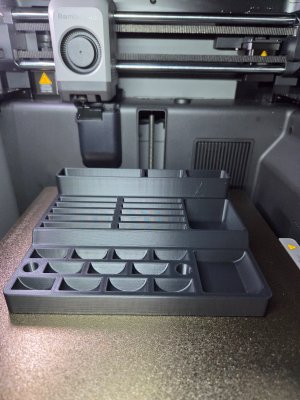
This just came off the printer. It's a model downloaded from makers lab here, that I converted to Nurbs, blew apart and modified. I basically should have started from scratch, as it would have been quicker, but got in too deep before figuring that out.....😀 I've added my model below if anybody wants one.
20260228_192654.jpg
20260228_193203.jpg

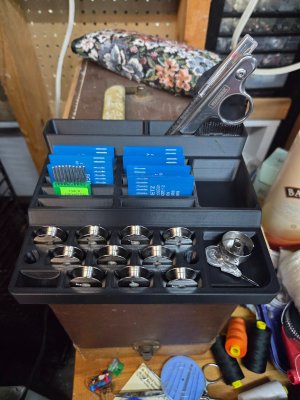
A couple weeks ago I ordered a bunch of needles, bobbins, and other accessories to get me closer to getting My Mom's sewing machine (singer 20U) usable. I don't know what happened to all the stuff that she had with the machine, but there was very little when I got it.....Long story short, I had some issues with bobbin timing when using it and found it very difficult to get any acceptable results, and that, coupled with the motor clutch issues it has (it's too fast for me, and the clutch is basically a light switch and isn't very linear....) I basically put it on the backburner. For a few years.....

With my Daughter expressing interest in learning how to sew now, I started looking into it again, and am pretty sure my timing issues come from not having the right needle size. I was only using the few that came with it. So I ordered a large variety of correct ones for the machine. I also bought a small servo motor for it, so it'll be easier to control for us mere mortals. I've been unsuccessful in trying to find the old needles that came with it that I was using to confirm my suspicions, but that area's become such a mess that I'll have to spend a day cleaning just to get at it. Flat surfaces man.....

I hope to dig into it more this week, but at least I'm (semi) organized with this stuff now.....

 

Attachments

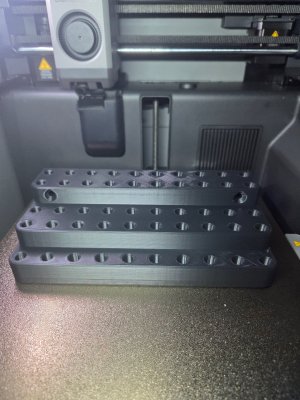
Another quick organizer this morning for my tts tools.

20260301_100318.jpg
20260301_100400.jpg
20260301_100549.jpg


I have my wall storage racks for the rest of them over near the Tormach, but since I also use them alot with the Excello I've been wanting to make something like this for a while. Originally intending to cast one to keep with the cast theme on my wall ones, I opted to take the easy way out and just print one and get it over with. Although this is drafted should I want to make a pattern from it eventually (except the outerwall). I modeled it after the ubiquitous molded ones made for cat-40 I used to use at work.

Model below if anybody else wants to print one. Took about 1:30 at stock settings for PETG.

Edit: I published it on Makerworld also (my first project published)
 

Attachments

Last edited:
Back
Top