• Scam Alert. Members are reminded to NOT send money to buy anything. Don't buy things remote and have it shipped - go get it yourself, pay in person, and take your equipment with you. Scammers have burned people on this forum. Urgency, secrecy, excuses, selling for friend, newish members, FUD, are RED FLAGS. A video conference call is not adequate assurance. Face to face interactions are required. Please report suspicions to the forum admins. Stay Safe - anyone can get scammed.
  • The 2026 Calgary Area Meetup is set for Saturday May 30th at 10am. The signup thread is here! Robinhood has graciously offered to host the meetup again this year. Please note that you MUST RSVP to the notice linked above if you wish to come.

Today in Tobho's foundry

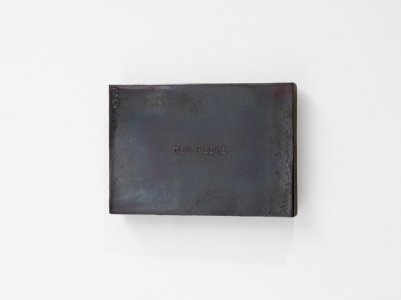
Finally got my hands on a pic of the finished version of one of last year's cast iron art plates.

"Ten Hooks" was made out of 10 cast iron hooks...

IMG_9137.jpg

Also, since a picture is worth a thousand words, some moving pictures of the new crucible tools, upgraded oil feed tank, and Saturday's casting adventure:


Jeff
 
Casting day with @Gennady this past Sunday. He needed a bronze blank poured so he can machine a new half nut for his lathe. He also brought me back my old 3D printer that he got working again and upgraded a few parts on for me. Thanks! 🙂

Started with a blank drag.
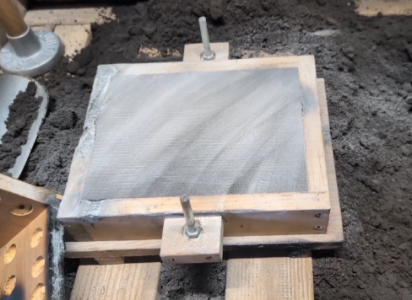
Screenshot_20260511-094640_copy_488x356.png

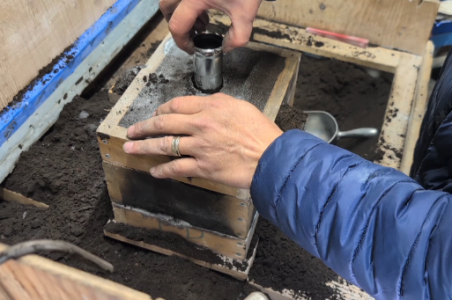
Had to screw another drag onto the cope to make it tall enough for this mold. I put in the sprue pattern and used my normal riser pattern / pouring basin cutter as the cylinder blank pattern as it was just the right diameter, and began ramming up the cope.
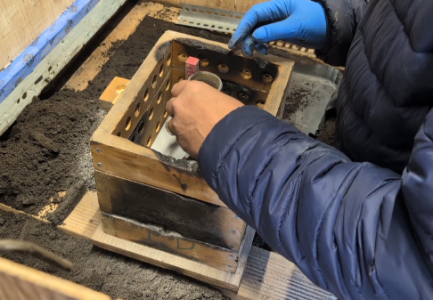
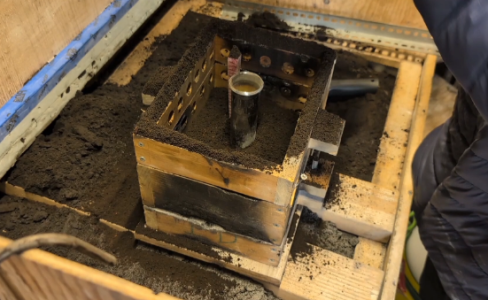
Screenshot_20260511-094749_copy_486x337.png

Screenshot_20260511-094759_copy_551x339.png

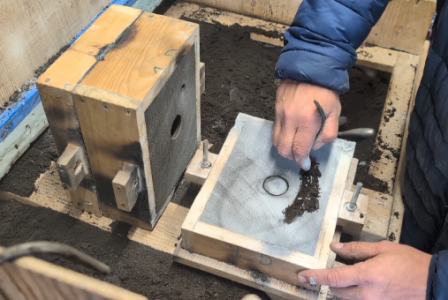
Once the cope was rammed up and struck off, I pulled the sprue and pattern out of the cope, cut the pouring basin (shown below), and opened up the mold to cut the runner.
Screenshot_20260511-094838_copy_513x341.png

Screenshot_20260511-094847_copy_507x340.png

To locate the in-gate in the cope more easily, I dusted the drag then closed and reopened the mold. This optional step leaves a print on the cope showing clearly the location of the runner in the drag, which the in-gate must connect to.

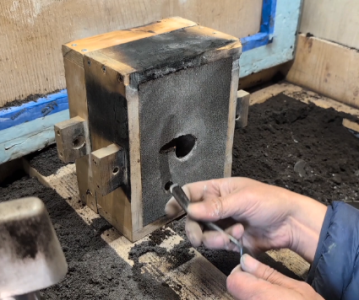
I cut the in-gate at a tangent to the mold cavity wall. This puts the whirl in "whirl gate".
Screenshot_20260511-094934_copy_425x356.png

A whirl gate had been recommended for casting machining blanks. It is supposed to centrifuge any dross inclusions out to the skin of the casting where it will be turned away, leaving clean metal behind.

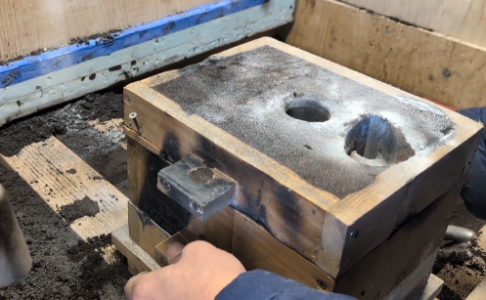
Closed the mold back up and that's it. That was all that this mold entailed, pretty simple. (There's that pouring basin)
Screenshot_20260511-094954_copy_497x307.png

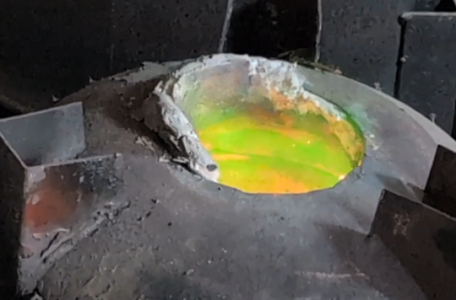
Fun shot of the green 'dragon's breath' that can be seen when copper is being melted...
Screenshot_20260511-095001_copy_540x356.png

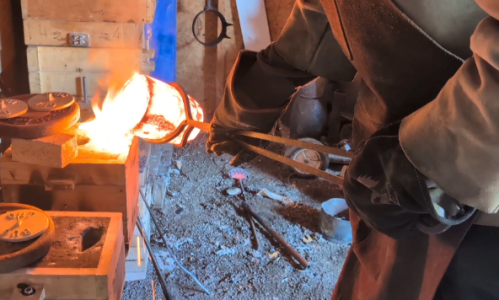
Gennady brought a bunch of copper and some tin/lead alloy to make the bronze. After the tin was finally mixed in, I degassed the melt with 10g of 7% phos-cu brazing rod and poured.
Screenshot_20260511-095034_copy_592x356.png

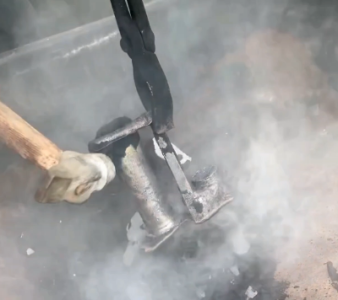
It isn't the prettiest thing yet, but hopefully that is because the whirl gate did its job, and it'll be nice clean sound solid metal on its interior.
Screenshot_20260511-095050_copy_400x356.png

The shrink should all be at the top end of the blank, but we cast it longer than it needs to be to compensate, plus any remaining shrink voids left in the remaining needed length should be in the center, where the bronze will be bored away anyhow.

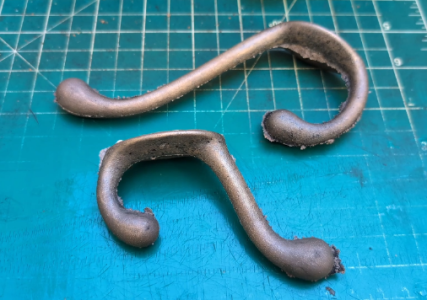
We made more bronze than we needed, so I also poured a couple of hook shaped ingots with the leftovers. I already happened to have a test mold prepared.
Screenshot_20260511-095132_copy_506x356.png

The old hook castings molded up fairly well as patterns despite having all the draft ground flat on the back sides (the reason why a test mold was needed).

Happy enough with the results on the hooks. I think I'll make a bunch of these for the house, to replace a bunch of low quality zinc hooks on the back of bedroom doors that keep snapping off.

Jeff

 
Thought I already posted this. Another deja vu video version that you've already seen the highlights screenshots from.

I'm not really sure it adds much value here beyond possibly entertainment. But maybe some will find it helpful to see a video example of the parting dust trick that lets me print the runner in the drag onto the cope so I can see where the gates in the cope must begin? I thought I explained it clearly, but sometimes when the topic is molds, it can hard to visualize what someone really means via text alone unless you're already thinking inside out in just the right way.


Jeff
 
Today's pour: A new Dungeons & Dragons themed plaque pattern. Plus a couple others molds.

I've played D&D for around 45 years with the same core group of friends. These days we mostly play online using a virtual tabletop, but before my eyes went bad and I learned how to make real bronze axes I used to spend much of my hobby time collecting and painting miniatures to paint so they look like they're holding tiny fake bronze axes, and building model game terrain.

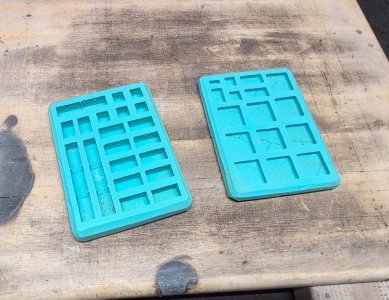
So I have these old molds for casting plaster dungeon floor tiles and wall pieces to place in a 1" grid that works well with the standard scale minis and the game's movement rules.

edited_716b6578-011e-4230-9408-725f2b316dd83297841128896493232_copy_1021x788.jpg

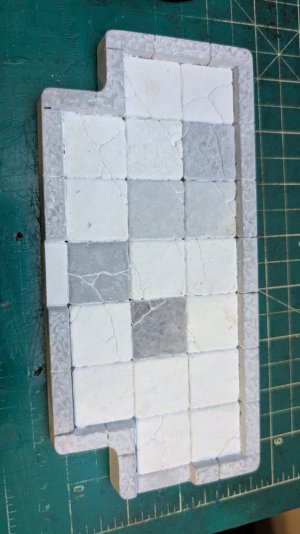
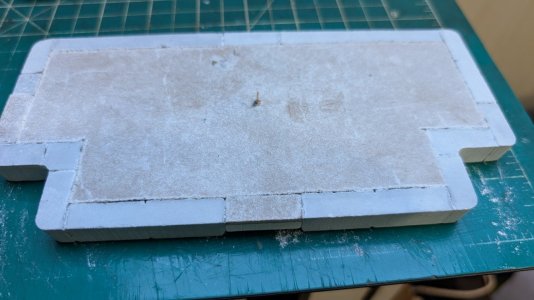
I glued up an assembly of plaster tiles and walls to act as a plaque background that looks like an old school IRL D&D game-table dungeon room. There's a piece of 1/8" dollar store clipboard MDF under the floor tiles. The tiles are 1/4" thick so probably thick enough on their own to fill, but a little extra helps, and the bottom board really made the whole pattern much sturdier. Draft was sanded on the outside of the walls and filed on the part of the inside of the walls that sticks up above the floor tiles.

PXL_20260603_192914908.jpg

PXL_20260603_195002899_copy_1330x748.jpg

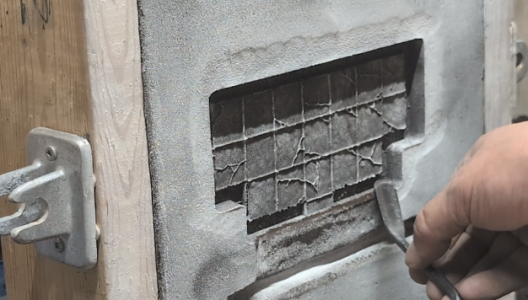
A fairly simple flat back to mold up. There was some sharp crumbly edges where sand got down into the thinnest cracks and gaps. I could have sealed up those parts of the pattern with some wax or putty, but the broken off edges of these tiny sharp fins of sand would only make the dungeon scene look less recently swept, so I called it a bonus feature and saved myself some putty work.

Screenshot_20260603-153226.png

PXL_20260603_184536396.jpg

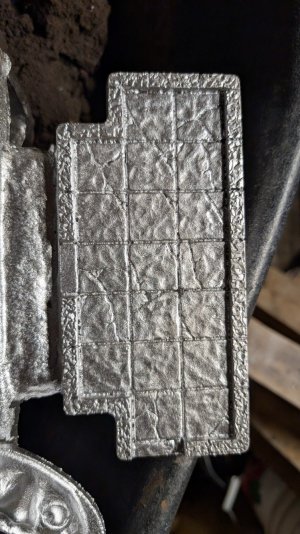
A little putty and sanding and it'll be ready to take pattern letters. And, more importantly, survive having those pattern letters soaked off, so I can make different nerd signs using the same background. First one will be a housewarming gift for a guy in my group who just got divorced.

PXL_20260603_192849891_copy_1330x748.jpg

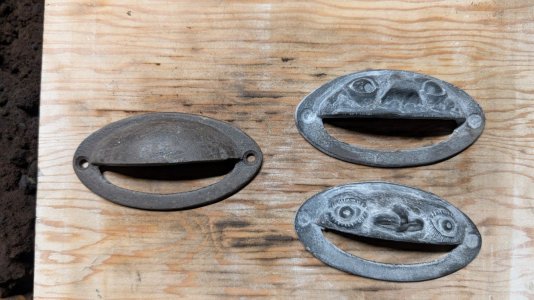
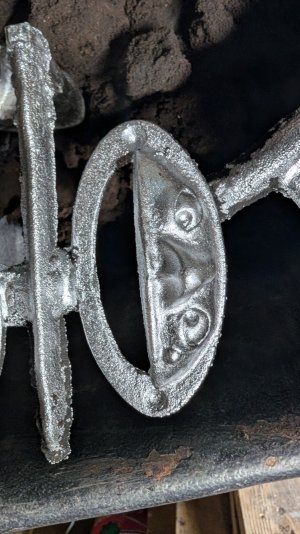
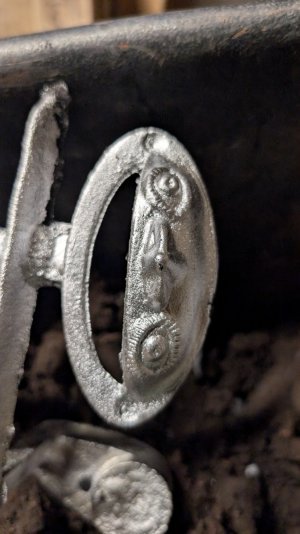
Also I decided these cheap crap aisle drawer pulls weren't creepy enough and that it was up to me to save them. Used a couple as armatures to build up the most disturbing looking eyes and noses they were clearly missing. I used sculpy clay, the polymer clay from Michael's that you bake in a toaster oven and it hardens. It sticks quite well to the rough cast iron drawer pulls. You add a little, mush it around a bit until it's how you like it, then bake it to lock in your work. Then add more and repeat. The original iron pulls are hard AF, my files just skate on the stuff, so I'll do any smoothing to make them into nicer patterns in the aluminum copies and use those as my patterns. I only have 2 more blanks to sculpt onto, but I could always rip the sculpy off these 2 if I need more than 4 different disturbing drawer pull faces, now that I have these aluminum patterns made of them.

PXL_20260603_184611749_copy_1330x748.jpg

PXL_20260603_184545075_copy_748x1330.jpg

PXL_20260603_184559879_copy_748x1330.jpg

They look awful, I may never actually cast any. But maybe less horrible in brass? Anyhow really just a fun project to get some practice on the sculpting end of my patternmaking game.

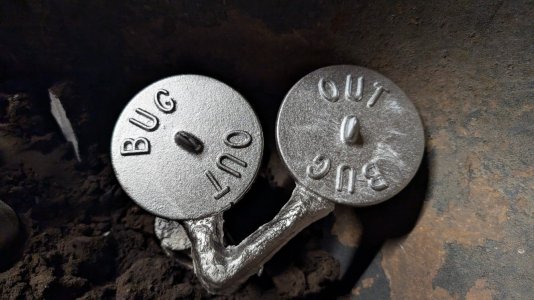
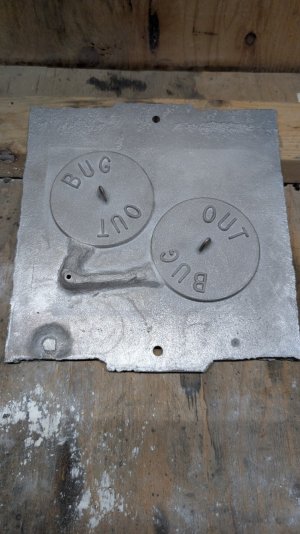
Lastly, a couple extra sprue covers, to keep any spiders from crawling down in there before I can pour my molds, bent on some bizarre arachnid quest to become a steam explosion. Every time I find myself asking, "where the hell are all my sprue covers?!" one of these molds goes into the line the next time I pour.

PXL_20260603_184605386_copy_1330x748.jpg

My aluminum matchplate makes them super fast to mold a couple up, I almost think of these like ingot molds when I ram up a set.

PXL_20260603_175150091_copy_748x1330.jpg

Jeff
 
Really cool stuff, despite ugly looking pulls . LOL
Some years ago I was reading Fine homebuilding magazine (it was a time when it was something to read there) and they made a comparison between door knobs - starting from chippiest stamped from some iron sheet 2 dollars per piece and ending up with cast bronze knob 200$ valuie. So that bronze one had a visible marks of mold and imperfections and not ideally geometric form. So idea was to make a "hand-made" piece with clearly seen human touch and some uniqueness. I think your furniture pullls are half-way there 🙂 Just do it with bronze or brass.
 
Interesting. That was always the idea, to make a set in brass with all different faces for some piece of furniture. The aluminum copies will only be used as patterns. They're only half original though, since I used some oversesas foundry's cheap, chilled, mystery iron castings as the base to sculpt the polymer clay faces onto. A fun hobby project and some much needed practice pushing clay around, but I'm not sure they're something I should try to turn into a product.

FWIW, on the other hand, the website that sells the rubber game tile molds offers licensing agreements for businesses, and permission for hobbyists to sell up to $1000 in cast "models" made from their molds per year without one. 😉

Jeff
 
Nice work. Have you seen this video. Talk about production for packing in the sand for casting.

Also stumbled onto this video about polycast filament for the equivalent of lost wax casting.
Very cool video. Fun to watch.
The polecats was something I was interested in to but I'd need to finish each part to remove the print lines for my projects. Interesting though.
 
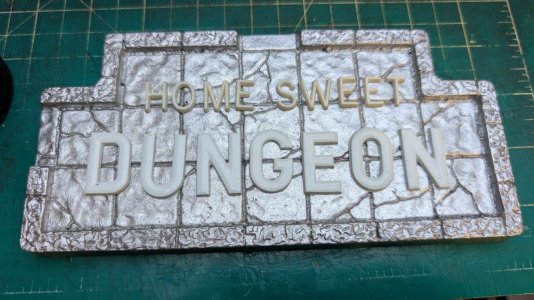
The lettering for the first Dungeons and Dragons plaque was a bit of a pain. The U and one of the N's from the larger font are a bit curved upwards on the bottom surfaces' corners, creating small undercuts I only noticed after the glue was dry. Those would have held onto and torn sand out of the mold, producing unacceptable fuzzy detail (small breakout defects) around the text. Cost me a good hour with my wax rods and smallest fillet iron to carefully fill them in without getting wax where I didn't want any. Filled in the little gaps where the spaces between the "floor tiles" pass beneath the letters. I might have skipped that if not for the warped letters, so in a way it's good that U and N were messed up.

Poured the first brass copy today. A bit more dramatic than I hoped - the mold ran out on me. I used a little bit too small flask with a little too tall cope. I used a 10# barbell weight to hold it down. It only held down the back half of the cope; the front half floated a smidge. Not the first time nor the last, I'm sure.

Sealed itself up right away though, and let me top up the sprue without further leaks. The whole thing was molded in the drag anyway.

PXL_20260608_000530256.MP_copy_1330x748.jpg

The casting will be fine, mainly just a bunch of extra flash to cut off. I'll get a better pic once I've cleaned it up some and brushed the sand out of the letters. I like to do that with a plastic brush not wire to get a first look, so I'm letting it cool off first. But from what I can see, all that wax work paid off at least.

I'll also make an aluminum pattern of it before I remove the letters from the reusable background, so that I can always make more with these same words. I have a couple other ideas for this same background too. But first I have to get this brass copy finished up, I would like to have it ready to hand off to my DM on game night this Friday, when I'll visit his new place for the first time.

Jeff
 
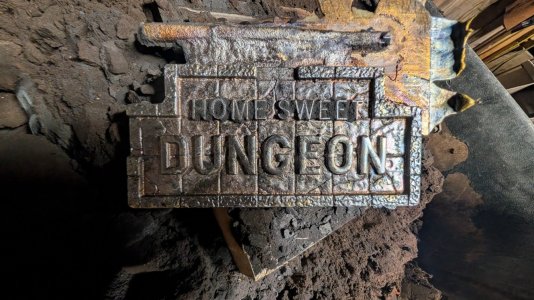
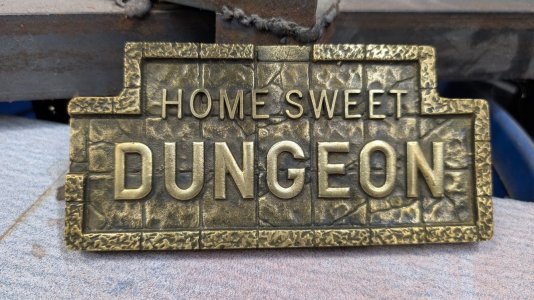
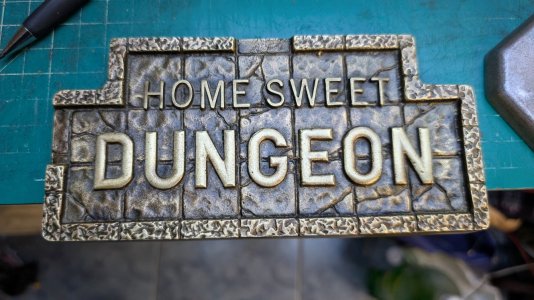
Couple pictures of the finished piece in different lighting after a hot liver of sulphur patina and a coat of wax, and a video that has to stay unlisted for another day (until I can hand the piece off):

PXL_20260608_151847093.MP_copy_1330x748.jpg

PXL_20260608_194226343_copy_1330x748.jpg


PXL_20260608_194247797.NIGHT_copy_1330x748.jpg

So far nobody has ever gotten the joke, but this time I have high hopes 🙂

Screenshot_20260611-125837.png

I'll help him mount it later if he wants it hung up.

Jeff
 
Thanks folks!

Ohhh, I like this colour - looks genuine 🙂 Aluminium ( I guess ) without chip Aluminium look! Well done , Jeff. How it feels by touch. BTW ?

Let me clarify, the master pattern (1st casting, seen in post 27) is in cast aluminum, (specifically wheelium aka almost certainly A356 with maybe a little chrome contamination). I'll cast another copy with the letters on it in aluminum too probably, so I can make more Home Sweet Dungeon plaques if I ever want to. Then I'll soak the white-glued on plastic letters back off the aluminum and glue on some new letters. "Goblin XING" or "(blank)'s Lair" (gamer's name to be added and changed later as needed) or the like. Some D&D players might want one in aluminum, to paint using the same techniques as their own miniatures and terrain models.

But the finished version (2nd casting) in my previous couple of posts here, with the cast letters, is in yellow brass, with a fairly basic patina. Probably more like a step 1 of what an actual patineur might do, really.

In hand if feels surprisingly heavy. The coat of paste wax adds something nice to the feel of it as well. I haven't done many brass plaques so the weight surprised me a little. I could have skipped adding the 1/8" MDF backer to the bottom of the plaster original pattern and saved some metal. It did help that pattern hold together long enough to mold up so I could cast the master though.

Jeff

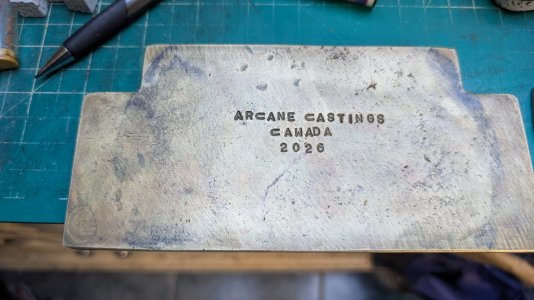
PS. To some Normals, arcane really just means 'obscure'
 
Back
Top