• Scam Alert. Members are reminded to NOT send money to buy anything. Don't buy things remote and have it shipped - go get it yourself, pay in person, and take your equipment with you. Scammers have burned people on this forum. Urgency, secrecy, excuses, selling for friend, newish members, FUD, are RED FLAGS. A video conference call is not adequate assurance. Face to face interactions are required. Please report suspicions to the forum admins. Stay Safe - anyone can get scammed.
  • The 2026 Calgary Area Meetup is set for Saturday May 30th at 10am. The signup thread is here! Robinhood has graciously offered to host the meetup again this year. Please note that you MUST RSVP to the notice linked above if you wish to come.

The Taylor monoplane saga - propeller hub build & other things

Despite my lack of updates i have actually been working on this thing.

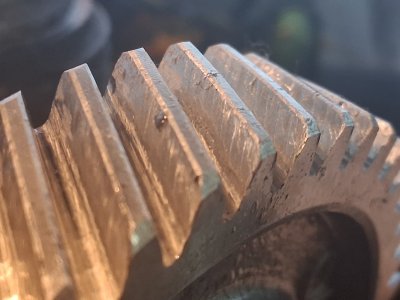
I put the motor back together with oem vw thrust shims supplied to me by my brother in law, new rod and main bearings, primed, back on the airplane in a 2 weeks, ran it but was getting odd oil pressure readings, came back a few days later and installed a mechanical gauge, ran it, oil pressure is good, did a 15 minute 1500-2000 rpm run in, drained the oil, and it was absolutely full of little square chips....unusual, not your typical bearing chunks, little 1mm x 1mm squares

off she came again, opened it back up, for some reason the original (steel) cam drive gear was eating the original (aluminum) cam gear?? what the heck ? maybe the drive gear has some damage I did not/can not see? the bearings all look ok, no out of the ordinary wear any place else, strange
20260727_134032.jpg

Well its open, what to do....how much money to spend.....Well one of the main vw retailers has a site wide sale, i believe it was 20% off on orders over 1000$.....i guess decision made for me, New crank, new better rods (and and lighter...nice), new performance camshaft, new lifters, new straight cut cam gears, new mains, new rod bearings, new cam bearings, new jugs, new pistons, new oil relief pistons, a full rebuild minus heads

no pictures, it still just looks like an engine

seeing as i was going to be down longer while i waited for various parts i decided it was time to see if i could improve the cabin heat/carb heat muffs, it would only blow luke warm air on the ground, and just not freezing air in the air, no good for winter flying

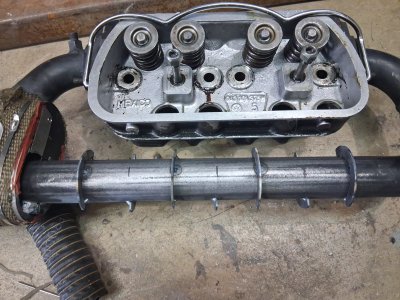
my idea is to have the air in contact with the hot header tube longer with some baffling to slow down the air flow and hopefully heat it up better
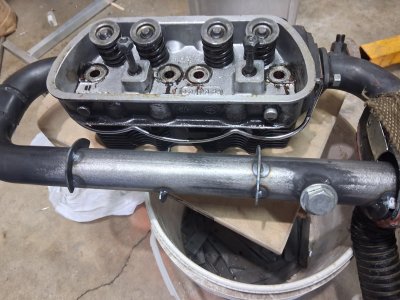
cut some circles out on the plasma table, cut in half and welded to the header tubes, i put half as many on the carb heat side, i dont want to much restriction, just a little more heat. There is an aluminum shroud around the whole works not shown.
20260803_112323.jpg20260803_112330.jpg

Also decided it was time to add oil filtration, at least if something goes and i catch it, hopefully the oil filter will strain out the damaging chunks from flowing through the engine again. I had to drill/tap the oil pump outlet for a plug, use an aftermarket pump cover with an outlet, and drill/tap one of the galleys for the return, it is all plumbed with 8an PTFE braided hoses with an fittings, and fire sleeved. You can also see the heat muff in the video....and where i used brake clean to wipe off some oil, of course the paint came with it. I may yet wrap the heat muffs in exhaust wrap to prevent the 80mph air from cooling them and the air withen, i will wait to see how they perform


And after a long struggle I managed to get it started and running for the 20 minute obligator flat tappet cam break in, hopefully with the struggle to start it i didnt wipe every little bit of cam lube off the lobes, only time will tell if i end up with a flattened lobe


it was a struggle keeping the cht's down during the break in with no cowl on, but i managed it, now i need to finish the annual, as well as test out the oil temp sender in a pot of boiling water, it always reads very cold, even on the 20 minute run in i never saw more than 150f. Its likely i just have the wrong calibration in the efis or a bad location for the sender and need to move it. But something to check in any case. Also the cabin heat its HOT now, burning hot, hopefully it stays warm in flight.

 
She lives! first flight with the new motor, im not sure if its the cam, or its the new fresh top end, but it definitely has more power. Tied down static rpm is higher, rpm on climb out is higher (with the same airspeed), hurray for that. Cabin heat is HOT! moved the oil temp sender location, still never see above 150, next flight i will partially block the oil cooler and see if i can get it to run a little hotter, closer to 180 would be preferable


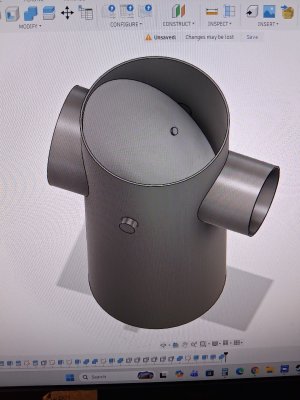
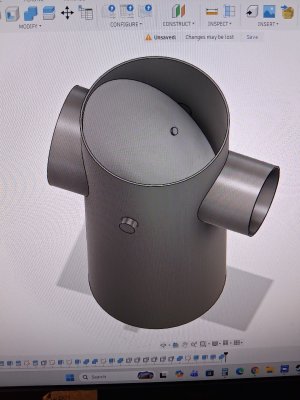
ive also drawn up and 3dprinted a new air box, the 3d printed version is only to get the location of the inlets/outlet, if the design works i will weld it up out of aluminum tube. I have a 3rd ?spiggot? printed out that will be the carburetor inlet, i intend to crazy glue it into position. Next time i have the lower cowl off for an oil change that will be the project

20260914_205521.jpg
 
Good job. Love the videography.

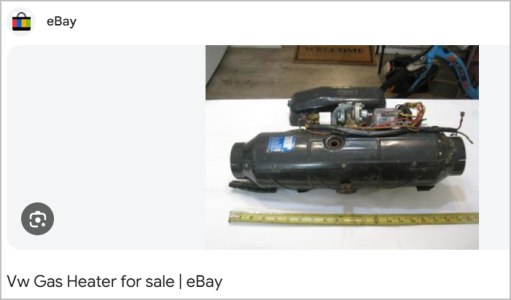
ps I assume you fully explored the infamous VW gasoline heater option? LOL (ex-VW driver & the left thigh burn scars to prove it).
1789922151993.png
 
She lives! first flight with the new motor, im not sure if its the cam, or its the new fresh top end, but it definitely has more power. Tied down static rpm is higher, rpm on climb out is higher (with the same airspeed), hurray for that. Cabin heat is HOT! moved the oil temp sender location, still never see above 150, next flight i will partially block the oil cooler and see if i can get it to run a little hotter, closer to 180 would be preferable


ive also drawn up and 3dprinted a new air box, the 3d printed version is only to get the location of the inlets/outlet, if the design works i will weld it up out of aluminum tube. I have a 3rd ?spiggot? printed out that will be the carburetor inlet, i intend to crazy glue it into position. Next time i have the lower cowl off for an oil change that will be the project

View attachment 87148
Cool flight video - Ryan.
Not a lot of air traffic in your area ?

Nice to see you are progressing with the plane.
 
Good job. Love the videography.

ps I assume you fully explored the infamous VW gasoline heater option? LOL (ex-VW driver & the left thigh burn scars to prove it).
View attachment 87149

Thanks, im trying, i dont think im very good at it yet, i haven't quite figured out the special sauce for camera angles and such. Maybe voice over...but then i would have to hear my own voice on a video....

ouch, yea i have heard those were notorious for burning people. I was more thinking of getting an electric vest or something, but that doesnt really do anything for your hands or window fogging

Cool flight video - Ryan.
Not a lot of air traffic in your area ?

Nice to see you are progressing with the plane.

Thanks. As for it being busy, yes and no, if i were to fly in any other direction but straight east im almost assured to see another aircraft in the air, the radio is very busy, i am also just below calgary class c. It just happens to be most of the vfr traffic fly north, south and west of calgary.
 
She lives! first flight with the new motor, im not sure if its the cam, or its the new fresh top end, but it definitely has more power. Tied down static rpm is higher, rpm on climb out is higher (with the same airspeed), hurray for that. Cabin heat is HOT! moved the oil temp sender location, still never see above 150, next flight i will partially block the oil cooler and see if i can get it to run a little hotter, closer to 180 would be preferable


ive also drawn up and 3dprinted a new air box, the 3d printed version is only to get the location of the inlets/outlet, if the design works i will weld it up out of aluminum tube. I have a 3rd ?spiggot? printed out that will be the carburetor inlet, i intend to crazy glue it into position. Next time i have the lower cowl off for an oil change that will be the project

View attachment 87148
Neat stuff! I love the video and am hoping I can eventually get some sort of camera for my bird. I have to get better at flying it first before I start mucking around with a camera tho!
My ultralight has an air cooled engine (oil cooled heads) and has no heat in the cabin so I am always interested in how others provide heat. I might be able to dress warm enough but I wonder if fogging windows would be a problem.
 
Neat stuff! I love the video and am hoping I can eventually get some sort of camera for my bird. I have to get better at flying it first before I start mucking around with a camera tho!
My ultralight has an air cooled engine (oil cooled heads) and has no heat in the cabin so I am always interested in how others provide heat. I might be able to dress warm enough but I wonder if fogging windows would be a problem.

heat muff just like ive done, same thing Lycoming's and continentals do

As for the windshield, if the cabin is enclosed i would think you would either need to pipe cold air on the window, have a fan or heat the cabin, the little taylor fogs up in about 15 seconds on the ground. I don't know if it would be ok once airborne, but i dont want to find out that its not
 
heat muff just like ive done, same thing Lycoming's and continentals do

As for the windshield, if the cabin is enclosed i would think you would either need to pipe cold air on the window, have a fan or heat the cabin, the little taylor fogs up in about 15 seconds on the ground. I don't know if it would be ok once airborne, but i dont want to find out that its not
Well my cabin isn't exactly airtight...wind blows around but not in a controllable manner really. Heat muffs will be difficult (but not likely impossible) my plane is a pusher engine as opposed to a tractor so getting air to move ahead to cabin where it is needed will be a challenge. I am evaluating bringing engine cooling oil into cabin but that is complicated and likely has risks. Probably will be electric socks and mitts for quite a while.
 
Well my cabin isn't exactly airtight...wind blows around but not in a controllable manner really. Heat muffs will be difficult (but not likely impossible) my plane is a pusher engine as opposed to a tractor so getting air to move ahead to cabin where it is needed will be a challenge. I am evaluating bringing engine cooling oil into cabin but that is complicated and likely has risks. Probably will be electric socks and mitts for quite a while.
Sorry to hi jack your thread. 😕 Moderators please remove my comments if deemed appropriate.

Moderator Edit - Looks fine to me!
 
Last edited by a moderator:
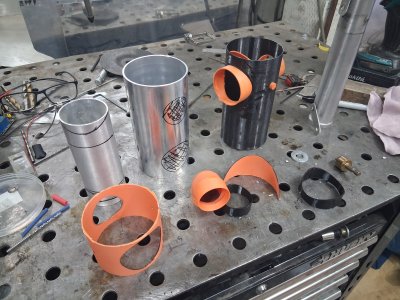
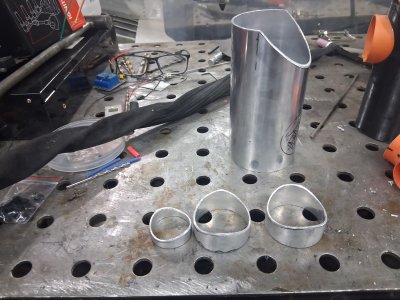
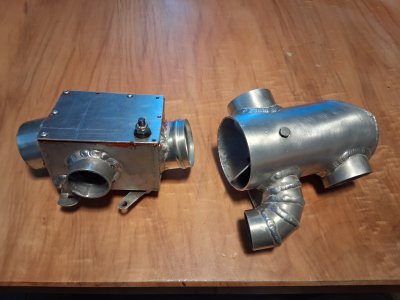
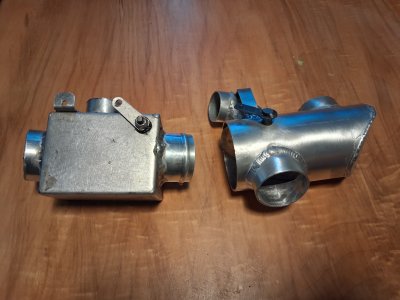
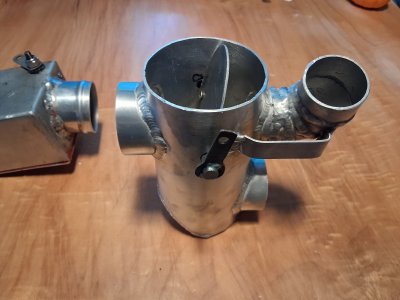
A few updates, finished up the new airbox, i was never really happy with the one i built. It was leaps and bounds better than the original, but still not great, the welding was trash, it squished the air filter between the cowl and engine, it looked horrible, it was likely restrictive for various reason, and didn't actually allow the escape of the hot air from the heat muff

the new one ended up heavier by 12g, the 3" tube i ordered was described with a 1mm wall thickness, what arrived had a 2mm wall thickness, i also used a 3/8 steel round bar for the pivot as i did not have 3/8 aluminum round bar, the pivot out of aluminum probably would have saved the 12g, oh well, we are talking about the weight of 2 jujubes (yes i weighed them out of curiosity)


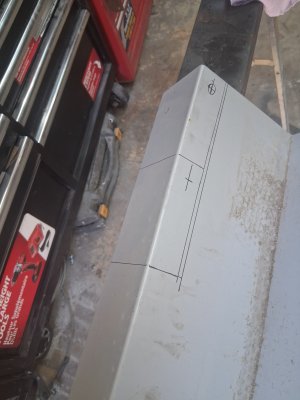
The 3d printed prototype as well as various tracing templates to make locating and shaping the various bits quicker, easier and more accurate
20260914_205521.jpg20260924_173645.jpg20260924_175408.jpg

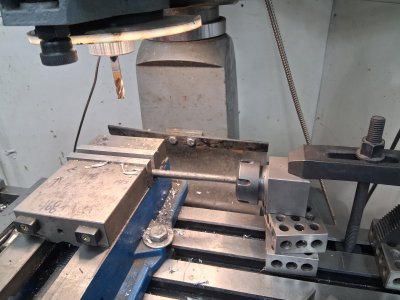
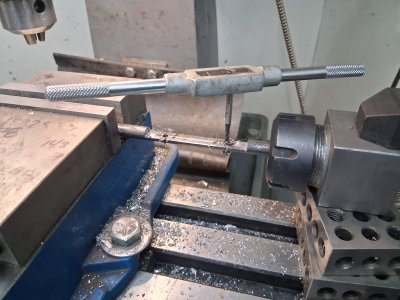
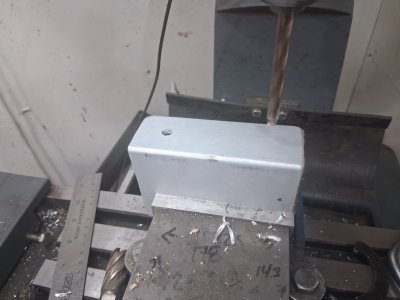
The setup for milling the flat in the 3/8 round bar as well as tapping the two 8-32 screw holes, I could have likely gone smaller, but decided on 8-32 as its a common screw size in aircraft
20260926_103706.jpg20260926_105912.jpg

The finished product, I have succeeded to tig welding with readers, now the welding is closer to as good as i once was

20260926_125128.jpg20260926_125146.jpg20260926_125214.jpg

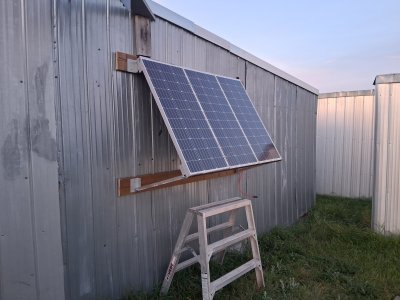
Part of the reason I did this little project earlier than planned is that i needed to mount the solar panels properly, they had been sitting on the ground as i originally didnt want to put any more holes in the rented hangar, the owner told me he was scared of breaking them when mowing and would like me to put them on the wall if possible. I looked at various brackets you could purchase online, and did not want to pay 70 or 80$, or really any amount of money.

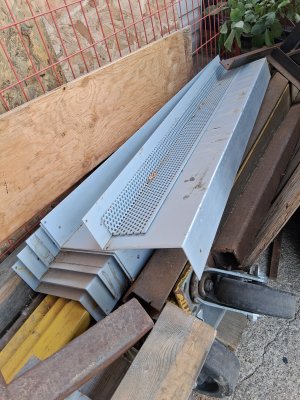
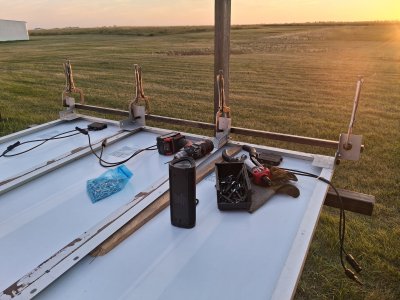
i have a whole pile of these aluminum things i scavenged from a job a few years ago, the material was to good to just toss. Along with that some 1/4 bolts from my bolt collection, and a piece of aluminum hss.
20260926_125935.jpg

I made a bunch of brackets on the bandsaw, drilled some holes, bobs your uncle, 0$ spent for the bracketry
20260920_122824.jpg20260920_130311.jpg

Went out after work to install the brackets, and mount the panels, i did end up buying 1 5/4 deck board and some cheap pop rivets as i did not want to use my expensive rivets for this. I think it turned out pretty nicely
20260922_191205.jpg20260922_193528.jpg
 
So what about a leakdown test put a valve at either end and pressurize with a schrader valve if it holds pressure it’s good.
 
Back
Top