• Scam Alert. Members are reminded to NOT send money to buy anything. Don't buy things remote and have it shipped - go get it yourself, pay in person, and take your equipment with you. Scammers have burned people on this forum. Urgency, secrecy, excuses, selling for friend, newish members, FUD, are RED FLAGS. A video conference call is not adequate assurance. Face to face interactions are required. Please report suspicions to the forum admins. Stay Safe - anyone can get scammed.

Solid Toolpost Turret

thestelster

Ultra Member
Premium Member
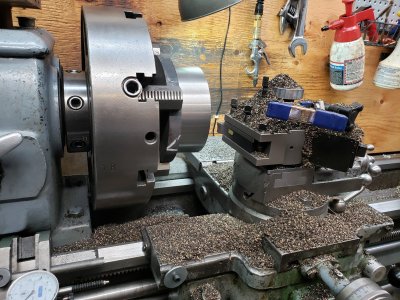
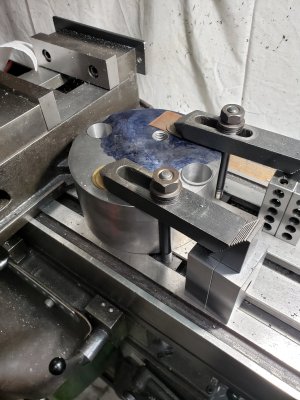
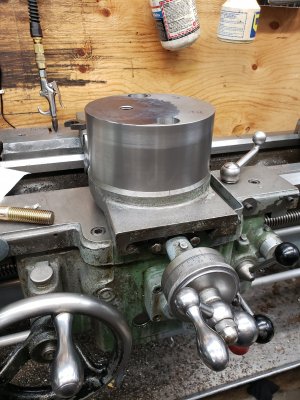
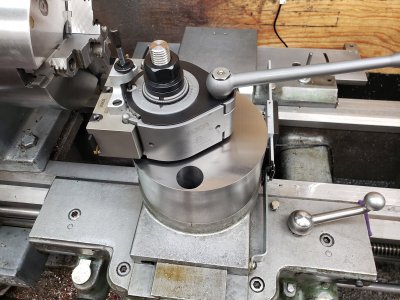
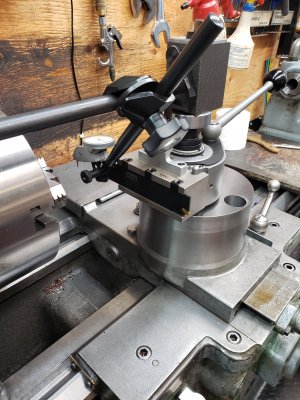
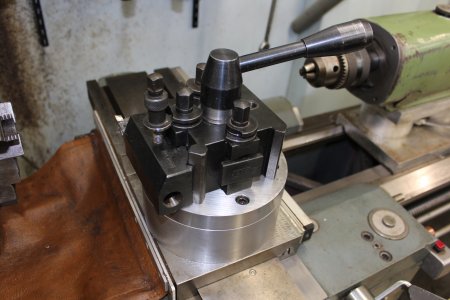
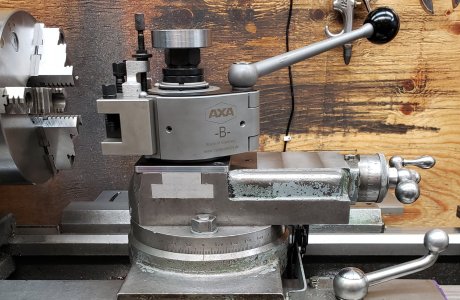
With all the fuss on the net about a solid tool post, I decided to give it a whirl and see for myself. My lathe is a Standard Modern 1654 Utilathe which weighs 2,500 lbs, so I don't expect it to make a huge difference except when taking heavy or interrupted cuts, and possibly parting.

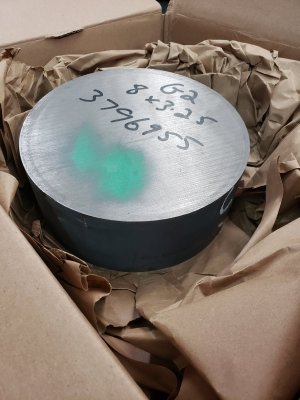
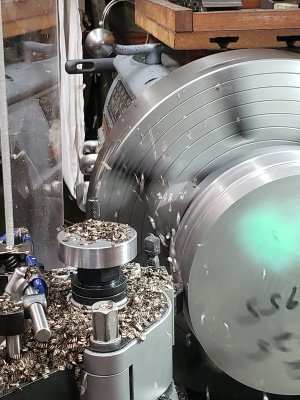
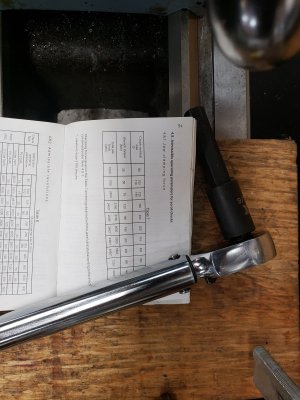
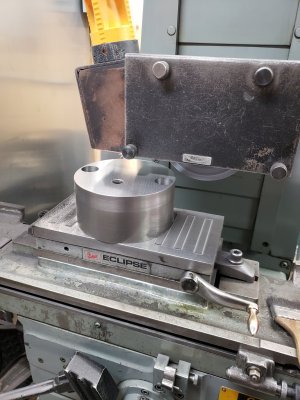
So I got in a massive chunk of grey cast iron, and started turning it down. I had to use my big 4 jaw chuck, and I was a little nervous. I found that max tightening torque is around 200Nm. I torqued them to 150Nm. But all went well.
 

Attachments

  • 20221021_085522.jpg
    20221021_085522.jpg
    402.4 KB · Views: 21
  • 20221021_110226.jpg
    20221021_110226.jpg
    489.4 KB · Views: 22
  • 20221021_113813.jpg
    20221021_113813.jpg
    414.8 KB · Views: 19
  • 20221021_115735.jpg
    20221021_115735.jpg
    682.8 KB · Views: 21
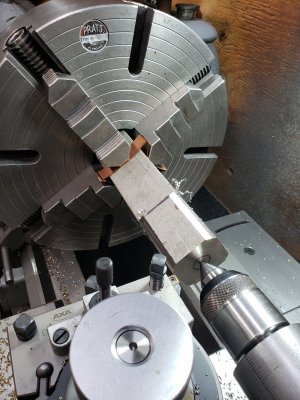
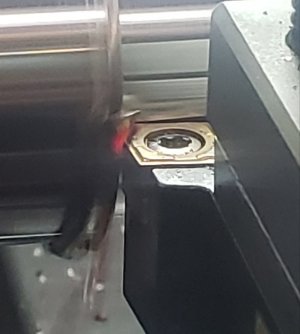
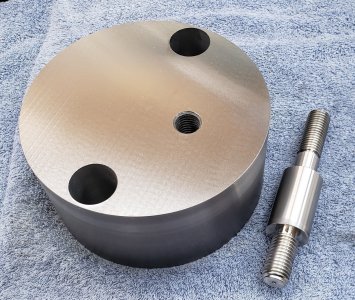
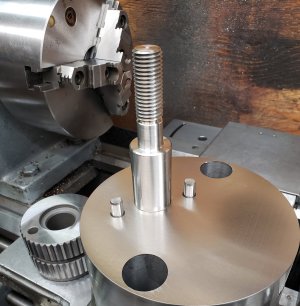
I had to make a new center post to attach the Multifix, and looking all over the shop I couldn't find a suitable piece of round bar stock. I didn't want to order anything. I did have a piece of 2"x2" Uddeholm Impax Supreme (P20 Modified), pre- hardened and tempered to around 33HB. Ok that will work, a bit of a waste, but its been sitting here for 15 years, might as well make use of it. As you might know, carbide inserts don't like interrupted cuts, but I decide to try anyway. 0.050" depth of cut, at 600 rpm. Yeah, it lasted maybe 2 minutes. Switched over to hss slowed it right down, I think 100rpm, 0.050" depth of cut and .010" feed. That worked perfect, and once it was round, put the carbide cutter back on and finished it up.
 

Attachments

  • 20221023_125428.jpg
    20221023_125428.jpg
    540.7 KB · Views: 16
  • 20221024_102234.jpg
    20221024_102234.jpg
    177 KB · Views: 16
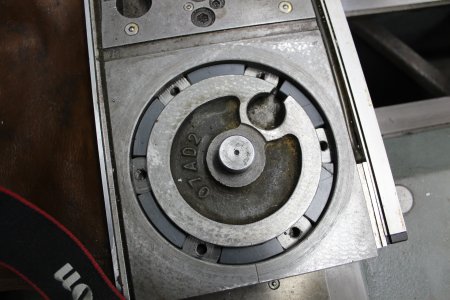
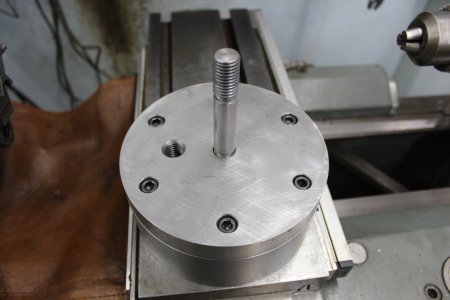
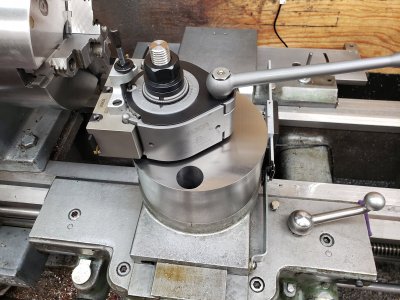
I made a similar post, but used six securing bolts instead of just the two that were used for the compound slide. The six bolts were long with just enough countersink to put the heads below the surface. I used spacers between the six nuts in the cross slide so that each bolt could easily find the nut.
 

Attachments

  • IMG_1760.JPG
    IMG_1760.JPG
    333.3 KB · Views: 15
  • IMG_1761.JPG
    IMG_1761.JPG
    161.8 KB · Views: 15
  • IMG_1762.JPG
    IMG_1762.JPG
    240.1 KB · Views: 16
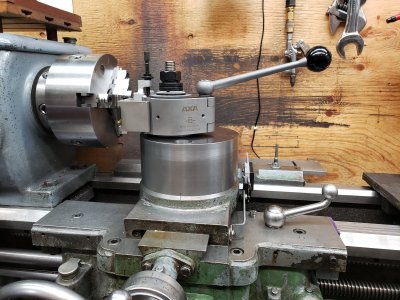
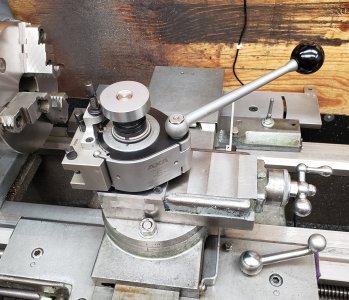
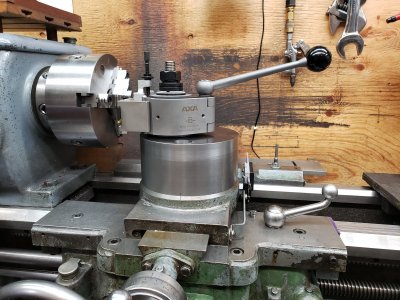
Before and after shots.

What I do like, is that I can still rotate the whole unit 360° to perfectly align the tools to the x-axis, but also, because I put the Multifix QCTP off center, I have almost an inch off-set in case I need more clearance.

Two bolts and the hole thing comes off, and then I can put the compound back on.

Plus, it gives me tons of room on the right side. Sometimes, the compound would get in the way of the tailstock.

Two disadvantages to a solid toolpost:
1. I need to use full form threading inserts since now I can't control the root width.
2. I'll have to figure out a way how to machine a taper on the face, I.e. counterbore.
 

Attachments

  • 20221025_121143.jpg
    20221025_121143.jpg
    499.1 KB · Views: 25
  • 20221025_073750.jpg
    20221025_073750.jpg
    608.8 KB · Views: 25
  • 20221025_121131.jpg
    20221025_121131.jpg
    574.9 KB · Views: 25
  • 20221025_073716.jpg
    20221025_073716.jpg
    487.4 KB · Views: 26
Nice. Will be interested to see how you like it.
I'm jealous of your lump of cast iron, did you buy it local?
Hi Peter, I decided just to buy it from McMaster-Carr. Next day delivery, plus Material certificate. I've bought lots of metal from some local shops but I never know what they're really giving me.
 
I made a similar post, but used six securing bolts instead of just the two that were used for the compound slide. The six bolts were long with just enough countersink to put the heads below the surface. I used spacers between the six nuts in the cross slide so that each bolt could easily find the nut.
Nice. I had the exact same idea except I was contemplating 4 vs 6 (still better than existing 2).
I also have the same separation spacer arc segments as yours. Except mine are handcrafted by the finest grade of MDF wood - an example where the prototype never advanced to the metal fabrication stage. haha
 
I horse traded for a couple hundred pounds of fine grain ductile iron slabs last summer, with the same intention. Only I want to wait until I complete my Metal Lathe Accessories tee slotted cross slide; sure wish that was next on my to do list..... Yes, I expect that I will have leftovers for another project ;)
 
I was thinking of sculpting it to make it look "pretty", but the Standard Modern is definitely not a handsome machine. So, "build it like a battleship" was my mantra!
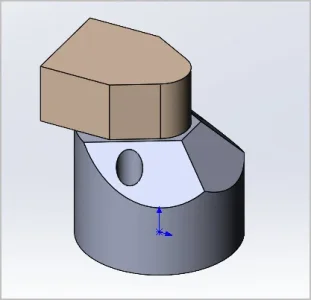
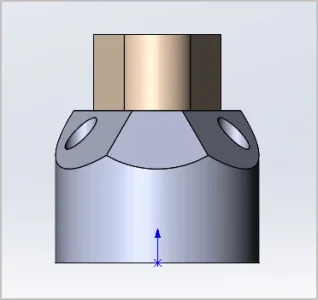
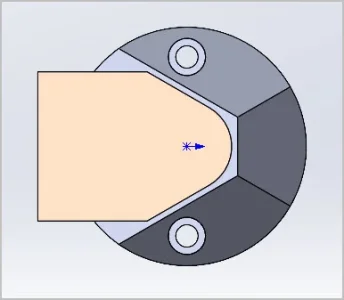
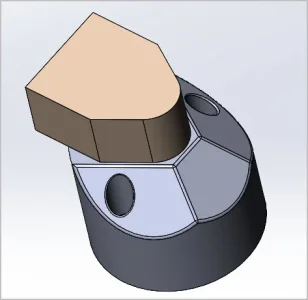
Just an eyeball sketch based on your pics. Meh, I'll let you decide. Facet starts slightly offset from edge of tool post, then lopped at 45-deg
Yes, the solid ones I've seen had those faceted bevels I suppose for chips/fluid & a bit nicer for your hand to work around. Their facets look a bit more proportional probably because of rectangular footprint, which presumably comes about supporting the square dovetail tool post.
The deeper counterbores might be swarf collectors but not the end of the world.
 

Attachments

  • SNAG-2022-10-25 10.24.44 PM.webp
    SNAG-2022-10-25 10.24.44 PM.webp
    7.4 KB · Views: 2
  • SNAG-2022-10-25 10.24.57 PM.webp
    SNAG-2022-10-25 10.24.57 PM.webp
    4.5 KB · Views: 2
  • SNAG-2022-10-25 10.25.12 PM.webp
    SNAG-2022-10-25 10.25.12 PM.webp
    7.6 KB · Views: 2
cosmetic fillet to exposed edges
 

Attachments

  • SNAG-2022-10-25 10.37.19 PM.webp
    SNAG-2022-10-25 10.37.19 PM.webp
    12.3 KB · Views: 1
Before and after shots.

What I do like, is that I can still rotate the whole unit 360° to perfectly align the tools to the x-axis, but also, because I put the Multifix QCTP off center, I have almost an inch off-set in case I need more clearance.

Two bolts and the hole thing comes off, and then I can put the compound back on.

Plus, it gives me tons of room on the right side. Sometimes, the compound would get in the way of the tailstock.

Two disadvantages to a solid toolpost:
1. I need to use full form threading inserts since now I can't control the root width.
2. I'll have to figure out a way how to machine a taper on the face, I.e. counterbore.
Have you found any difference between using it and when the compound is mounted? Does it appear more solid?
 
Just an eyeball sketch based on your pics. Meh, I'll let you decide. Facet starts slightly offset from edge of tool post, then lopped at 45-deg
Yes, the solid ones I've seen had those faceted bevels I suppose for chips/fluid & a bit nicer for your hand to work around. Their facets look a bit more proportional probably because of rectangular footprint, which presumably comes about supporting the square dovetail tool post.
The deeper counterbores might be swarf collectors but not the end of the world.
Hi Peter, that looks pretty good. Setting it up on the mill should be relatively easy. Bit of a pain, but doable. But later, let me see how this set up works.

I do plan on making some plugs to go into the countersink holes to keep swarf out.
 
Nice job. You should notice an increase in rigidity with that I'm sure. One day I will get around to making one for my little myford which could use some help in that department.

This is on my to do list too. My lathe is not so little and is probably just fine as is, but more is better when the operator isn't the best tool in the cabinet.

I mostly need help with parting. It's not that I can't part, it's just that it's almost never a painless activity, and I know I can do better so why not try. A dedicated parting plinth just seems so obvious so why not! @thestelster is my inspiration this time around, but @Dabbler has inspired me in the past. This project keeps moving up my priority list.

I'm thinking a plinth to replace the entire tool post with a dedicated 1" blade holder built right into it. At this time, the only real challenge is setting spindle center. Adjustments reduce rigidity, so I'd like to get around that somehow without losing the flexibility of being able to use various blades.
 
Last edited:
Hi Peter, I decided just to buy it from McMaster-Carr. Next day delivery, plus Material certificate. I've bought lots of metal from some local shops but I never know what they're really giving me.

What is the part number at MMC?
 
Back
Top