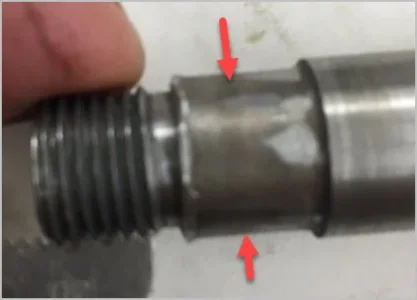
Well if the inner shaft doesn't run or engage anything, the 15mm could be meaningless. Maybe its a stock diameter although odd for a N-Am based machine. Or maybe 5/8 nominal shaft (0.625) with a skim pass. Looks like the bearing ID & threads are the only important dimensions which are both further reductions?
-
Scam Alert. Members are reminded to NOT send money to buy anything. Don't buy things remote and have it shipped - go get it yourself, pay in person, and take your equipment with you. Scammers have burned people on this forum. Urgency, secrecy, excuses, selling for friend, newish members, FUD, are RED FLAGS. A video conference call is not adequate assurance. Face to face interactions are required. Please report suspicions to the forum admins. Stay Safe - anyone can get scammed.
-
Several Regions have held meetups already, but others are being planned or are evaluating the interest. The Calgary Area Meetup is set for Saturday July 12th at 10am. The signup thread is here! Arbutus has also explored interest in a Fraser Valley meetup but it seems members either missed his thread or had other plans. Let him know if you are interested in a meetup later in the year by posting here! Slowpoke is trying to pull together an Ottawa area meetup later this summer. No date has been selected yet, so let him know if you are interested here! We are not aware of any other meetups being planned this year. If you are interested in doing something in your area, let everyone know and make it happen! Meetups are a great way to make new machining friends and get hands on help in your area. Don’t be shy, sign up and come, or plan your own meetup!
You are using an out of date browser. It may not display this or other websites correctly.
You should upgrade or use an alternative browser.
You should upgrade or use an alternative browser.
Small shaft repair options?
- Thread starter calgaryguy
- Start date
Former Member
Guest
I agree this is likely the easiest option and will likely give you the best results (one of the respectable YouTube machinists gave a good example of this).if you didn't want heat involved you could clean up the worn surface in lathe, machine a ring with snug/slight interference fit on ID, attach with Loctite retainer, turn the (slightly oversize) ring OD to whatever the bearing ID needs. Minimum diameter of ring dictated by threads.
The overall shaft looks like its slips in something, or is that just the way it came out? You could probably machine a better one in about as much time, but that presumes the mid section diameter is just nominal. Plus maybe look like you have opposite threads on either end? OK, maybe a few more minutes LOL
However the second option if you are going to weld it I would Tig with with cooling on the threads to avoid damage. Then turn it down.
calgaryguy
Chris
So it turns out that my neighbour isnt comfortable with single point threading on his lathe at this point. Concerned about crashing.
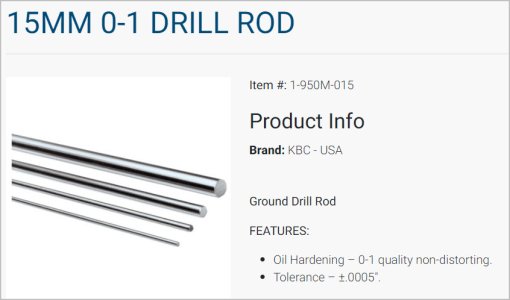
I'm going to be in the market for someone to make me a replacement shaft from the 15mm ground drill rod I just ordered.
shaft specs are 15mm rod, about 12" long, with 1/2-20 threaded section about 3/4" long at each end. Should be easy peasy for someone with the skills/confidence.
I really need my own lathe and welder soon. I put off actively searching for a lathe when my neighbour bought his as the implication at the time was that I'd have access to putter and learn a bit. Hasnt worked out that way, and thats cool - its his perogative.
calgaryguy
Chris
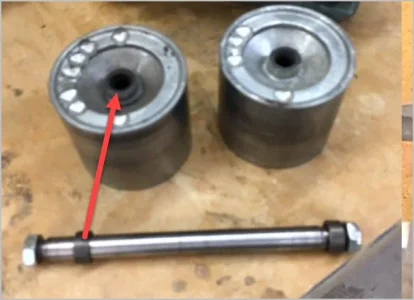
The inner shaft has two aluminum drums that fit over it in a very close fit. So it *needs* to be 15mm. To clarify:Well if the inner shaft doesn't run or engage anything, the 15mm could be meaningless. Maybe its a stock diameter although odd for a N-Am based machine. Or maybe 5/8 nominal shaft (0.625) with a skim pass. Looks like the bearing ID & threads are the only important dimensions which are both further reductions?
Below is a pic of the sub-assembly from an identical sander I'm also restoring. The two drums and shaft in the foreground are from the unit I currently has disassembled.
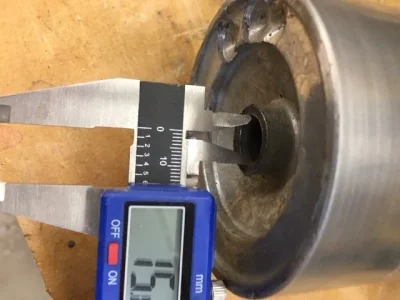
The caliper image is cut off, but the el cheapo calipers read 15.05mm
My sizes and specs are right from a thread on vintagemachinery.org forums on EXACTLY how to replace these shafts as its a common problem.
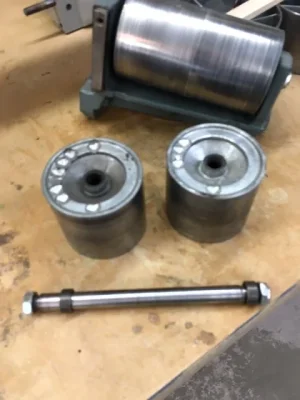
Last edited:
calgaryguy
Chris
Both RH threads.Opposing threads on each end? LH and RH or both RH?
calgaryguy
Chris
*shrug*, isnt the best option to ensure a good seat of the nuts on each end against the bushings and hence the drums is to single point thread?Have him turn the ends down to 1/2" then thread the ends with a die?
I can probably do all kinds of things to 'fix' the shaft I have or DIY a new shaft as much as possible, but I'm looking to get a brand new shaft made at this point.
Honestly I really dont want to use my neighbour for this anymore.
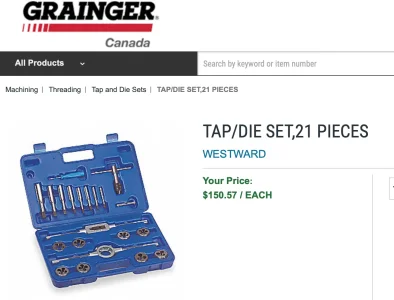
I suggest turning the ends down for the threads to 0.495 and then just using a die to thread the ends 1/2. 1/2 NC (13 tpi) is more common so easier to find beg borrow than 1/2-20. Acklands granger has (or had) a good tap die set for not too much money.So it turns out that my neighbour isnt comfortable with single point threading on his lathe at this point. Concerned about crashing.
I'm going to be in the market for someone to make me a replacement shaft from the 15mm ground drill rod I just ordered.
shaft specs are 15mm rod, about 12" long, with 1/2-20 threaded section about 3/4" long at each end. Should be easy peasy for someone with the skills/confidence.
I really need my own lathe and welder soon. I put off actively searching for a lathe when my neighbour bought his as the implication at the time was that I'd have access to putter and learn a bit. Hasnt worked out that way, and thats cool - its his perogative.
calgaryguy
Chris
I suggest turning the ends down for the threads to 0.495 and then just using a die to thread the ends 1/2. 1/2 NC (13 tpi) is more common so easier to find beg borrow than 1/2-20. Acklands granger has (or had) a good tap die set for not too much mo
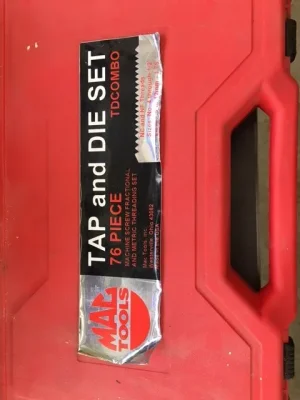
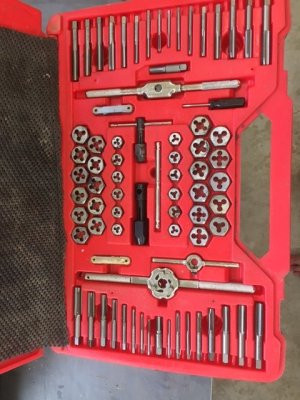
I picked up this on kijiji used for $100 last year, so not a problem. Of course I've already had to buy 3-4 dies that werent in the set for odd sizes. I got tired of junky T&D sets with poor quality tap and die handles, etc. This set is vastly superior in quality to the cheapies I've owned in the past.
Attachments
Last edited:
Not quite sure I understand when you say 'drums'. Do these 2 collar/bushing looking parts engage the hole of larger diameter roller looking part? Is one a sliding fit & the other is friction fit (ie. which)? Do the collars both sit on the main shaft OD like the left one (not the step immediately behind the threads like the right one). Does your 15mm shaft require further work to fit, or maybe it not in your possession quite yet?
Is the existing shaft damaged or bent you don't want to attempt a sleeve (even as a spare)? What is the diameter of the step between the threads & main 15mm OD shaft?
FYI, drill rod is 'pretty close' to nominal size but specs say +/- 0.0005". That's usually more critical for bearings & such but possibly could be your case too if its a running fit in a bushing.
Attachments
Former Member
Guest
Sadly to say this should be an easy thread to cut, lathe (single point) or die wise. The reason I say this notice the relief cut between the thread and bearing surface of the shaft, that is what that is for......there would be no crashing on the lathe, feed is left to right, single point starts in grove, if using a die relief cut ensures shoulder of parts sits on stop.
Make it easy on your neighbour and just have him turn your shafts with a slight relief cut and thread it yourself.
If you are really stuck use your drill press/mill and do it vertically with a file, just takes a little time. Make do with what you've got, this is the difference between a machinist and a machine operator 😉.
@calgaryguy - my two cents for what it's worth:
A new shaft is the obvious best way to go. But it would be worth spending some time figuring out why that shaft failed in the first place and remedy that too. Lack of lube, excessive force, too much heat ????
As a temporary fix, you already bought the new bearings with smaller ID. Nothing to lose trying that approach till you can get a new shaft made.
I agree with @Degen. This is about as easy a thread to single point as it gets. Somebody needs to grow bigger ones.....
On a side note, reading between the lines it sounds like your neighbour has soured a bit. No idea why nor does it matter. But if he really isn't comfy threading such an easy thread, maybe he would like to sell his lathe.....
Not sure why using a die to cut the thread concerns you. You can keep the sharp shoulder, perhaps a small thread relief like the original part, tap as far as it will go, and then flip the die around to fully finish the thread.
@Degen @Susquatch @PeterT @RobinHood
Can this O1 oil hardened drill rod be threaded without annealing it first?

Can this O1 oil hardened drill rod be threaded without annealing it first?
Last edited:
calgaryguy
Chris
Its a common problem with these delta/rockwell sanders. Bearing failure/seizure results in the shaft wearing.@calgaryguy - my two cents for what it's worth:
A new shaft is the obvious best way to go. But it would be worth spending some time figuring out why that shaft failed in the first place and remedy that too. Lack of lube, excessive force, too much heat ????
Delta 6x48 Sander Shafts - VintageMachinery.org Knowledge Base (Wiki)
This is the same sander I am refurbing. Delta/Rockwell/Beaver made thoudands of these.
Scroll down a bit to 'Examples of Shafts and Conditions' for sample pics showing exactly the same condition my shaft is in (see original pics in my 1st post above).
THe consesus at Vintagemachinery.org is to make a new shaft from 15mm ground drill rod. The experience there has show repairs to existing shafts to not be worth it versus just making a new one *if* you have the technical nous to do so. The 15mm nominal size of the drill rod allows the ilder drums (seem my pics above) and the bushings to slide on with a slight drag-fit. Its not a pressed interference fit. When I removed the drums I needed to apply a little propane torch heat to expand the aluminum as there was a slight amount of galvanic corrision/welding holding the aluminum drums to the steel shaft.
As a temporary fix, you already bought the new bearings with smaller ID. Nothing to lose trying that approach till you can get a new shaft made.
Dont need a temp fix. I bought one undersize bearing but realize after that I'd have to also cut teh OD of the threads down to allow the bearing to fit over the threads onto the new shoulder. I'd rather have this project sit and wait (even if for a few months) until I can fix it 'proper' back to an original spec with a new shaft.
I agree with @Degen. This is about as easy a thread to single point as it gets. Somebody needs to grow bigger ones.....
On a side note, reading between the lines it sounds like your neighbour has soured a bit. No idea why nor does it matter. But if he really isn't comfy threading such an easy thread, maybe he would like to sell his lathe.....
Hes a great friend and a super neighbour. We have essentially free roam access to each others shops (mine primarily woodworking, his primarily metal fab).
Not sure why using a die to cut the thread concerns you. You can keep the sharp shoulder, perhaps a small thread relief like the original part, tap as far as it will go, and then flip the die around to fully finish the thread.
I had gone down the path of 'well if Im going to make a new shaft on neighbours lathe, why not learn how to single point thread while I'm at it'. This is an opportunity to increase my knowledge and 'maker' skills by machining a new shaft from scratch.
calgaryguy
Chris
PEr my last response to you, I had posted the schematic earlier in the thread. Since you didnt seem to notice this, here it is againNot quite sure I understand when you say 'drums'. Do these 2 collar/bushing looking parts engage the hole of larger diameter roller looking part? Is one a sliding fit & the other is friction fit (ie. which)? Do the collars both sit on the main shaft OD like the left one (not the step immediately behind the threads like the right one). Does your 15mm shaft require further work to fit, or maybe it not in your possession quite yet?
Is the existing shaft damaged or bent you don't want to attempt a sleeve (even as a spare)? What is the diameter of the step between the threads & main 15mm OD shaft?
FYI, drill rod is 'pretty close' to nominal size but specs say +/- 0.0005". That's usually more critical for bearings & such but possibly could be your case too if its a running fit in a bushing.
As I've explained numerous times, the shaft is 15mm od. The threads are 1/2-20. This is the way it was manufactured by delta/rockwell/beaver for my 'late model' unit ('new style shaft' in the below pic).
Delta 6x48 Sander Shafts - VintageMachinery.org Knowledge Base (Wiki)

The "2 halves" denoted in the above schematic are a slip fit on the 15mm shaft. Their OD, roughly measured by me in a pic above is 15.02mm or so. I have some inside snap gauges arriving today to get an accurate measurement with a micrometer for my own interest.
The two 'bushings' noted as '6' in the above diagram are also slip fit on the shaft and act as spacers. The shaft then has a bearing on each end that is an interference fit denoted by '5'. FInally there is a nut on each end of the shaft denoted by '4'. When the nuts are tightened to spec (not sure on the ft-lbs yet, need to find that document) the bearings (5) squeeze the 'bushings' (6) and teh drums (two halves) together as a single rotational unit.
Does that make sense?
I am not going to sleeve the shaft or attempt any other repair, as the effort required isnt much less than just making a new shaft. 15mm drill rod has been ordered from KBC as MSM doesnt stock anything that large.
I buy and sell a moderate amount of used woodworking equipment. Learning how to do something like machining a shaft and single point threading will be a useful skill for this sideline/hobby of mine. I'm sadly without a lathe of my own at this point - something I aim to rectify in the coming months and a primary reason I've been lurking here for a while. .
Last edited:
Six O Two
(Marco)
If you're neighbour's not comfortable single pointing the threads, and you'd rather not cut them with a die, then maybe post something in the request a job subforum. Lots of fellow members in Calgary it seems, maybe one could knock it out for you. I'd happily take it on if I was still in that part of the country.
This is an opportunity to increase my knowledge and 'maker' skills by machining a new shaft from scratch.
I see now.
Gotcha on the threading / bearing size - and agree. Been there done that. Same problem I had on my BP draw bar bushing. I solved that by threading the inside of the bushing so it could go over the threads before serving the smaller shaft centering feature. That isn't practical on a bearing race.
Sounds like a fun easy project to learn threading.

