• Spring 2024 meetup in Calgary - tentative date Saturday, April 20/2024. Other regions are also discussing meet ups. If you want one in your area get going on organizing it! discussion
  • We are having email/registration problems again. Diagnosis is underway. New users sorry if you are having trouble getting registered. We are exploring different options to get registered. Contact the forum via another member or on facebook if you're stuck. Update -> we think it is fixed. Let us know if not.
  • Spring meet up in Ontario, April 6/2024. NEW LOCATION See Post #31 Discussion NEW LOCATION

Propane ribbon burner forge build

Dan Dubeau

Ultra Member
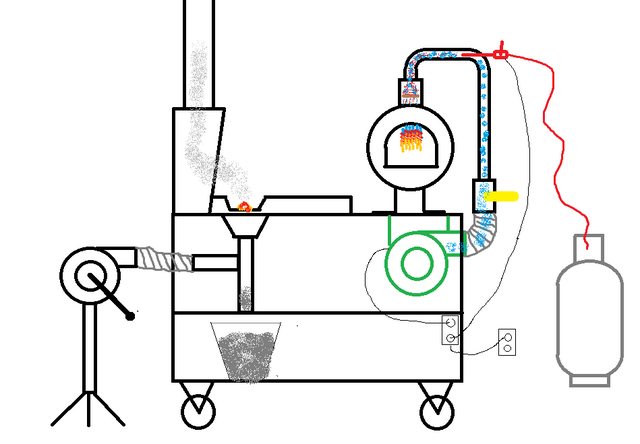
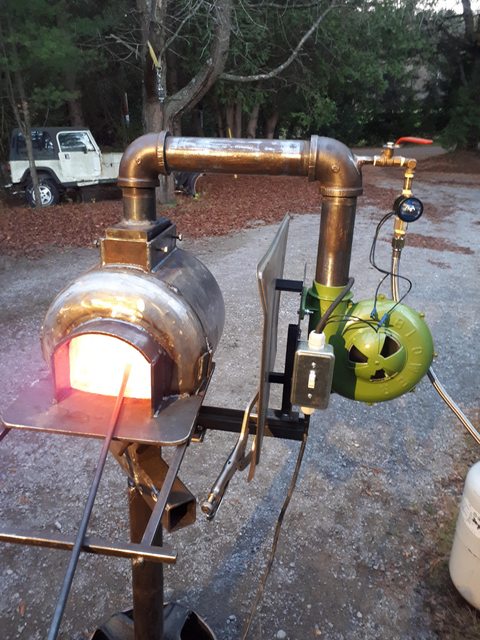
I'm still not done, but thought I'd throw up some pics of a blown ribbon burner forge I'm currently building.

Started a few weeks ago, and just tonight finished welding up the forge body. Things move slow around here sometimes.....

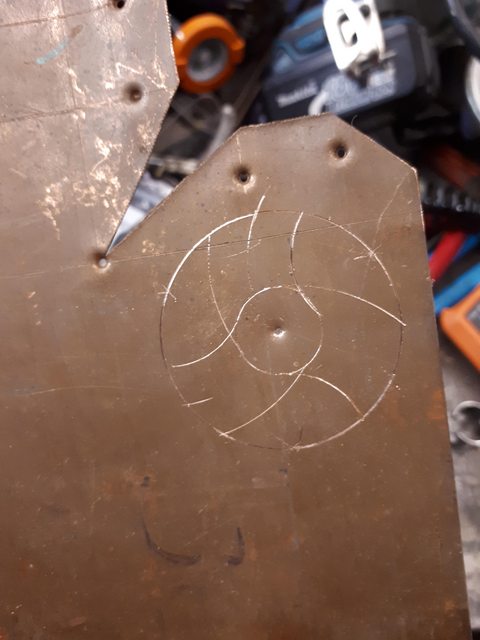
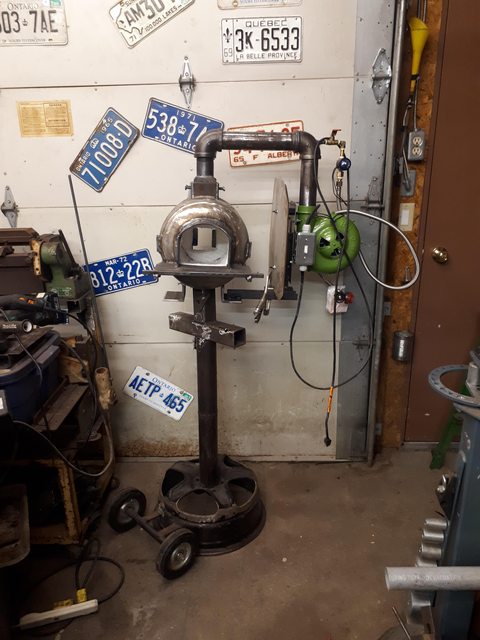
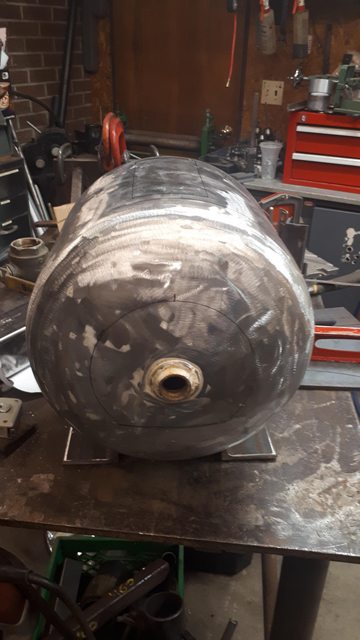
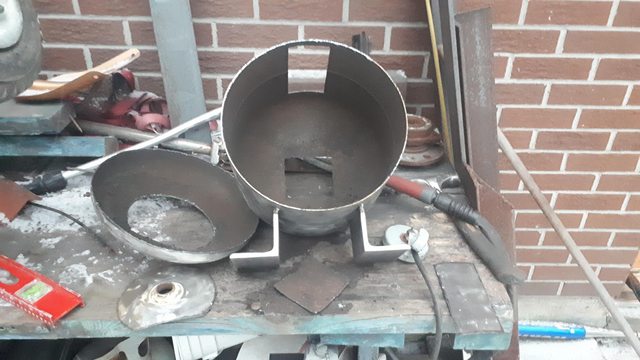
Started off with an old purged 20lb propane tank. Welded on the some angle scraps for feet, then started laying out my doors. and burner hole.

aXyofQCl.jpg

Plasma made quick work of it.
ET1IUcbl.jpg

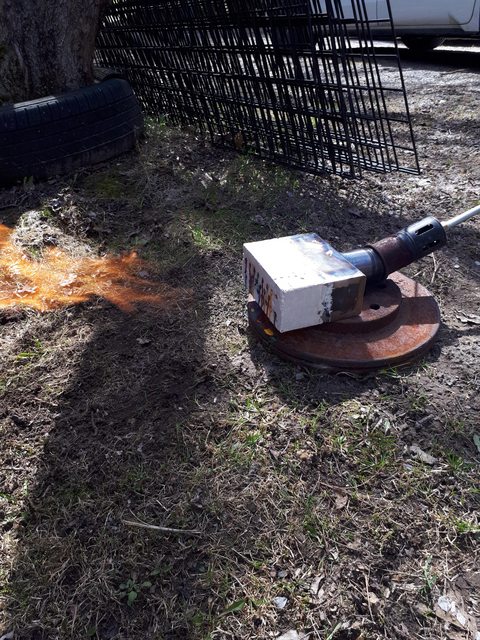
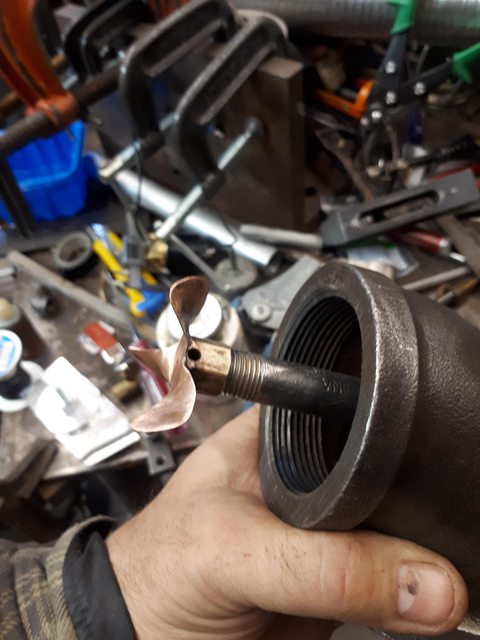
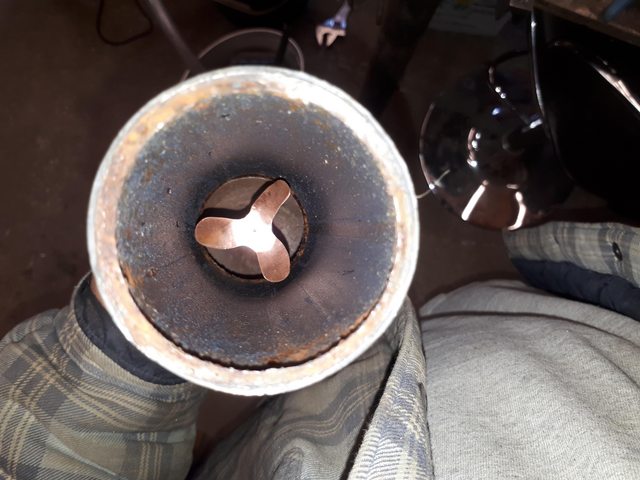
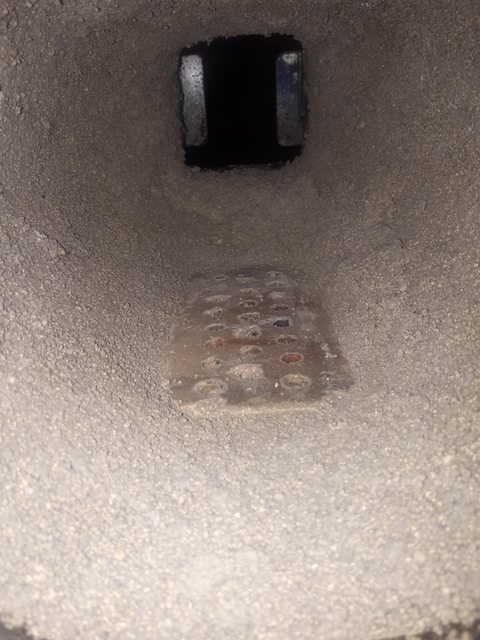
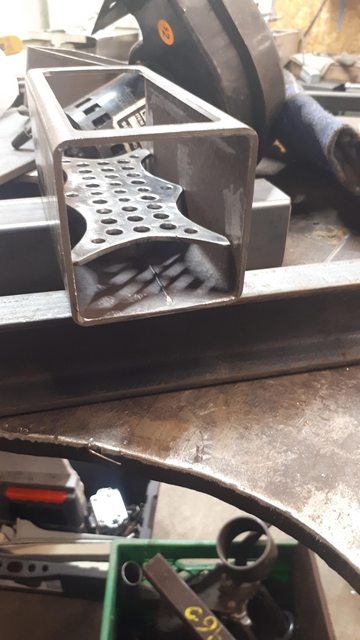
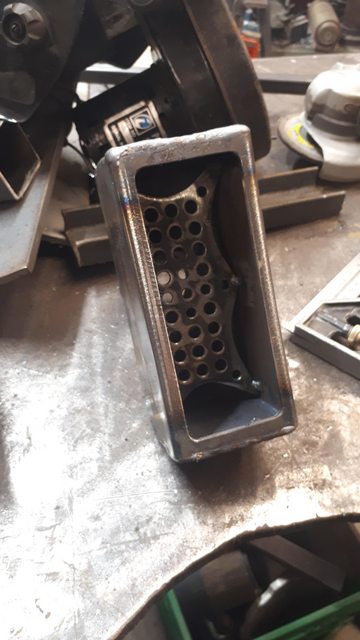
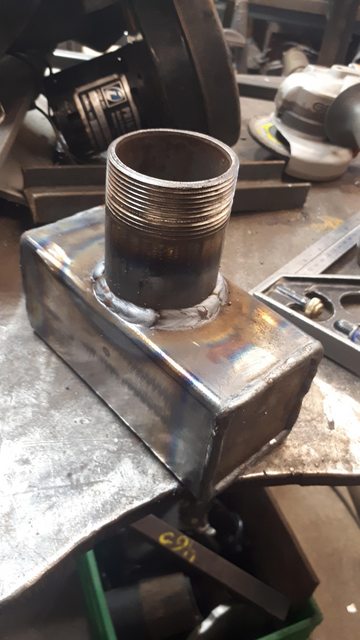
Then is was time to make the ribbon burner. It started life as a 3x3"x6.5" square tube. I made a diffuser plate, and capped the ends. Also welded in a 2" pipe stub.
ToJ51nFl.jpg


IbWX9Vrl.jpg

ha2koROl.jpg

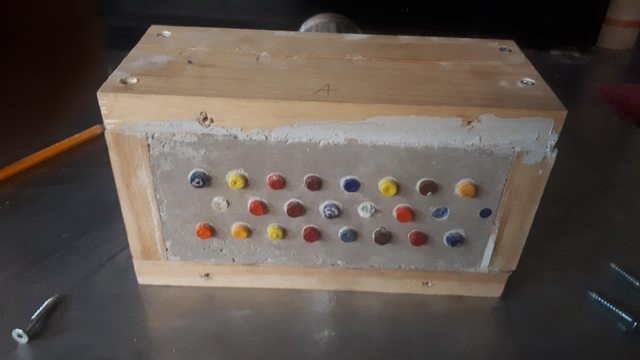
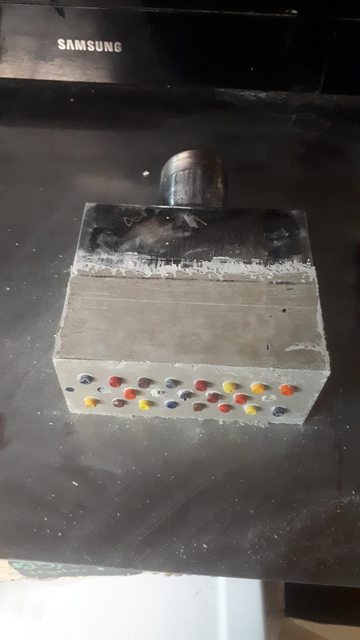
Then is was time to make a mold box, and steal some of the kids crayons. Not shown is the bottom plate where I drilled a pattern of 5/16" holes to hold the crayons for the refractory pour.
1R0SDdEl.jpg

c8NGTa2l.jpg

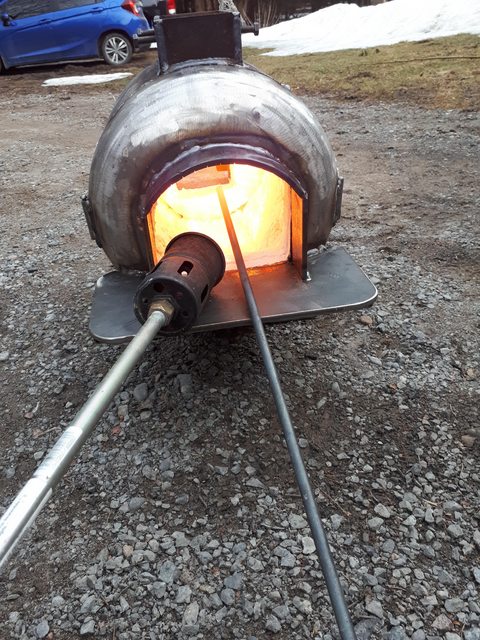
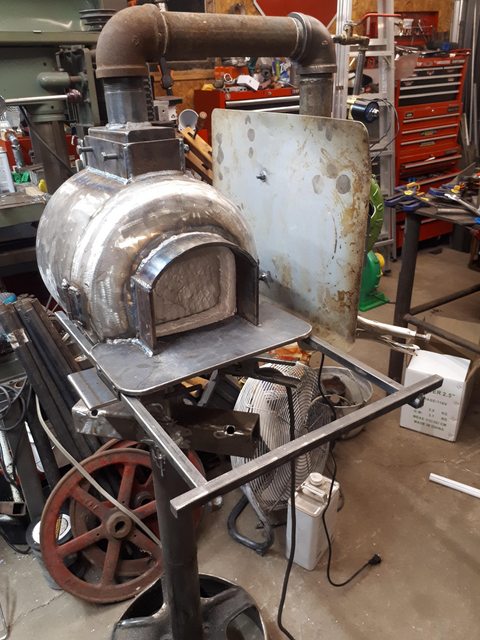
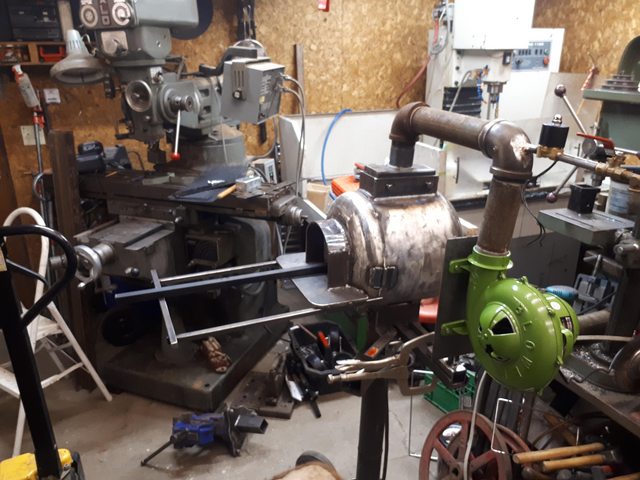
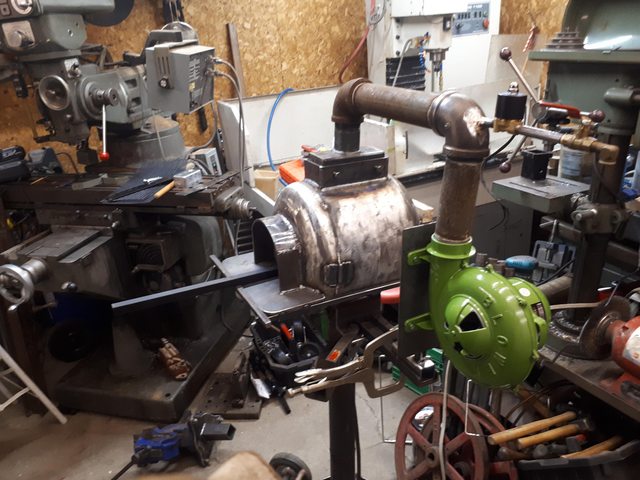
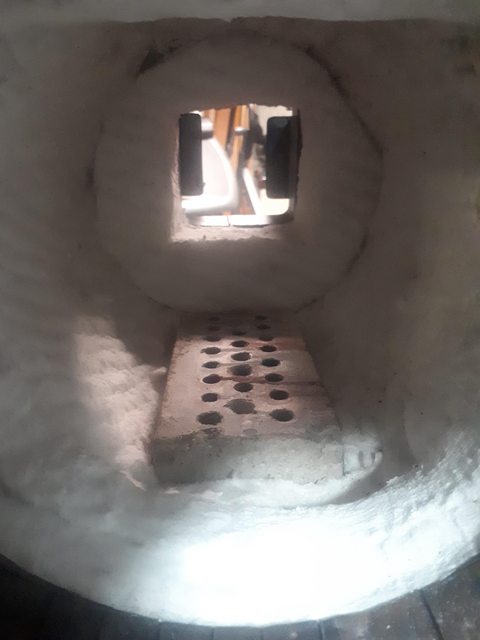
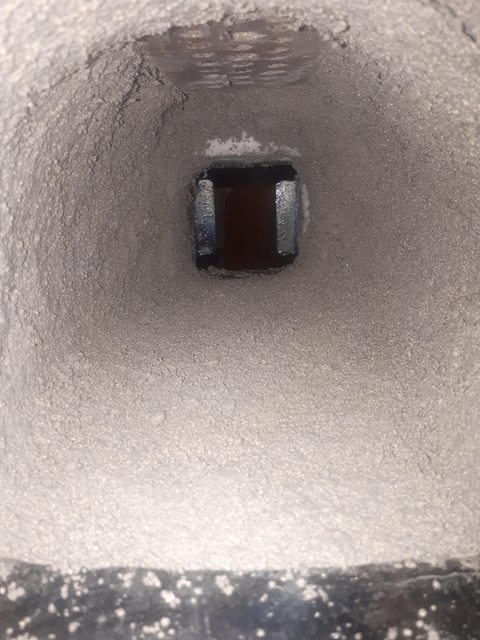
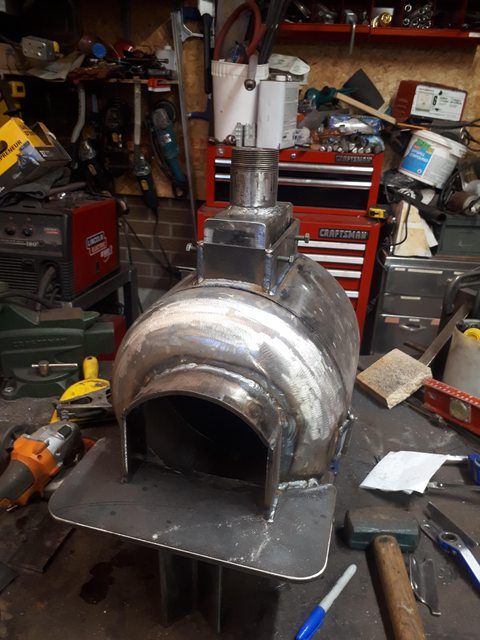
Then it was time to let everything acclimatize in the shop for a few weeks before getting back to it again today.....I didn't take many pictures today as I was going, I just wanted to get it done, but here's where I'm at with it. It's all ready to be lined with 2 layers of 1" 2600* rigidised ceramic blanket, and a 1/4-3/8" kast-o-lite 30, with a poured floor. I have some itc-100 for a top coat too.
aHDV4abl.jpg

X7NbqyCl.jpg

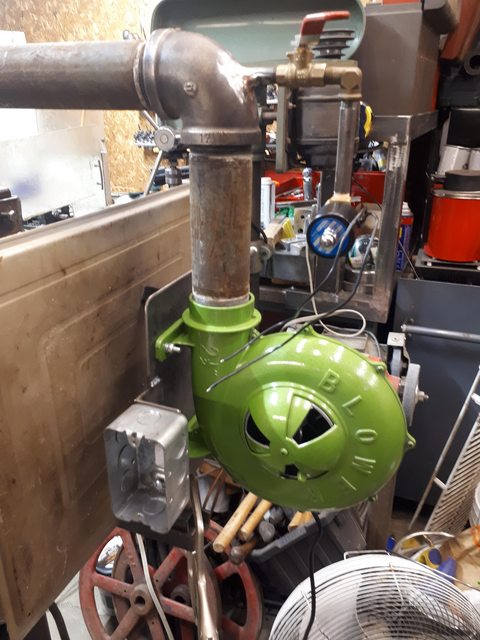
I still have to make a cart to hold the blower, etc, but hopefully it won't be 3 weeks until I get back to it again. I'll try and get on that, and lining it this week. Hopefully.
 
Very nice build, I keep thinking that I want to make one too, then my shoulders start to remind me why there's no rush. ;)
However, since I already have some old tongs, hammers, an anvil shaped object, and a decent post vice, I will be keeping a close eye on your progress. No rush though...:rolleyes:
 

Dan Dubeau

Ultra Member
I know it's been a while, but i've been chipping away at in in bit's an pieces.
it's been lined with 2" of 2600* wool, rigidized and fired (with a weed burner because I don't have the ribbon burner done yet. I still need to line it with cast o lite.
IEsU3CAl.jpg

Couldn't help but stick another "iron in the fire" while I was at it. A recurring theme in my life....
pHalN3Dl.jpg


I will be making a combined coal forge, propane forge cart for it next, but have a few other projects in the queue first.
 

Dan Dubeau

Ultra Member
I also thought my cute little weld on hinges would have been enough to have the front hinge open, and close up nice and tight, but they're just too sloppy, so I ended up stitch welding it up again in a few spots around the perimeter. So much for plans lol.
 

Chris Cramer

Super User
Vendor
Premium Member
I like the idea of the ribbon burner! That would spread the heat much more evenly. My current propane forge that I purchased from Hall Knife and Forge is a rectangular forge with three large burners pointing straight down. That definitely creates some hot points, but that forge is only used for shaping.
 

Chris Cramer

Super User
Vendor
Premium Member
I will be making a combined coal forge, propane forge cart for it next, but have a few other projects in the queu
I've been thinking of making the same sort of cart for my shop. My propane forge is too small to fit the larger items like the skillet I forged, so I'm planning on building a coal forge for that purpose. The thing is I would need to find a way to fit both the coal forge and the propane forge in my shop.
 

Dan Dubeau

Ultra Member
I was sold on the Ribbon burner idea since watching the essential craftsman a few years ago. I really want to learn pattern welding. Just took a while to get the wheels in motion. All my projects are long drawn out affairs in various stages of completion lol.

I don't really have a spot for this in my shop either, but I have a few sheds/outbuildings I could turn into a blacksmiths shop in the backyard. Undecided which one will get the nod yet, as they all need the same amount of work (knocked down and rebuilt lol), but at the moment I plan to make things portable as much as I can. Some have power running to them, some HAD power running to them, it's all a mess TBH.

I did burn out the crayons and cure the ribbon burner last weekend though. With the weed burner shoved in the end I got nice even distribution of flames out the holes and nothing blew up, so that was a plus to know my baffle plate worked and the burner didn't fall apart :D.
E8ojncdl.jpg


I still need to line the forge with kastolite. I did bring it into the basement last week, so it IS closer to being done......I gave a couple 2" pipes for my blower to a buddy of mine to thread for me (HVAC guy) and still haven't got them back, so I'm blaming him for the forge not being done :D.
 

Chris Cramer

Super User
Vendor
Premium Member
Does a ribbon burner not use any orifices to force the gas, or is it inside that box? In other words, how would the propane be evenly spread out every hole?
 

Dan Dubeau

Ultra Member
Mine is a forced air style, where I'm going to use a bouncy castle blower, and a propane jet in the airstream. Jet size is not all that important like on a venturi burner. Some guys just dump the gas straight into the blower pipe, and stick some bent sheet metal scraps into the pipe to create turbuleance to mix the charge. I'm going to have a straight pipe coming in the end, with a ball valve/solenoid valve combo on the end and a drilled out bigger mig tip for a jet. The elbow, and the internal baffle plate (shown inside the burner head in post one) should mix the gas/air enough, and evenly distribute it through all the 23 holes. I hope so anyway. I can tune the airflow, and gas with ball valves. I kinda shot from the hip on this after watching a bunch of videos, and reading a bunch of forum posts. Plus trying to do things my way a bit and trying to visualize the airflow inside the burner. We'll see how it all works when I finish the blower portion. My build was based on stuff I already had lying around. 2" pipe, ball valves, bouncy castle blower, steel and 20lb propane tank.

There are also atmospheric venturi style ribbon burners, that would be like the ones on your forge. They have a refractory head like mine with many smal holes, but an appropriately sized tube and jet and air control on the backend. I don't really know much about them, and only recently found out they exist. The weed burner stuffed in the back works similar. My ribbon head wouldn't draw like that on the weed burner until it got hot, then I could get a nice even flame from all the holes with the burner in the back

I went with forced air because I already had the blower, and will be using it in a spot with hydro. Forced air are also easier to tune too, and more forgiving. I've also got a solonoid valve inline with the blower too in case the power ever goes out....very important part.....

Seeing as how I'm laid up on the couch right now from a day of trying to act young again, I had some fun in ms paint and just made this pic. Up till now the plan has been in my head and whatever was in my junkpile. But this is what I'm shooting for.
zfpNBitl.png

I didn't draw the hammer/tong rack all the way around the cart :D Wife says I may have got a bit carried away with it lol. It happens.
 

Dan Dubeau

Ultra Member
Very nice looking forge. I don't see me getting back to finish mine until the end of July. Too much other stuff on the go right now.

Do you mind sharing any details of the burner block and blower? I have a blower similar to that, but didn't think it would put out enough airflow to be useful. Seeing yours run changes my mind a bit. The other blower I have is a bouncy castle one, which I think puts out too much air, so a bit of a Goldilocks problem. I'd rather run the smaller one if it would work.
 

Crosche

Super User
Very nice looking forge. I don't see me getting back to finish mine until the end of July. Too much other stuff on the go right now.

Do you mind sharing any details of the burner block and blower? I have a blower similar to that, but didn't think it would put out enough airflow to be useful. Seeing yours run changes my mind a bit. The other blower I have is a bouncy castle one, which I think puts out too much air, so a bit of a Goldilocks problem. I'd rather run the smaller one if it would work.

Our ribbon burners are practically identical with the exception that my perforated diffuser is bent and looks like a tent with the peak towards the gas inlet. Also, your burner appears to be slightly deeper, perhaps 1/2" or so. I will post the blower data plate for you tonight. The blower is from a hot water tank and seems to very work well although I need to figure out the right propane pressure vs throttle valve position vs air flow; for some reason the naturally aspirated burners seem to be more intuitive to tune. I think the bouncy castle blower would be over-kill to the point of making your fuel mixture too lean and not combusting properly or even not combusting at all. I have video at various gas setting which I can try to send you or post if you are interested.
 

Crosche

Super User
Apologies for the late reply. Here is the data plate from my forge blower.
 

Attachments

  • 20220620_210739.jpg
    20220620_210739.jpg
    288.1 KB · Views: 7

Dan Dubeau

Ultra Member
Apologies for the late reply. Here is the data plate from my forge blower.
No Problem. Thanks for the reply. I'd thought I had replied to this, and your other post, but now realized I either didn't send it, or....Not sure what happened. I ended up getting an import "forge Blower" a few months ago. It's typical import quality, and only cost $40, but actually moves some decent air, and is quiet. I'm not sure how well it will work compared to a more proper VAC blower, but the design of my forge can easily accommodate for the change if I need to.
 

Dan Dubeau

Ultra Member
So I finally got time to get back to finishing the forge....Took a while......

I knocked a big chunk of the stuff left to do on the forge off today. It's now sitting up on a stand, the blower pipes are all figured out, the gas pipe is brazed into the end elbow, and the blower sorted and mounted in a way that is removable. I welded 2" square tube on the bottom so it would mount on my 2" receiver vise stand, and am making another one specifically for the forge. I also made the sliding tool rest. I currently don't have space for the all in one forge cart like I originally wanted, so this will do for now. None of the pipes are fully assembled yet, and need to be wire wheeled to clean up still. It's all flat across the bottom, so when the time comes, it can sit anywhere, nothing hangs below the feet. Enough rambling, here's some pics of where I'm at.

5E7fkDwl.jpg

oTqQKo9l.jpg

OS6PLD1l.jpg

KxDDYo0l.jpg


I bought a new adjustable regulator with a braided hose too, and it showed up today. Digging through all my fittings I couldn't find the right flare fitting I need to use it, so will have to make a trip to town tomorrow. Then I need to wire up the power for the blower and the solenoid valve for the gas. I want the gas supply to shut off if there's ever a power outage, trip a breaker, or trip over the cord. There will also be a manual ball valve, but I might switch that to a needle valve if I can't control the gas good enough with the ball valve. A few little odds and ends left to finish before firing, but it's getting there. Once the burner works, I'll line it with refractory over the ceramic blanket. I didn't want to do that before I had the burner all sorted out.

Didn't think it would take this long to get back to it, but that seems to be the way everything goes around here.
 

Dan Dubeau

Ultra Member
Yeah, the colour is something. I tried to find some colourmatched high heat paint the other day, so I could name it Kermit the forge, but I struck out lol. Jury still out on the blowers longevity, it's honestly pretty crappy IMO, but it blows, like it's supposed to. I don't expect a long life.

Didn't get to work on it yesterday, my Son got a lego boost robot for his birthday, so we played with that all night. He's 10 and showed Dad a thing or two about how to program it in skratch. Pretty cool.

Woke up this morning to a sick daughter so had to take the day off and stay home with her. In between programming some stuff for work, and looking after her I managed to sneak out in the garage and finish up some things. First thing was to take it all apart, and clean up the 2" pipe, then make the gas injector/impellor like thing. Don't know what to call it, Don't know if it is even necessary, but I had the idea, so I went with it. Gas comes in through the 1/4"npt nipple brazed into the far elbow, then down into this pipe cap. There are 3 radial holes that empty the gas between the blades which are some copper that I laid out with some dividers.
p8mOCEel.jpg

CsAC7A3l.jpg

k05I2Gkl.jpg

KtHvtbIl.jpg

6iCkpkJl.jpg

JuFRqpsl.jpg


Then I reassembled it all, and couldn't wait to wheel it outside to see if it would even work.
W5uRUfGl.jpg

JHvKwunl.jpg

Boy it doesn't take long to heat up. Ball valve isn't too bad to tune either, but I'm sure it'll take a while to figure it all out. I only ran it for about 5 minutes.

Now I can line it with refractory, and let it cure for a few days before firing. I bought a few types, and still not 100% on what I'm going with. I will be pouring a replaceable floor though, so I can swap it out when it get's eaten by flux. No idea when that will be, as I've got a few projects I'm also juggling, but I'll post when I do. Also a few more things I want to make for the body, like a sliding front door, but I'll work on those as I go. I thought about that after I had the body done, so I'll have to cut it up a bit to make that happen the way I want it.

Pretty excited to get this far, and can't wait to start learning another facet of metalworking.
 
Last edited:

Dan Dubeau

Ultra Member
I tapped into a pretty good vein of productivity today, so I decided to just buckle down and finish lining this thing. I was pretty nervous to start it, because I'd never worked with refractory cement before aside from pouring my ribbon burner which is a much different product, and I didn't want to screw it up. But it turns out my reservations were unfounded. Kast-o-lite 30 is pretty easy to work with, and it went pretty smooth. I only had one little area near the back door, that broke off when I flipped it up that I can patch tomorrow. Apparently this stuff sticks to itself pretty good, even when dry, so patching should go pretty seamless. I hope. I stuck a damp rag inside and wrapped it in a garbage bag to slow down the curing process.

I only took 3 pictures as I had gloves on, and it was messy. I started with the forge inverted to do the roof first. B&D workmate earned it's keep here. I sprayed it all down with water before patting the mix into place. Pretty easy stuff to work with. Pretty dry mix according to their instructions, but it wasn't crumbly at all, and held together just fine in thicker sections......
ggMhB2jl.jpg

TSulMiyl.jpg


Then I did each side, and finally flipped it up on its feet and did the floor.

K6pSKvSl.jpg


You can see the spots where the refractory fell down when I flipped it right side up. I fixed the one on the side after I took this picture and saw it on my phones, but couldn't get the top one to stick, so I'll let it set up a bit and patch it tomorrow. I also just now noticed a couple spots on the left side of the roof that might need some attention too. I did not account for the refractory thickness when I trimmed the ceramic blanket around the doors. I'm pretty sure that's the reason that it fell down, as it's just not very thick there, maybe about 1/8-3/16" as I tried to pat down the blanket a bit to build up some refractory thickness. Never having worked with it before, I thought it would go on a bit thinner, but it seemed like i preferred a thicker cross section to stay together. 100% an oversight on my part. Next forge I make I'll trim the openings back to account for at least 3/8"-1/2" of refractory thickness.

The good news is the 55lb bag will be enough for another project as I only used 5.5lbs. I bought enough kastolite and blanket (entire roll) to also build a foundry too. So there should be enough refractory left for that. I get that way when shipping is so expensive, I start adding stuff I will need eventually to make it worthwhile. They say there is a 6 month shelf life on it, but I've read people say it'll last a lot longer than that if kept dry, so I'm not too worried.

Apparently kastolite is pretty flux resistant too so I also changed my plans of making a replacement floor and just made it all solid. I've got a kiln shelf on the way, and can toss that in there whenever I'm doing some welding if it becomes a problem and stared eating away at it.

I'll let it dry for a few days down in the basement, then try and fire it later this week if I get some time.
 

Dan Dubeau

Ultra Member
I just finished patching the bare spots. The stuff I did last night has started to firm up, and patching went well. The new stuff stuck just fine. It's tough to photograph, but here it is.
zqiqswxl.jpg


I've clamped it upside down in the workmate with a damp rag, and bag over it, and will check on it tomorrow night, and maybe pull the bag tomorrow and flip it back over. I'll let it air dry in the basement for a while before firing with a mix of hand torch and the weed burner, and finally it's own ribbon burner. I still haven't sorted out the ribbon burner air control, so that's too intense IMO to cure the refractory until it's really dry already.
 
Top