Perfect @RobinHood!
I think that explains everything for me. Maybe that will be the first part I make on the new mill!
I think that explains everything for me. Maybe that will be the first part I make on the new mill!
I run my mill at 50 Hz , 240 volts. Speed is bang on. At 60 Hz it runs about as fast as yours.
Its too bad it was run with the belt against the springs for so long
I forget, did you have this belt out for inspection? Perhaps just a new belt will solve the problem?
I believe the woodruff key you need is item 171 on the parts drawing. The BP part # is ST66, or a standard #3 woodruff key.
I believe the woodruff key you need is item 171 on the parts drawing. The BP part # is ST66, or a standard #3 woodruff key.
Part 11 is labelled as a #7 woodruff key, BP part no ST68.
It looks like someone put the 2 keys together to try and replicate the correct key that maybe got lost. A #7 woodruff key would likely be correct as it is 1/4" taller than a #3 woodruff key.
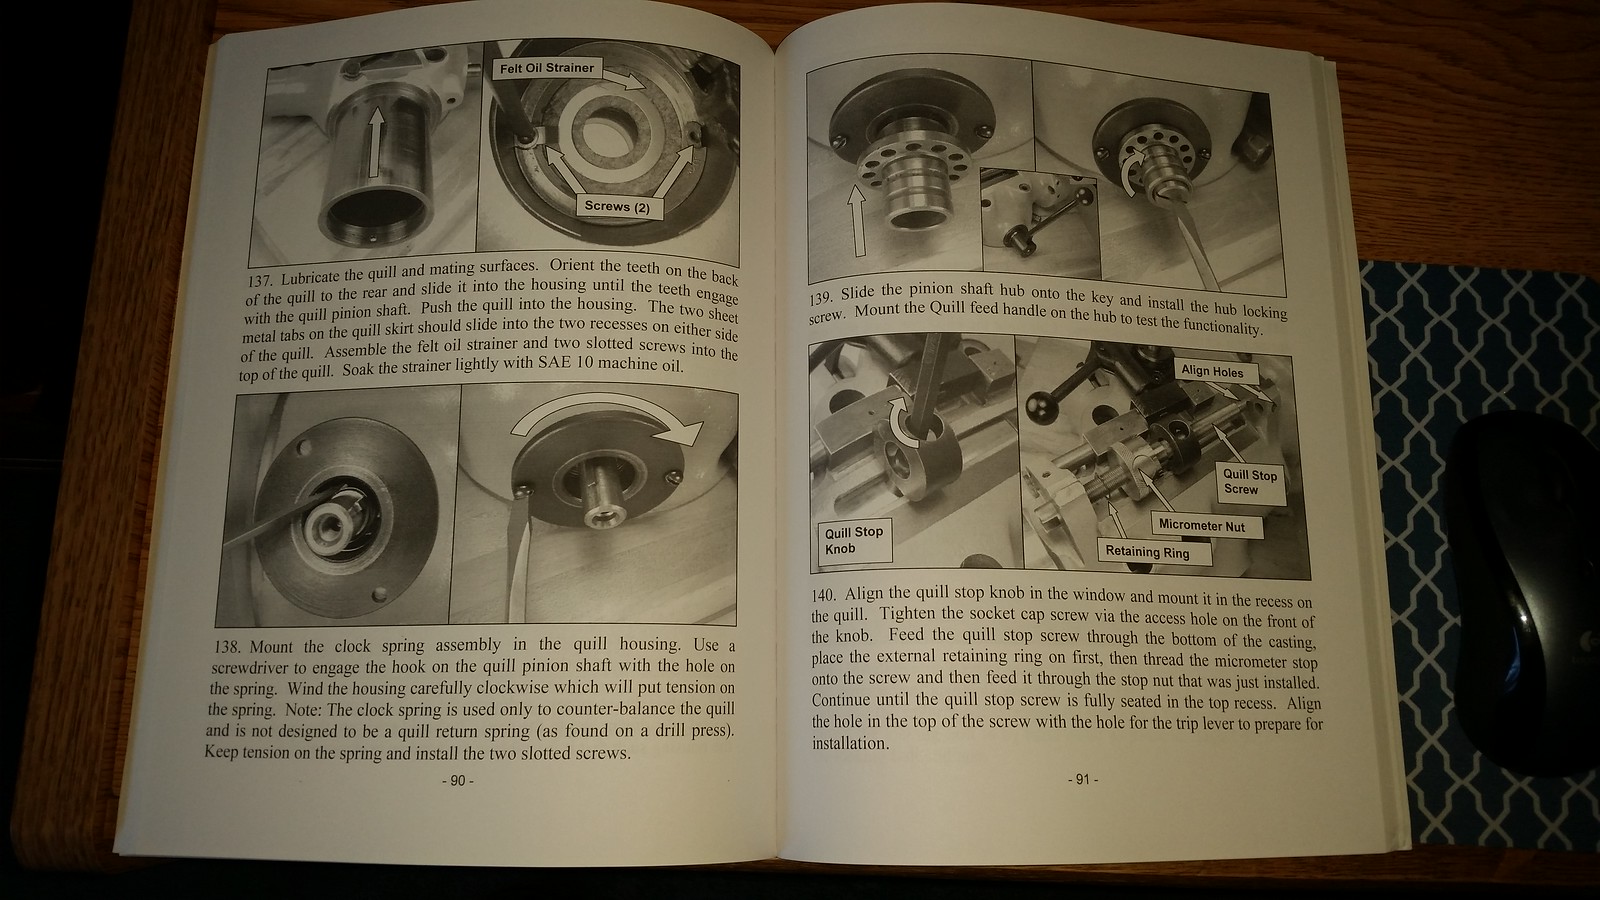
Instructions to install the clock spring from my manual.
Yes that is interesting. I always thought my BP clone was sluggish on the return up. It doesn't stay in equilibrium, it does raise on its own (slowly). I guess its supposed to be this way for some reason. My only prior data point was my prior RF-45 mill which retracted quicker, more like a drill press.I admit that I am surprised to learn that the clock spring is not supposed to lift the quill - just balance the weight. I would never have guessed that.
For next time, I've got a stash of various size woodruff keys. Not all sizes but quite a few. They came from an auction lot a couple of years ago.Couldn't find a woodruff key today. Nobody in my part of the world had any stock.