TorontoBuilder
Ultra Member
The first iteration of my friend and I's multipurpose tachometer and machining calculator is complete and passed the first round of testing.
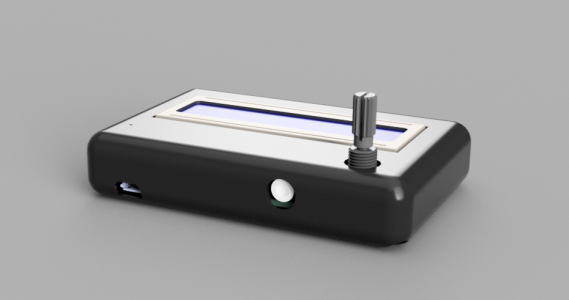
The design is based on a custom circuit board with an inexpensive LCD display and a single encoder for the data input in order to keep the costs very affordable. The board features a ESP32 MCU with has a hybrid Wi-Fi & Bluetooth chip but does not currently utilize those functions. The boards have a mix of surface and thru mount components and are assembled in Ontario. The cost to produce the board per unit is about $10 without a case, hall sensor or the magnets and magnet mount.
The board has very low power consumption, and accepts a 5.5v power supply so it can run off a laptop, a wall wart phone charger, or an external battery as shown.
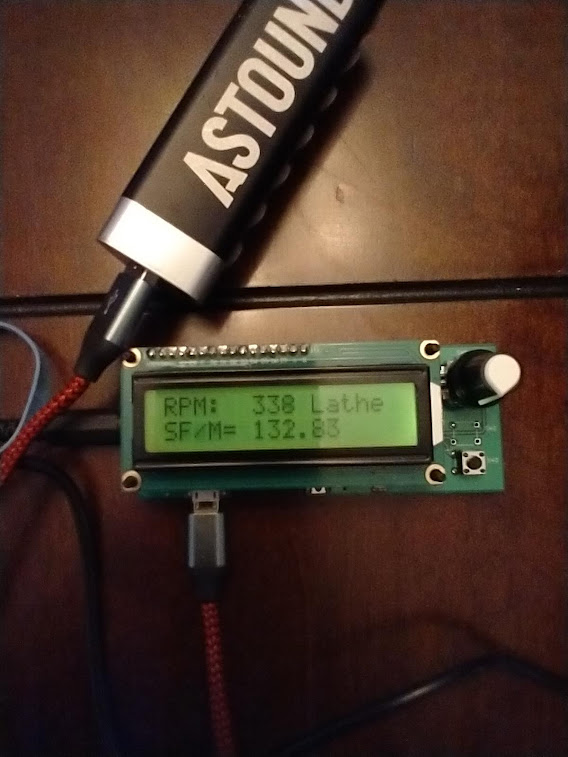
The controller calculates the machine speeds and feeds for the Lathe, Mill, Drill, and will soon calculate the same for 2x48 and 72 inch belt grinders. It also functions as a revolution counter for making springs and electrical windings.
![AMWts8Bp5po87Uf487a9pi7U8x-R7ikIhHVWiwt08iW1ONhTw0zVV6GOnUAB3TBGGsN9yU56yiA-CQhk0AndkWmDcMghrtqAkbGo9L4ttDREVw9M3UpGhFiYjsyCEsw1LiP5CcWsoiJG6zONxuGiUHP3eVIy=w568-h757-no]()
Version 2.0 will have a minor layout change to provide better cable management and ergonomics.

Next steps are to design mounts for our Bridgeport Mills, 3 different lathes and 2 belt sanders
The design is based on a custom circuit board with an inexpensive LCD display and a single encoder for the data input in order to keep the costs very affordable. The board features a ESP32 MCU with has a hybrid Wi-Fi & Bluetooth chip but does not currently utilize those functions. The boards have a mix of surface and thru mount components and are assembled in Ontario. The cost to produce the board per unit is about $10 without a case, hall sensor or the magnets and magnet mount.
The board has very low power consumption, and accepts a 5.5v power supply so it can run off a laptop, a wall wart phone charger, or an external battery as shown.
The controller calculates the machine speeds and feeds for the Lathe, Mill, Drill, and will soon calculate the same for 2x48 and 72 inch belt grinders. It also functions as a revolution counter for making springs and electrical windings.
Version 2.0 will have a minor layout change to provide better cable management and ergonomics.

Next steps are to design mounts for our Bridgeport Mills, 3 different lathes and 2 belt sanders