mill power feed mount improvement

PeterT

Ultra Member
Premium Member
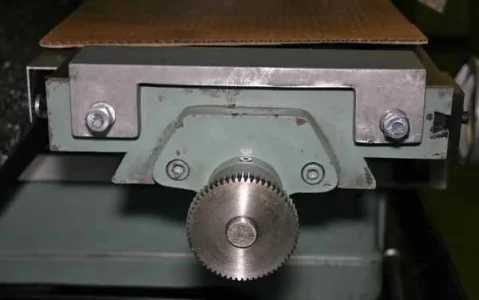
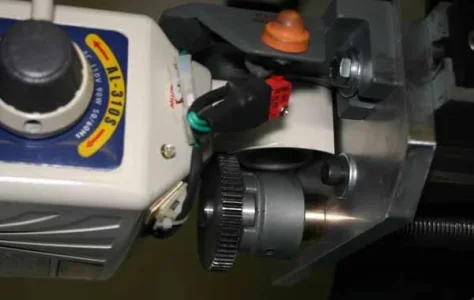
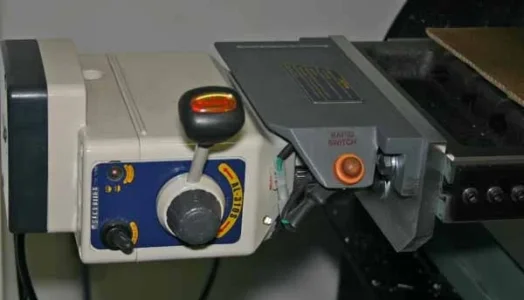
I've been using this Chinese (Align knockoff) X-axis power feed on my RF-45 mill for a couple years. Mostly it worked OK but I perpetually had to fiddle-fart with the alignment (shall I say misalignment) of the motor gear & lead screw gear. Once set up it purrs like a kitten. But a few hours of traversing & its starts growling ugly again.

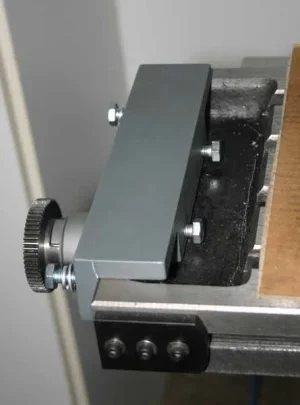
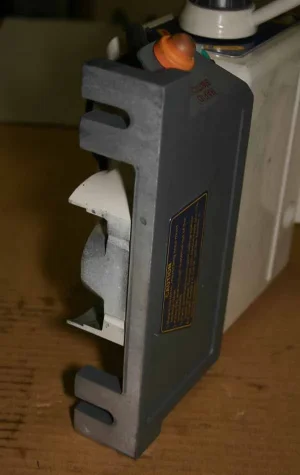
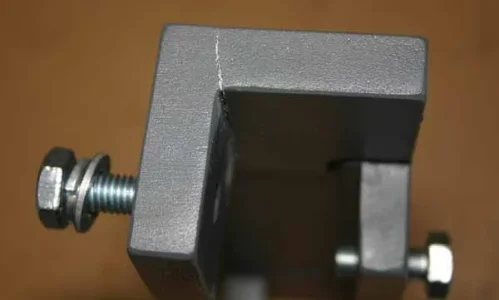
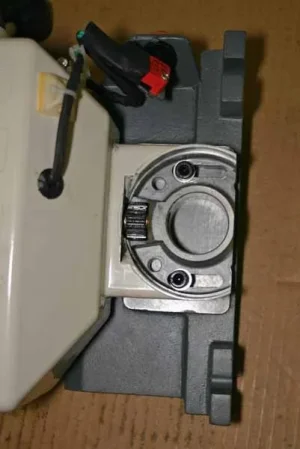
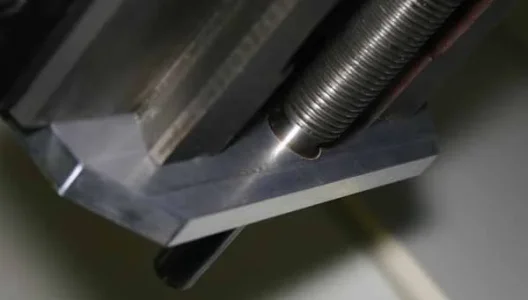
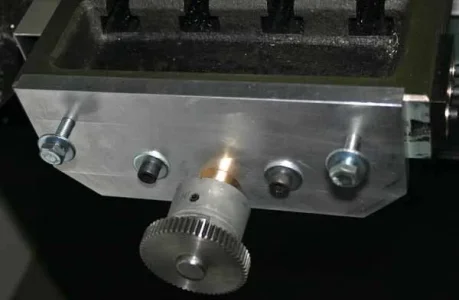
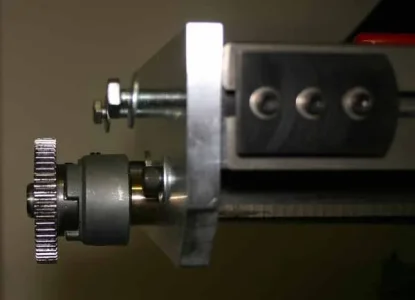
The culprit is the mounting plate assembly. Its intended to be a bolt-on affair. An adapter casting is fixed to the table by 2 bolts that 'set screw' into the pocket. Trouble is, the table pocket has substantial taper & is rough casting, so the bolts have nothing substantial to bite onto. They eventually slip on the casting & the motor assembly slides out of gear alignment. After a few to many re-adjustments the (cast aluminum) bracket finally cracked. I found out Shars sells the plate combo for 50$U but I wanted something better.
 

Attachments

  • IMG_6426_edited-1.jpg
    IMG_6426_edited-1.jpg
    33.4 KB · Views: 20
  • IMG_6432_edited-1.jpg
    IMG_6432_edited-1.jpg
    43.7 KB · Views: 20
  • IMG_6433_edited-1.jpg
    IMG_6433_edited-1.jpg
    40.7 KB · Views: 20
  • IMG_6439_edited-1.jpg
    IMG_6439_edited-1.jpg
    49.4 KB · Views: 20
  • IMG_6441_edited-1.jpg
    IMG_6441_edited-1.jpg
    45.8 KB · Views: 20
  • IMG_6444_edited-1.jpg
    IMG_6444_edited-1.jpg
    32.9 KB · Views: 20

PeterT

Ultra Member
Premium Member
So I had this idea to replace my lead screw end casting with a plate that served double duty for the power feed mount. I also wanted to incorporate a proper bronze bushing for the lead screw to run in. My stock end casting is the classic shaft running in a cast iron hole. It does have an oiler. (btw once this style of PF assembly is mounted, the oiler nipple becomes essentially inaccessible so you have to disassemble & give it a squirt.) I think a bushing was a good idea because I could see some wear on the CI hole, I suspect self-inflicted adjusting the gears closer on the shaft & putting some down pressure on it?

Here is my wood mock-up. I'm not sure if its v3 or v5 but this method saved me a lot of wasted metal because I only had one chunk to play with. Its always fun to try & guess WTF was going through the minds of the designers. Its 95% metric mill but the bolts are 5/16-18 (yup even says so in the manual). After many trial & error measurements, I determined the bolt/shaft spacing is definitely nominal millimeters. Or maybe odd-ball inch, but just not drilled & tapped accurately? Oh well, eventually I had a layout I thought would work.

btw - what tapping fluid do you guys recommend for MDF wood? :)
 

Attachments

  • IMG_6445_edited-1.jpg
    IMG_6445_edited-1.jpg
    36 KB · Views: 16
  • IMG_6446_edited-1.jpg
    IMG_6446_edited-1.jpg
    39.2 KB · Views: 16
  • IMG_6447_edited-1.jpg
    IMG_6447_edited-1.jpg
    34.2 KB · Views: 16

PeterT

Ultra Member
Premium Member
And here is the end result. I was going to notch out the bottom of the plate a/p the wood template but after mulling it over, a 45-deg corner lop off worked fine & preserves more meat in the plate. The plan was to permanent Loctite the bushing in the plate but I could not find any of those oiler nipples on-line. I want the ball nipple to face horizontal so I can get at it with an oiler. But if I make the bushing permanent now it will be a impossible to drill & tap that. Its a tight press fit now so I'll just leave that way until it shows up. The one I have coming is M6x1 tapped in. But looking at my lathe & mill, seems like they are pressed in? Anybody know where to get these? I see lots of grease fittings with a male nipple but not these flush mount oil type.

Well, so far so good. The table traverses quieter than it ever did manual mode or power feed because I can establish the right gear mesh & it stays put. I think that bronze bushing really helped too by removing the lead screw free play that was developing.
 

Attachments

  • IMG_6466_edited-1.jpg
    IMG_6466_edited-1.jpg
    28.5 KB · Views: 20
  • IMG_6459_edited-1.jpg
    IMG_6459_edited-1.jpg
    47.3 KB · Views: 21
  • IMG_6474_edited-1.jpg
    IMG_6474_edited-1.jpg
    30.7 KB · Views: 21
  • IMG_6475_edited-1.jpg
    IMG_6475_edited-1.jpg
    39.7 KB · Views: 21
  • IMG_6476_edited-1.jpg
    IMG_6476_edited-1.jpg
    33.8 KB · Views: 21
  • IMG_6477_edited-1.jpg
    IMG_6477_edited-1.jpg
    40.3 KB · Views: 21
  • IMG_6478_edited-1.jpg
    IMG_6478_edited-1.jpg
    43.7 KB · Views: 22

RobinHood

Ultra Member
Premium Member
But looking at my lathe & mill, seems like they are pressed in? Anybody know where to get these?

Look for “gits ball oiler”. You should be able to find the real ones from Gits Manufacturing; knock-off ones are available from other sources. Motion Industries sells the Gits ones ($$). Yes, the flush mounted ones are pressed in.

Really nice solution and repair.
 

PeterT

Ultra Member
Premium Member
Dang! Thank you. I should have asked that question here a week ago because I was not getting many hits aside from McMaster Carr. Yes, these look like what's on my machines & smaller diameter which is also what I'm after. I saw on a Stefan.G vid where he drilled out his old ones & replaced with fancy-schmanzy red ball (assume euro) ones, but I lost the scent of where he sourced them.

So do you install them with Loctite or something so they withstand the oil injection pressure & don't pop out? I also read something about an installation tool - maybe a tube profile or something to press on the ring. My lathe ones are troublesome but when I had certain components apart I freed them up with thinner. I think they got schmegged up with that waxy orange packing goo they put on new machines, I found it in all kinds of orfices it didn't belong.
 

Attachments

  • SNAG-12-20-2017 0005.jpg
    SNAG-12-20-2017 0005.jpg
    10.4 KB · Views: 3

PeterT

Ultra Member
Premium Member
What I bought on Ali. They cost me a fortune! :) But the way my stuff gets delivered it will arrive Sept-2018 so I was figuring on making my own :/ Ok, I was searching on 'Zerk', maybe that's the issue? Are Gits more orientated to oil? (crazy names!)
 

Attachments

  • SNAG-12-20-2017 0006.jpg
    SNAG-12-20-2017 0006.jpg
    59.4 KB · Views: 12

RobinHood

Ultra Member
Premium Member
The ones you bought will work; the price certainly is right.

The Gits style oilers are just a press fit. No need for locktite. Their bases have a nice bevel which aids in getting them started in the hole. I just took a socket of the correct size and carefully drove them home.

Yes, I did get mine from McMaster-Carr.
 

PeterT

Ultra Member
Premium Member
I meant to add that I also considered the power feed attachment style like the big boy machines favor - where the motor box unit hangs down vertically vs. laying horizontal like mine. I would have preferred that but I see on these larger units they include bevel gear, hardware, shims & other goodies specific to that class of machine that would be hard to replicate on mine. Actually, units like mine look like a bit of afterthought. They lopped off a chunk of the ring casting (that normally would encompass the lead screw) to space it relative to the end of the table. The gear reduction is 2 plain gears - small one in the power unit drives a larger bolt-on.

I don't like the extra weight & stick-out which is another reason why I opted for an 0.5" aluminum end plate vs. steel. I have not detected any bow on my table though. I could improve on their bracket that mounts to the motor body with something more meaty but I'll see how this goes. Hopefully the main PITA issue is dealt with.

I also didn't install the shut-off switch thingy because it conflicts with my homebrew table stop positioner which I really like & use a lot. So I run a bit of risk there when I drive to 7-11 in between power passes. But I did have a hindsight idea - maybe install a brass shear pin in the coupler vs. the 4mm steel roll pin. Details, details...
 

Attachments

  • SNAG-12-20-2017 0008.jpg
    SNAG-12-20-2017 0008.jpg
    93.3 KB · Views: 12

Alexander

Ultra Member
Administrator
Try for a press fit and if the hole accidently goes oversized use green locktight and tell people that's what you meant to do.
 

Alexander

Ultra Member
Administrator
Also shear pins are always a fantastic idea. But if you don't have one the machine always finds a weak link. Do you see what I mean?
576_1513832886614.jpeg
 

PeterT

Ultra Member
Premium Member
I actually saw those but didn't read carefully apparently. "Lot 20" - does that mean 20 in a package or that price for each?

DOH! says right there.
Each bid for 20 PCS!
 

RobinHood

Ultra Member
Premium Member
As Alex mentioned, I would go with a brass shear pin iso the roll pin if you don’t use limit switches. Given the small amount of time required to make one vs the amount of damage a crash can cause: I would opt for the former.

Good methodical approach and solution to an issue caused by marginal factory parts.
 
Top