• Scam Alert. Members are reminded to NOT send money to buy anything. Don't buy things remote and have it shipped - go get it yourself, pay in person, and take your equipment with you. Scammers have burned people on this forum. Urgency, secrecy, excuses, selling for friend, newish members, FUD, are RED FLAGS. A video conference call is not adequate assurance. Face to face interactions are required. Please report suspicions to the forum admins. Stay Safe - anyone can get scammed.

Making an ER32 wrench #2

Janger

(John)
Vendor
Premium Member
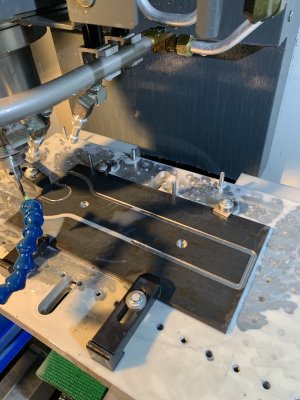
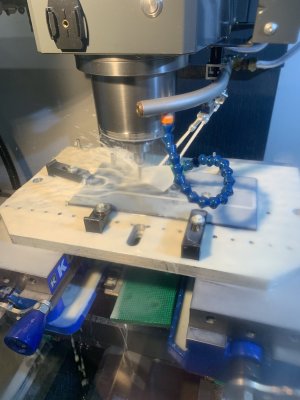
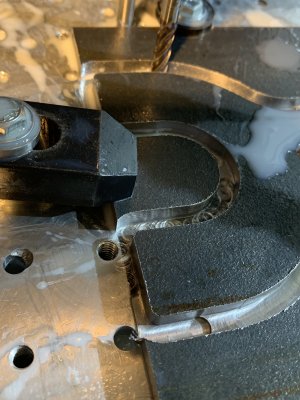
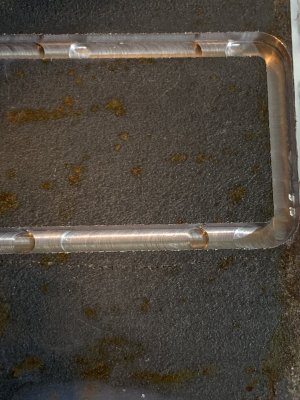
I bought an accusize R8 ER32 collet holder. I have a ER32 wrench that I made, but,... this also needs a flat sided wrench. So I decided to make one out of hot roll 1/4" flat bar - 6" wide as that is what I have in the shop. The machining will be using tabs. I measured the wrench opening at 1.651" more or less. I think it is intended to be 42mm. I decided on 12" long. ER32 collets are supposed to be tightened to 120 ft/lbs. I use a 12" wrench with a 18" extension on the CAT40 tooling for this. I doubt I'll get to 120 ft/lbs but the little R8 mill is not even 1HP so I hope I won't have any issues. EM pullout maybe.


1648932285238.png
1648933138058.png
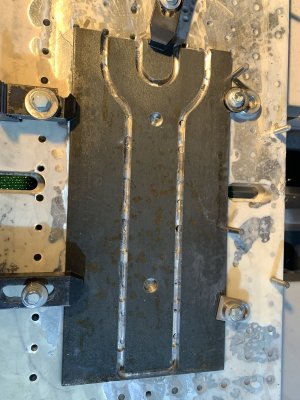
Simulation showing the tabs.
 
Last edited:
Photos in progress.
Picture #2 is verifying the Z axis is configured correctly. XYZ zero coordinates are set. The tool length is correctly measured and set. Here the program moves the tool to 0.6" above the work. I stop the program at that point (single stepping through the cnc code, it's just like debugging). That stair step device lets me verify quickly the tool height is indeed correct. Funny I've never seen anything like that stair step measuring device I made on you tube or anything. People like Titan or Pete have a precision slug of a single height.
 

Attachments

  • 5344206F-94FF-4F39-9F2A-92E5992434EB.jpeg
    5344206F-94FF-4F39-9F2A-92E5992434EB.jpeg
    405.4 KB · Views: 16
  • C2A1324D-DB7A-4B5B-99DB-80E6D2926709.jpeg
    C2A1324D-DB7A-4B5B-99DB-80E6D2926709.jpeg
    375.1 KB · Views: 17
  • 31EE9C94-16D5-4B1C-BFAB-CCC50E8C6B9E.jpeg
    31EE9C94-16D5-4B1C-BFAB-CCC50E8C6B9E.jpeg
    281.1 KB · Views: 16
  • C0E486C3-02C4-4FC5-8523-6D7BFE089E8D.jpeg
    C0E486C3-02C4-4FC5-8523-6D7BFE089E8D.jpeg
    340.4 KB · Views: 14
  • B5D4FCE0-829E-4DBF-ADC1-327F12472B54.jpeg
    B5D4FCE0-829E-4DBF-ADC1-327F12472B54.jpeg
    399.6 KB · Views: 14
  • D8304D9B-01EC-43CE-A325-C7B496D1CC01.jpeg
    D8304D9B-01EC-43CE-A325-C7B496D1CC01.jpeg
    290.4 KB · Views: 14
Last edited:
More pics.
First pic shows the tabs.
You can see in the last photo I am milling to 0.255” depth. Just below the bottom of the material so I get a clean edge.
 

Attachments

  • D6AA8ADB-E4FC-4BEE-8413-1DB6D0A8DCAB.jpeg
    D6AA8ADB-E4FC-4BEE-8413-1DB6D0A8DCAB.jpeg
    422.4 KB · Views: 10
  • 88C6A7A8-E34D-4025-BCBB-BCF60A980CF7.jpeg
    88C6A7A8-E34D-4025-BCBB-BCF60A980CF7.jpeg
    464.3 KB · Views: 10
Looks good John!
I understood from my reading that 3D tabs were easier on the tooling because it's ramping down into the material instead of plunging.
 
More pics. Needs filing and cleaning up.
 

Attachments

  • 864C6FC8-EF8A-4672-B7ED-A71795A3CE73.jpeg
    864C6FC8-EF8A-4672-B7ED-A71795A3CE73.jpeg
    490.9 KB · Views: 14
  • 5C7A4DA8-215D-4A96-9A57-93056673ACD1.jpeg
    5C7A4DA8-215D-4A96-9A57-93056673ACD1.jpeg
    487.8 KB · Views: 14
  • 02ECAE6F-4957-4541-B3A8-23D8E3C83E0A.jpeg
    02ECAE6F-4957-4541-B3A8-23D8E3C83E0A.jpeg
    451.2 KB · Views: 13
  • 35765E9E-C860-4D49-ACF3-9A70E3731BEA.jpeg
    35765E9E-C860-4D49-ACF3-9A70E3731BEA.jpeg
    1,023.7 KB · Views: 14
@David_R8 Tabs are 1/4 wide and 1/16" high. (0.25 x 0.0625)

Note position in Red. I switched from automatic tab placement to manual so I could place a tab on the outside edge of the turning end and also put a tab in the bottom of the throat. The automatic tab placement did not place tabs there and I was worried the EM might grab and pull it up off the table. Probably overly so.


1649035596218.webp
 
That stair step device lets me verify quickly the tool height is indeed correct.
I do this too. It just so happens that the programming department at work rapids the tool to 1.0" and then feeds to .1" before starting the cut. My combination set ruler is about 1" wide and .096 thick. A quick check before turning the coolant on is nice.
 
Threw the wrench in Citrix acid water bath for a week. It came out half clean. Then sanded on the bench sander and further buffed with the die grinder and red 3m wheel. Need to add shop dog engraving to it.

C2FFD0F5-9873-478F-9A85-E74C821E616D.jpegAFAE0C7F-798C-45E2-9649-CBA5CAA73B92.jpeg714404C1-A9F7-4D58-829B-79903EFE68A3.jpeg
 
Back
Top