• Scam Alert. Members are reminded to NOT send money to buy anything. Don't buy things remote and have it shipped - go get it yourself, pay in person, and take your equipment with you. Scammers have burned people on this forum. Urgency, secrecy, excuses, selling for friend, newish members, FUD, are RED FLAGS. A video conference call is not adequate assurance. Face to face interactions are required. Please report suspicions to the forum admins. Stay Safe - anyone can get scammed.

JCDammeyer's 42 projects

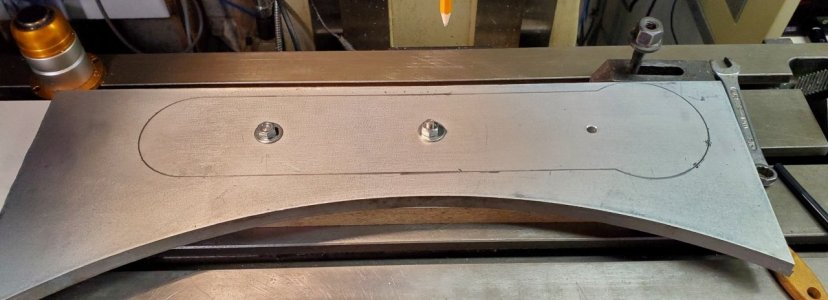
I think this is going to work really well. I put the plate on the posts through the two holes on the right to do the bottom end of the arm profile with a pencil. Then moved the plate over to the right and ran the top end arm profile.

End result isn't going to be any worse than a glued together 3D print of the two halves.
PencilOutline.jpg
 
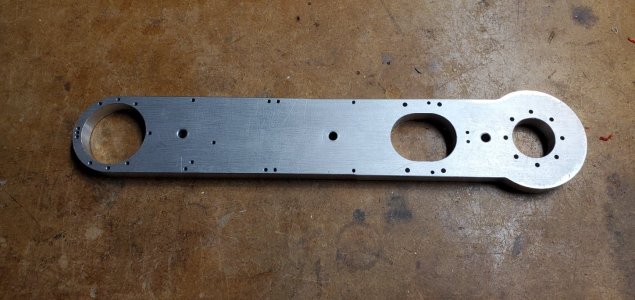
It went so smoothly as the end result shows. Just need to tap the holes. I don't like doing 1/2" thick 3mm tapped holes after having broken a tap on a different piece. As usual the mill backlash results in inaccuracy that fits with the backlash in the Y axis. But all in all it came out really nice.

J2_Arm_AlmostDone.jpg

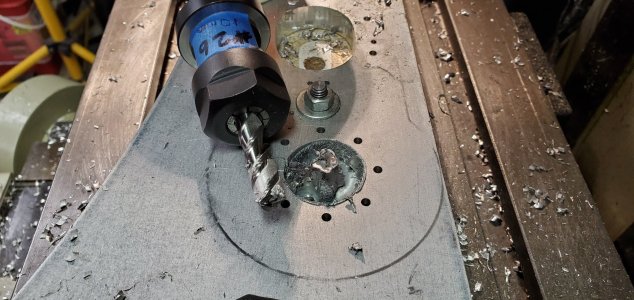
Went smoothly until the last big hole on the right. I was vacuuming the chips as they came out. The mister was making everything wet. Then suddenly no more chips and I'd swear I saw the cutter stop and start as if the TTS holder spun in the collet.

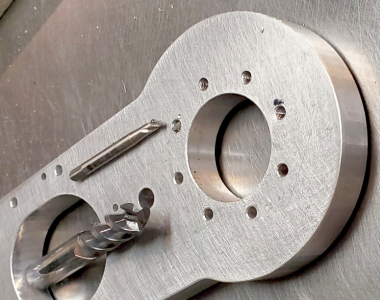
Yes. One casualty from making this arm. Metal melted into cutter.
OneCasualty.jpg

I used my boring tool to finish it off. It ended up being a hair over size by the time I had it round and smooth. Should be alright.
 
Last edited:
Well done John!
Thanks.

The sad part is the 10mm 3 flute end mill. The aluminum melted into it and I can't pry it out. Now that one only cost $20.16 from AliExpress but when I went to reorder that same end mill they now want $123 for it. Very strange.

All in all that pair of pins to align it went really well.
 
Thanks.

The sad part is the 10mm 3 flute end mill. The aluminum melted into it and I can't pry it out. Now that one only cost $20.16 from AliExpress but when I went to reorder that same end mill they now want $123 for it. Very strange.

All in all that pair of pins to align it went really well.
Soak them in sodium hydroxide (lye) for ten or so minutes.
 
Soak them in sodium hydroxide (lye) for ten or so minutes.
Great suggestion. Went through the house. None here. Used to be every house had a bottle of lye. So now I have to make a choice. I may have damaged the cutter trying to pry off the aluminum so spending the same amount as a replacement cutter to salvage a possibly damaged one is ... hmmm ... not a good idea?
But since that last search showed the same milling cutter suddenly 6 times more expensive in just a few months then the lye is a good idea.
 
Soak them in sodium hydroxide (lye) for ten or so minutes.
Worked like a charm. Cdn. Tire for $8.95 crystals. Some distilled water. All done outside. It ate away the aluminum which was literally almost bonded to the milling cutter. All clean. Have to see how well it cuts on something.

Meanwhile how do I remove that broken 4mm tap. Three holes without any problem. Almost all the way through #4 and snap. I guess dremel tool and stone to make it flat. Until I have an EDM machine to remove the metal in the middle I'm screwed.

1779488014719.png
 
I've tried using alum (the kind you buy in the grocery store spice rack area), and it works really slowly (days/weeks), and I found it ended up staining the aluminum and needed to be kept kind of hot and agitated to do anything at all, and that was a 2-56 tap - a fair bit smaller than 4mm.

Maybe one of those carbide tipped drills would be able to do it? Get a 3mm or 1/8" one and have a go at drilling it out? Note carbide tipped, not full carbide as it will probably want to skid off and the carbide will break, a carbide tipped the shank should just flex a little.
Maybe even make a starting drill point with a bigger stiffer carbide or carbide tipped drill.
 
Meanwhile how do I remove that broken 4mm tap.

Walton tap remover. Prolly done a dozen so far. Hasn't failed me yet. Follow directions carefully for best results.

Insert wings as much as possible. Bring collet up as tight as possible. Work slowly - wiggle wiggle wiggle with a bias toward the reverse direction. Wiggle back n forth till it comes all the way out.
 
I've tried using alum (the kind you buy in the grocery store spice rack area), and it works really slowly (days/weeks), and I found it ended up staining the aluminum and needed to be kept kind of hot and agitated to do anything at all, and that was a 2-56 tap - a fair bit smaller than 4mm.

Maybe one of those carbide tipped drills would be able to do it? Get a 3mm or 1/8" one and have a go at drilling it out? Note carbide tipped, not full carbide as it will probably want to skid off and the carbide will break, a carbide tipped the shank should just flex a little.
Maybe even make a starting drill point with a bigger stiffer carbide or carbide tipped drill.
For now I'm going to grin it down so the pointy bit doesn't stick out. Given that there 7 other holes to hold the hub it should be fine.
Walton tap remover. Prolly done a dozen so far. Hasn't failed me yet. Follow directions carefully for best results.

Insert wings as much as possible. Bring collet up as tight as possible. Work slowly - wiggle wiggle wiggle with a bias toward the reverse direction. Wiggle back n forth till it comes all the way out.
Doesn't look like it will work with spiral taps. At least from their website.
 
I tapped the rest of the 4mm holes by hand. Interesting. Depending on how much lubricant at the bottom of the hole the chips suddenly cause a major resistance to turning. Winding the tap back out shows the entire spiral grooves a mass of chips.

Cleaning those out made the last 3 turns or so easy peasy. So I think I was lucky with the first 3 power tapping where the chips were just pushed through or made it up with minimal resistance. However the 4th one jammed and the tap broke.

Now I'm doing the 3mm ones by hand. It requires 3 insert/remove/clean cycles to make it through.

I'm going to guess there is probably some sort of ratio of tap diameter to hole depth for spiral taps. Exceed that depth and spiral or not the chips just can't clear. They start out as 3 spirals out the entry hole but once deeper the spirals vanish and probably break and pack.

Just say'in.
 
Doesn't look like it will work with spiral taps. At least from their website.

My bad, i missed that. I don't own any spiral taps.

I'd still try though. The spiral tap will prevent the followers from fully engaging, but they only need a little bite to do their job.
 
I have also used alum..... dissolve in all you can, warm it up and dissolve in some more. A warm bath works best and yes, patience is key. Mine was a 5/16", it didn’t eat it all, but enough to loosen it up so I could remove with needle nose pliers.......

I wonder if you could make a couple Playdo doughnut dams to contain a few drops of alum to just the tapped hole so as to not mar the finish on the rest of the part.
Does the alum change state? Like will the few drops of alum be changed so would better to like pour some through continuously, maybe with a small pump?
 
Does the alum change state? Like will the few drops of alum be changed so would better to like pour some through continuously, maybe with a small pump?
You want to make a bath for it..... aluminum baking pans work great, the cheap krinkly type are fine.... it was the annealing season, so I elevated it over the wood stove for heat control, as I didn't want it to boil.... I kept up on the water and it took almost a week as I recall. I put the used solution in a plastic jug and put that in the pan on the shelf for next time. From a production perspective, it sucked big time, as an experiment that cost very little and worked as advertised, it was an awesome solution to the problem. Hence, I kept the used stuff, next time, if the part fits with the timing of the seasons etc I won't spend two days pissing around making the job harder. It did discolor the surface, but a quick lick with a d/a sander should fix it up in most cases.
 
You want to make a bath for it..... aluminum baking pans work great, the cheap krinkly type are fine.... it was the annealing season, so I elevated it over the wood stove for heat control, as I didn't want it to boil.... I kept up on the water and it took almost a week as I recall. I put the used solution in a plastic jug and put that in the pan on the shelf for next time. From a production perspective, it sucked big time, as an experiment that cost very little and worked as advertised, it was an awesome solution to the problem. Hence, I kept the used stuff, next time, if the part fits with the timing of the seasons etc I won't spend two days pissing around making the job harder. It did discolor the surface, but a quick lick with a d/a sander should fix it up in most cases.
Picked up some alum. What ratio of powder to water? You said heat water to dissolve as much as possible. Distilled water? Say 250ml of water and then as much alum. Or should I start with 100ml? At $6.99 for a small container I don't want to use too much water and have it not effective.
 
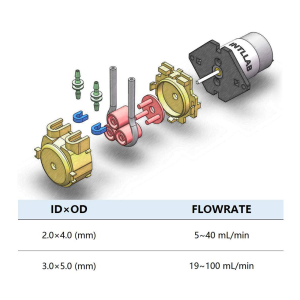
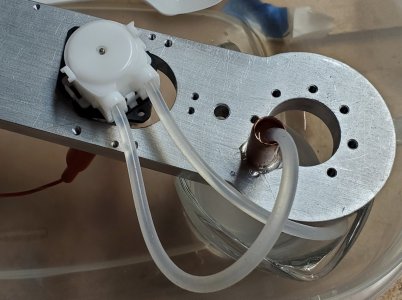
I bought one of these pumps a few years ago to potentially dispense coolant for the mill. Like in small quantities.
1779576456304.png

It's a pretty cheesy piece of kit compared to the more expensive peristaltic pumps but I thought it miht be ideal for supplying the alum mixture to the broken tap.

I run the pump for about 1/2 second and it fills the little copper reservoir hot melt glued to the plate. Takes about 5 minutes to drain so need to set up a timer and relay. The reservoir is a measuring cup with about 1/3 cup that had really hot water to dissolve the alum.

AlumPumping.jpg

We'll see how it goes.
 
Back
Top