• Scam Alert. Members are reminded to NOT send money to buy anything. Don't buy things remote and have it shipped - go get it yourself, pay in person, and take your equipment with you. Scammers have burned people on this forum. Urgency, secrecy, excuses, selling for friend, newish members, FUD, are RED FLAGS. A video conference call is not adequate assurance. Face to face interactions are required. Please report suspicions to the forum admins. Stay Safe - anyone can get scammed.

JCDammeyer's 42 projects

Sure, lots of industrial products are offered as either domestic or import versions. In my world, Watts offers domestic or import butterfly valves, Ebro offers either made in Germany or made in Thailand, Crane makes commodity valves in China or specialized valves in the USA. I think it’s mostly consumer products that have gone 100% offshore, lots of industrial stuff is still made here and industrial buyers recognize the value in buying domestic-made or European-made products. If your $1M per day paper mill is heavily dependent on keeping running 24/7 it makes sense to spend the extra to get domestic stuff, even if the only quality difference between domestic and offshore is how long it will take to get repair parts if something breaks.
Right. So maybe industry specific as to the demands, and that's a fair point consumers may only care about dollars. Industry might wince at the dollars but it keeps the factory running and outweighs the input cost

Good point
 
Right. So maybe industry specific as to the demands, and that's a fair point consumers may only care about dollars. Industry might wince at the dollars but it keeps the factory running and outweighs the input cost

Good point
Think of this product... it is a container. It is large enough to hold people. It has wheels on the 4 corners and can be controlled to move from point A to point B.

Many are virtually the exact same size and have the same capabilities but the cost between two different suppliers varies widely. And yet both stay in business mostly because of the sheer demand and volume.

Now move into the little house where that container is supposed to sit. (Blasphemy actually. Those places should only be for shops and tools). Anyway, given that there are foundries and machine shops in North America why is this type of product not made in North America?


I believe it comes back to volume. China has 1.4 billion people under one single government and next door India has 1.47 billion also under one government. North America has 610 million or so but spread out over 3 countries and different style governments.

Japan would have small little manufacturers on the ground floor and the family would live on the upper floor. They'd bring bags of little parts that they stamped out over to Toyota or some other car manufacturer.

Here we don't look at building things that way and as the population who could do that ages out it's easier to buy from China.
 
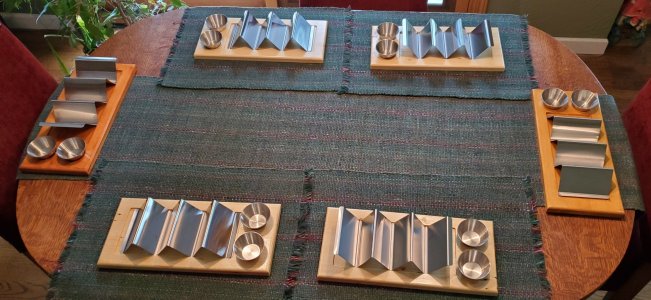
Different subject. Back when we vacationed in Mexico over Christmas a few of the places served Tacos in these metal frames sitting on boards.

1778211176767.png

The metal frames and metal cups are available from Amazon and Cdn Tire and places like that. But not the boards. So here's the evolution to create a birthday gift for my wife since she's the fish taco fan.

Started with a 3D printed model as two pieces glued together. Then bought some spruce 1x4s cut into shorter pieces (too short by 3/4" but that's another story) and then used the jointer for the first time in years on the edges to be able to glue two pieces making one almost 7" wide.

Then through the surface planer and table saw to square off one end, to width and the jointer again clean up the sawn side.

Next into the JGRO CNC router. Too much dust so one of the 42 projects was finished to make the dust shoe easily removable and installable.

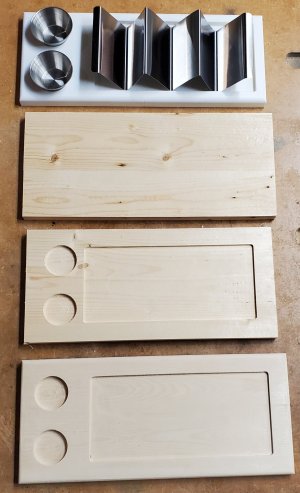
And this where it sits now.
Progress-1.jpg

I'm finding the spruce is really too soft. Should have splurged for maple but this cost $18 and the closest maple in the size I needed was closer to $100.

Because I cut the original pieces a tad too short I'm playing around with where I put the two cup holes.
 
Different subject. Back when we vacationed in Mexico over Christmas a few of the places served Tacos in these metal frames sitting on boards.

View attachment 81954

The metal frames and metal cups are available from Amazon and Cdn Tire and places like that. But not the boards. So here's the evolution to create a birthday gift for my wife since she's the fish taco fan.

Started with a 3D printed model as two pieces glued together. Then bought some spruce 1x4s cut into shorter pieces (too short by 3/4" but that's another story) and then used the jointer for the first time in years on the edges to be able to glue two pieces making one almost 7" wide.

Then through the surface planer and table saw to square off one end, to width and the jointer again clean up the sawn side.

Next into the JGRO CNC router. Too much dust so one of the 42 projects was finished to make the dust shoe easily removable and installable.

And this where it sits now.
View attachment 81955

I'm finding the spruce is really too soft. Should have splurged for maple but this cost $18 and the closest maple in the size I needed was closer to $100.

Because I cut the original pieces a tad too short I'm playing around with where I put the two cup holes.
And now I'm hungry.
 
What's the sauce? Referring to your first post on this, obviously you could use whatever you'd like
From:

3. Combine all the Taco sauce ingredients: 1/2 cup sour cream, 1/3 cup Mayo, 2 Tbsp lime juice (from 1 medium lime), 1 tsp garlic powder, 1 tsp Sriracha sauce, or to taste in a medium bowl or a large measuring cup and whisk together until well blended.
 
Connected up the ReoLink Argus 3 Camera+Solar Panelthat I picked up heavily discounted at London Drugs. Really don't like being on tall ladders anymore. Not sure the Solar Panel will be effective. So many trees.
And as yet although the PIR motion detection works within the small range it can see, the ability for the software to scan the image and detect motion doesn't seem to be working. And this particular model also requires a hub for connecting to Home Assistant.

Argus 3 Ultra-20260514_202919.jpg

Anyway, we'll see how it goes. The upside of the ReoLink is it doesn't require any sort of cloud subscription compared to all the other ones out there. The Blink camera from Amazon wants a certain amount per month for better motion detection and playing videos when we're out of the country. More when I learn more.
 
Hi John,

That is about the same as my TP-Link, TAPO camera except no motion activation, it runs 24/7 and fills an SD card, overwriting it when full.
 
Hi John,

That is about the same as my TP-Link, TAPO camera except no motion activation, it runs 24/7 and fills an SD card, overwriting it when full.
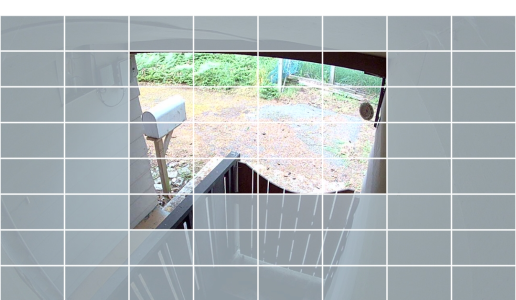
This is the Logitech Alert Commander which was essentially trashed even though the cameras were still good because Adobe Flash Player was discontinued. The areas in the squares are where motion is detected. The camera is powered via power over ethernet and the original connection on this camera was powerline networking until that unit failed. Now it's directly wired to an ethernet switch.

1778862784655.png

The Amazon BLINK camera (subscription require for AI motion detection) is done this way. We can see the mail and package delivery without too many false readings from critters like a black and white cat.
1778863348817.png

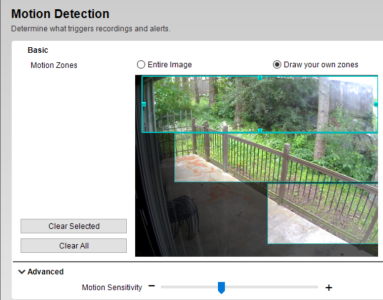
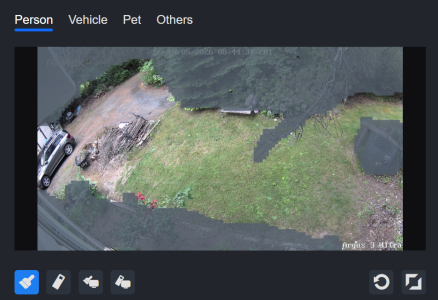
The Reolink is interesting in that you paint over the area you don't want in the detection zone. But because it's battery operated the PIR has to first see something and then the AI takes over.

1778863556931.png

Jury is still out whether I'll have enough sunlight to charge the battery.
 
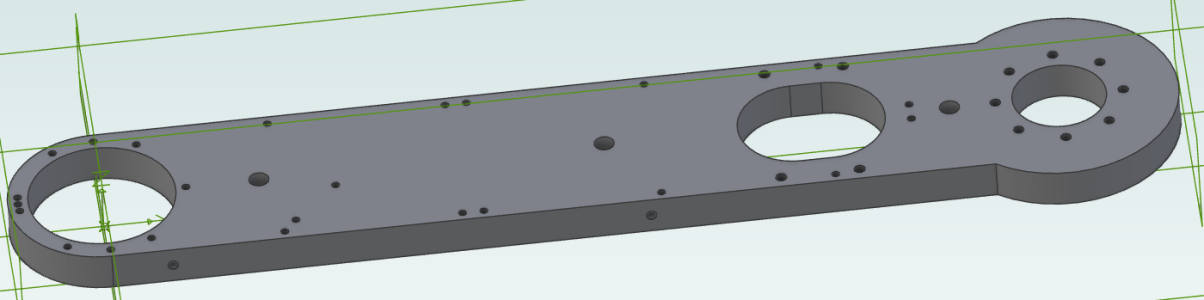
Back to the AR3 Robot arm. I need to machine this:
1778954557686.png
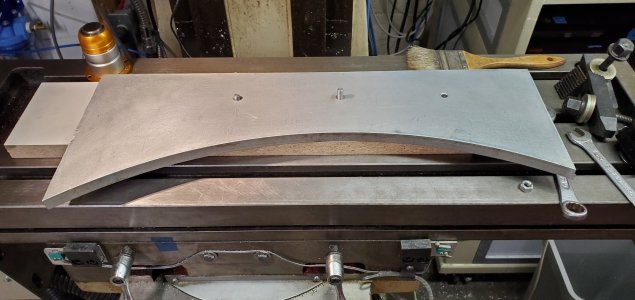
The problem is that it's longer than the X motion of my mill so I need to mill it in two operation sets and keep it properly aligned. I think my approach may be overkill but with the ACME lead screws and backlash may well be the best alignment method. I've put all the info into the attached PDF as a user instruction manual to myself.

First step will be to make the alignment pins.
 

Attachments

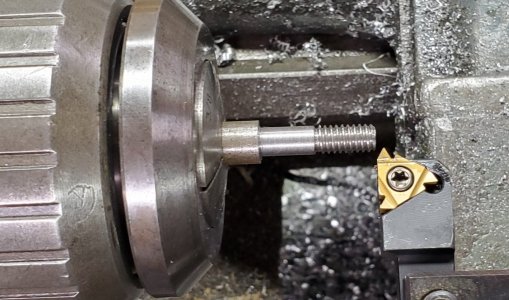
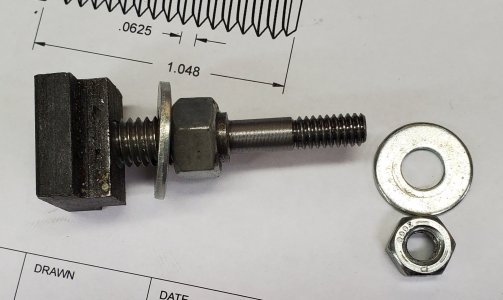
So here's the first of the two clamp studs. Only mistake is misreading (or forgetting) and making the overall length about 0.2" too short. Should be fine.

First the top turned down to exactly 0.25" and then the threaded length a tad thinner. Then 20 TPI for 0.5" threading.
TopClampThread.jpg

Cut it short and mount the 1/2" part now in a 1/2" collet and remove 0.002" just to clean it up and make it round. Then 16 TPI for 1.048" and it's done. Oh and edges were bevelled before threading.

FirstClampDone.jpg

Love my ELS. But for the last pass of the 1/4" registration section I should have dropped down to 0.003" per rev instead of leaving it at 0.010" per rev.
 
Before I make the second one or two more the correct length I thought I'd try the fit first.
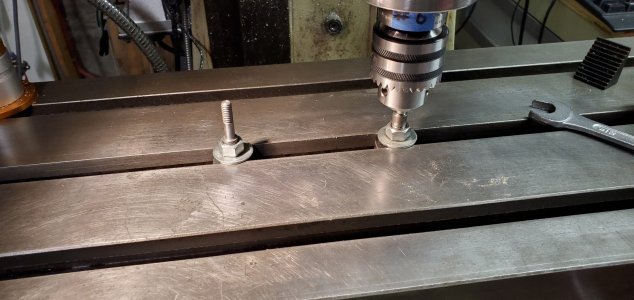
The BitsAndPieces.jpg

The hole on the bottom clears the nut and washer. I think the washer should be a bit bigger in diameter but it's really just required to hold the alignment pin in place. Not a lot of pressure on the T-Nut.

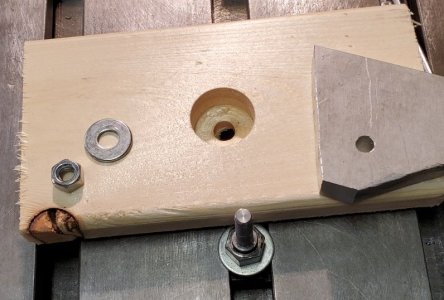
ReadyForPart.jpg

I drilled the 1/4" hole undersize and then reamed it to 0.25". It's a sliding close tolerance fit on the pin. The nut and washer help hold it in position but I believe it would still be smart to have additional clamps.

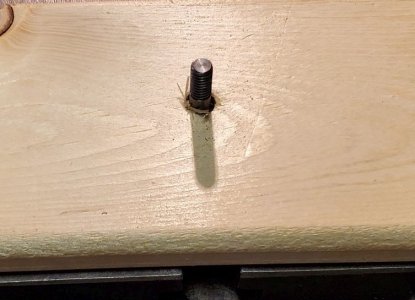
RegisteredOnPost.jpg
 
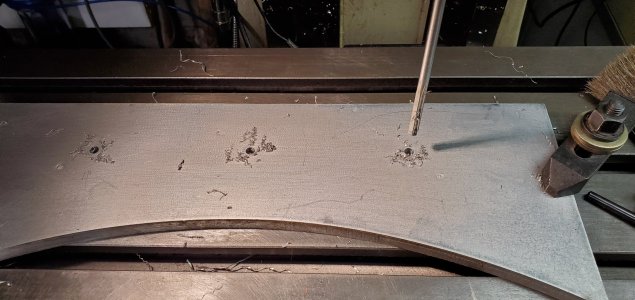
Being very careful always approaching from the left to make sure backlash isn't an issue I drilled and reamed the alignment holes.
GuideHoles.jpg

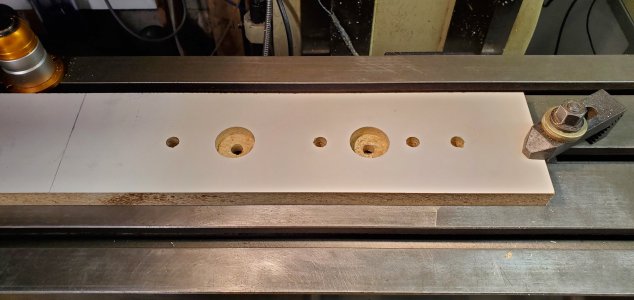
Then set up where the recessed and clamp down holes would be on the backing board.
BackingBoard.jpg

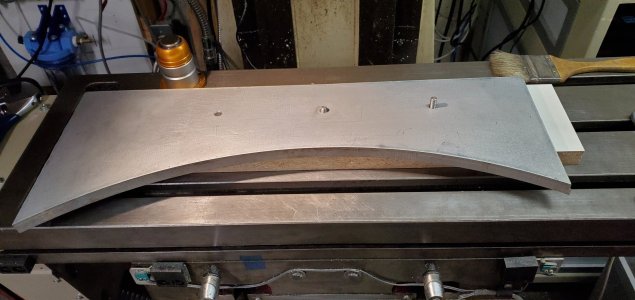
To set the exact spot of the pins I put one in at X==0.000 and then moved to 3.441" and held it there and tightened it down.
AligningPins.jpg

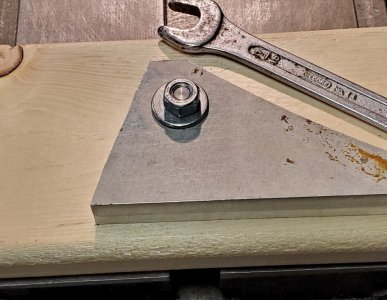
I might try it with an R8-1/2" collet instead. But I'm finding the holes I drilled so carefully are almost but not quite aligned. Could be the T-Nuts don't hold them perfectly perpendicular. Might have to make custom T-Nuts. Don't really want to enlarge the alignment holes.
 
So with a lot of fussing around last night I gave up. Then this morning I tried again and the fit is perfect. Close enough for my milling abilities.

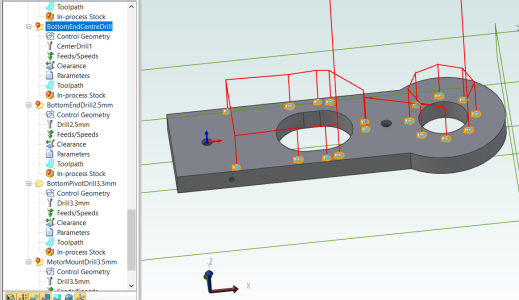
Now to make sure the CNC files are correct with respect to a home position.
 

Attachments

  • BottomEndCaptured.jpg
    BottomEndCaptured.jpg
    398.1 KB · Views: 2
  • TopEndCaptured.jpg
    TopEndCaptured.jpg
    410.4 KB · Views: 2
Back
Top