• Scam Alert. Members are reminded to NOT send money to buy anything. Don't buy things remote and have it shipped - go get it yourself, pay in person, and take your equipment with you. Scammers have burned people on this forum. Urgency, secrecy, excuses, selling for friend, newish members, FUD, are RED FLAGS. A video conference call is not adequate assurance. Face to face interactions are required. Please report suspicions to the forum admins. Stay Safe - anyone can get scammed.

JCDammeyer's 42 projects

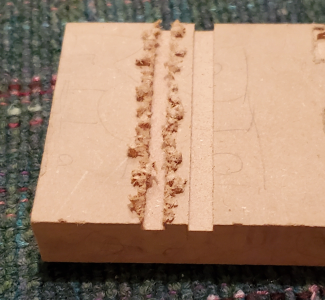
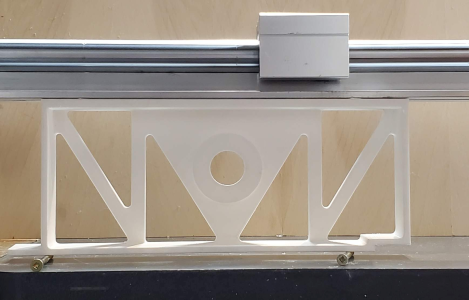
Wow. What a difference. On the left standing spiral up cut router bit. On the right the new one.

RPM 18000, 45 IPM and 0.110 depth of cut.

1773717509635.png

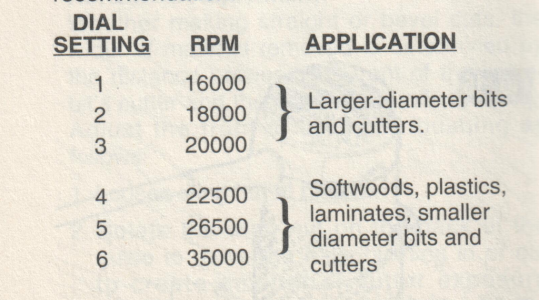
I really could run a much higher RPM.

1773717580404.png

Suggestions? Stay at 18,000 or move up?
 
Wow. What a difference. On the left standing spiral up cut router bit. On the right the new one.

RPM 18000, 45 IPM and 0.110 depth of cut.

View attachment 79706

I really could run a much higher RPM.

View attachment 79707

Suggestions? Stay at 18,000 or move up?
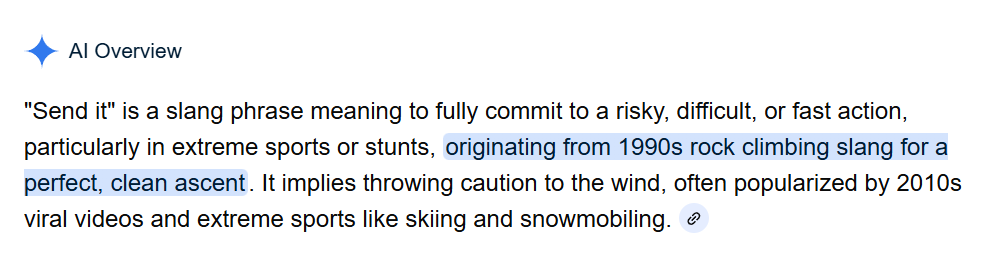
SEND IT!

disclaimer ( I know nothing about high speed upsy downsy router bits and will accept no liability for injuries received from flying carbide dohickeys)
 
Send it????

I believe it's a reference to sniper function. The spotter sets the trajectory parameters (windage, elevation, etc) and the sniper pulls the trigger on the send it command.

He prolly means the parameters are good. Start cutting product.

I Agree. Your right cut looks GREAT - even when I zoomed in as far as your photo allowed!

Never let the perfect be the enemy of the good...... Send it!
 
Send it????
1773774734503.png

Didn't know where it originated but this description 100% matches how it's been used in my experience (aside from shipping parcels).

Not sure what your router looks like rigidity wise, but those feeds/speeds are somewhat conservative for aluminum cutting let alone MDF. Although the video below is a single flute upcut, not sure how the compression bit affects chip evacuation.

 
Not ridged at all. Does have ball screws now. It's project #42 for upgrading. Already have the linear bearings.
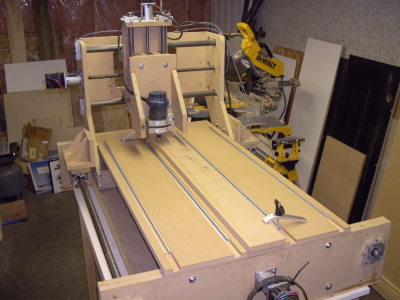
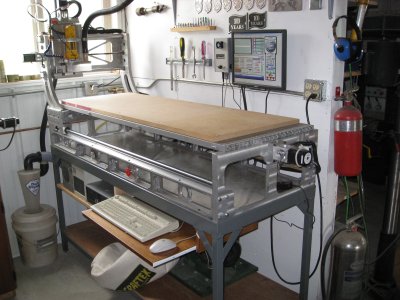
Looks something like this.
In Sooke right now. No photos on my phone.
 
Here's mine.
That's a nice router but I think you're right that it's not rigid enough for the cuts I posted. Still, I think you could push the feedrate/RPM a bit more without concern. I've found On CNCs generally you can hear when the cut goes from "happy" to "that's pushing it" to "that's too fast" all well before the bit breaks.

Does your control have a feedrate override? Usually expressed as a % of original feedrate. They're useful for dialing in the performance on new tooling.
 
That's a nice router but I think you're right that it's not rigid enough for the cuts I posted. Still, I think you could push the feedrate/RPM a bit more without concern. I've found On CNCs generally you can hear when the cut goes from "happy" to "that's pushing it" to "that's too fast" all well before the bit breaks.

Does your control have a feedrate override? Usually expressed as a % of original feedrate. They're useful for dialing in the performance on new tooling.
The main problem with it from the perspective of rigidity is the two long 1" steel bars. Chris MacKay did the math for me after I told him how much the gantry assembly weighed. He came up with 0.036" deflection at the mid point. I measured it and he was dead on.

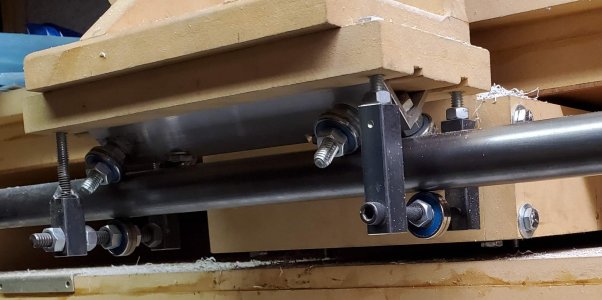
The rollerskate bearings on the angle, even with a keeper wheel below also allow the gantry to twist which is another area of no rigidity. Recall that when this design was first posted in around 2005 there were no cheap linear bearings etc. A commercial unit was well over $6000 in the year 2006. This one cost me less than $500 around 2010.

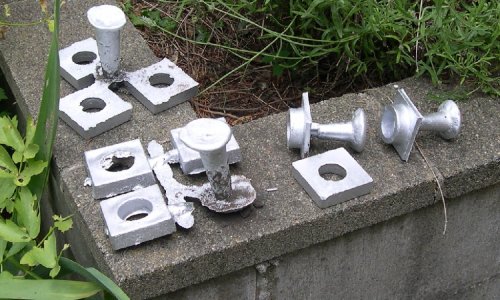
My bed is actually a 3" thick torsion box. Sorry. No photos of that. For the rails the general idea is like this 3D printed pattern cast in metal to hold the new linear rail and bearings. Again Chris M. worked out how tall the assembly had to be to have less than 0.001" deflection. And of course the linear bearings would ensure less deflection.

1773853047205.png

One day I will get back to casting. I did so much of it back 16 years ago.

More_JGRO_Parts.jpg

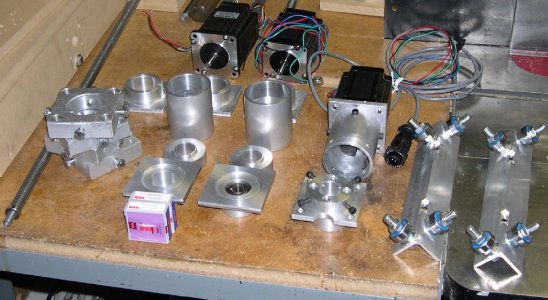
Parts were milled or turned on the lathe. All the mounting holes done with the rotary table controlled y my ELS so hole position were the same and the parts are interchangeable.
CNCDriveParts.jpg

I did add clamp wheels which helped reduce the twisting but it didn't eliminate it.

AlternativeBearing.jpg

So many projects. So little time.
 
Yahoo! My Wimberley lathe tool holder is on the way. Many years ago I received a prototype and a letter that said when the production version was available I could exchange it.

Dug it out a couple of weeks ago and sent the original back. Just got an email and tracking number for the replacement. The prototype worked really well and the HSS tool bit was easy to sharpen.


Yahoo! My Wimberley lathe tool holder is on the way. Many years ago I received a prototype and a letter that said when the production version was available I could exchange it.

Dug it out a couple of weeks ago and sent the original back. Just got an email and tracking number for the replacement. The prototype worked really well and the HSS tool bit was easy to sharpen.


I've lusted over the Eccentric Engineering tangential toolholder but couldn't bring myself to spend the cash. This looks similar in design but is significantly less expensive.
 
I've lusted over the Eccentric Engineering tangential toolholder but couldn't bring myself to spend the cash. This looks similar in design but is significantly less expensive.
I bought one of the EE 1/2” right-hand holders years ago, and bought a left-hand about 6 months ago. Now they’re my go-to tooling, but I just looked at the current pricing and the cost is insane!

Tangential isn’t good for super-heavy hogging cuts, but great for regular day-to-day stuff and fine finishing.
 
Wow, I have a set of L/H & R/h 16mm(5/8") Eccentric Engineering tool holders, I do love them.
I just looked at the Wimberley tool holder and it holds the tool bit differently than the EE, more traditional I'd say. The biggest advantage the EE has over it is dead simple tool bit sharpening. Looks rather complicated to sharpen the Wimberley.

This got me to wonder how much I did pay and when for the pair of EE holders and sharpening jig ...
the answer:
June 2015 for $235 +$38 Australian dollars, shipped. (current price is $394.90 Australian dollars - without shipping).
The CAD to AUS exchange is pretty close right now so that is eye watering. I checked and the exchange rate is almost exactly the same today as it was back then.. Inflation hurts (~70% in 11 years).
I must have felt wealthier back then...

 
Wow, I have a set of L/H & R/h 16mm(5/8") Eccentric Engineering tool holders, I do love them.
I just looked at the Wimberley tool holder and it holds the tool bit differently than the EE, more traditional I'd say. The biggest advantage the EE has over it is dead simple tool bit sharpening. Looks rather complicated to sharpen the Wimberley.

This got me to wonder how much I did pay and when for the pair of EE holders and sharpening jig ...
the answer:
June 2015 for $235 +$38 Australian dollars, shipped. (current price is $394.90 Australian dollars - without shipping).
The CAD to AUS exchange is pretty close right now so that is eye watering. I checked and the exchange rate is almost exactly the same today as it was back then.. Inflation hurts (~70% in 11 years).
I must have felt wealthier back then...
It's not really complicated to sharpen the tool bit. However compared to when I first got it the description has changed a bit. Still when it arrives I have a tool bit to sharpen so I'll take a stab at the new method. I've always found this tool leaves a nice surface finish.

They are easy to make. Start with a bigger chunk of steel and mill away everything you don't need.
 
It's not really complicated to sharpen the tool bit. However compared to when I first got it the description has changed a bit. Still when it arrives I have a tool bit to sharpen so I'll take a stab at the new method. I've always found this tool leaves a nice surface finish.

They are easy to make. Start with a bigger chunk of steel and mill away everything you don't need.
I've done that, but my home-made eccentric doesn't work as well as the store-bought EE version. Could be my particular eccentricity is not quite up to the task.
 
Back
Top