I’m thinking I may not need vector just the correct dimensions. On the larger plate there is just too much to trace or start from scratch. I really don’t need to change the size and the largest plate is about 10” x 8”, lots of detail. This would after cleaning up scratches etc. be printed onto overhead, clear, projector plastic. I think I would print in the negative as I want the lettering to etch not the background.
-
Scam Alert. Members are reminded to NOT send money to buy anything. Don't buy things remote and have it shipped - go get it yourself, pay in person, and take your equipment with you. Scammers have burned people on this forum. Urgency, secrecy, excuses, selling for friend, newish members, FUD, are RED FLAGS. A video conference call is not adequate assurance. Face to face interactions are required. Please report suspicions to the forum admins. Stay Safe - anyone can get scammed.
-
Several Regions have held meetups already, but others are being planned or are evaluating the interest. The Calgary Area Meetup is set for Saturday July 12th at 10am. The signup thread is here! Arbutus has also explored interest in a Fraser Valley meetup but it seems members either missed his thread or had other plans. Let him know if you are interested in a meetup later in the year by posting here! Slowpoke is trying to pull together an Ottawa area meetup later this summer. No date has been selected yet, so let him know if you are interested here! We are not aware of any other meetups being planned this year. If you are interested in doing something in your area, let everyone know and make it happen! Meetups are a great way to make new machining friends and get hands on help in your area. Don’t be shy, sign up and come, or plan your own meetup!
You are using an out of date browser. It may not display this or other websites correctly.
You should upgrade or use an alternative browser.
You should upgrade or use an alternative browser.
Enterprise 1550 Rebuild
- Thread starter Sailor
- Start date
Chipper5783
Super User
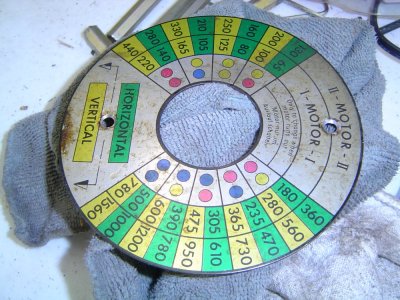
I made a new speed indicator plate for my Maho mill, with an approach similar to what you were thinking / PeterT suggested. The original plate had black lines and number on a silver back ground, then colours for different options - in my zeal for cleaning I washed the colour off (the lines were not effected). I had taken pictures first, so I knew what it needed to look like. I scanned the plate, and imported the image into MS paint, then I repaired all the lines, then I "poured" in colour (which in MS paint fills only the bound region). I printed many copies to get the colours as close as possible. Finally I printed onto a sheet of mostly transparent Avery label material. I made a new aluminum plate. The result was great (now I'm thinking the feed indicator plate - that is original - needs to be renewed, it looks sort of shabby!).
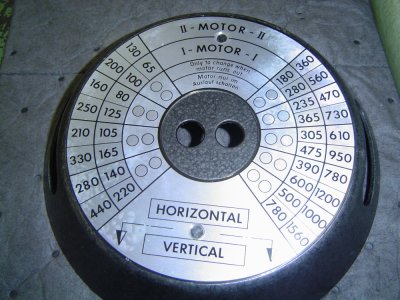
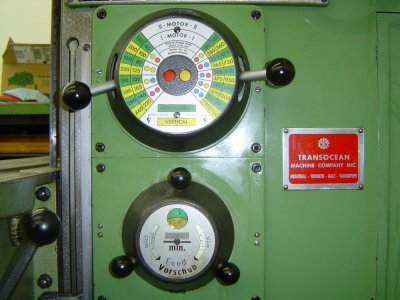
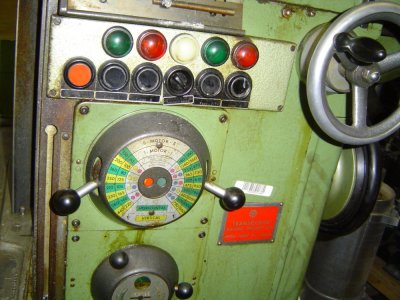
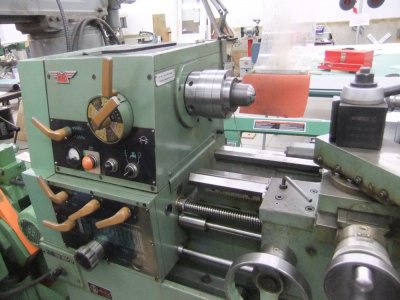
The first picture is the plate prior to me "cleaning" it, then the "cleaned" plate, finally pictures of after and before on the machine.
The first picture is the plate prior to me "cleaning" it, then the "cleaned" plate, finally pictures of after and before on the machine.
Attachments
Chipper5783
Super User
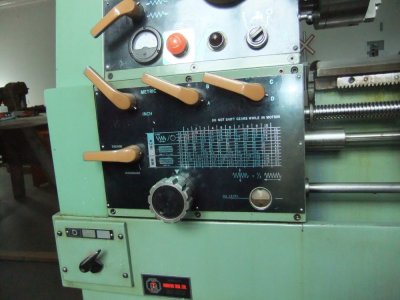
Probably all of them just to make it look good. I was thinking of doing it on brass with black lettering, less chance for scratching background paint off. I have to ask you as well what the gauge is and the two buttons beside the emergency stop. Mine were both broken or missing. I suspect one, because of the wiring, appears to be a motor reverse and the second an override for safety guard.
Last edited:
Chipper5783
Super User
I printed on a "semi-transparent" label (cruised the label shelf at Staples). I used the printer at work in colour mode (it is a good enough printer, but not really anything super special). The image was just a .jpg or a .tif (I don't recall - it doesn't really matter, it is just an image).
Chipper5783
Super User
Most of these small Enterprise lathes that I have seen, pretty well all have indicator plates that are hard to read. My indicator plates are pretty well pristine - since the lathe was very nearly new when I bought it in 1983. I've always been a home shop guy, and there have been years at a time when the lathe was not used at all. In otherwords, mostly one owner, never worked hard and babied. Still the plates are deteriorating - the threading dial is nearly impossible to read. Whatever technology they used for marking the plates was not very durable.
You did a really nice job Chipper5783.
Actually the graphic type software is probably more suited to the task because it has tools for lines, fonts, fill colors. I think I know the adhesive product you are referring to. You can load sheets into color printers, print the image, peel & stick. I think the sign making people have upscale materials for exactly this task. I've seen color or white vinyl background or B&W on clear which looks like what you did on the buffed metal surface?
Actually the graphic type software is probably more suited to the task because it has tools for lines, fonts, fill colors. I think I know the adhesive product you are referring to. You can load sheets into color printers, print the image, peel & stick. I think the sign making people have upscale materials for exactly this task. I've seen color or white vinyl background or B&W on clear which looks like what you did on the buffed metal surface?
I made a new speed indicator plate for my Maho mill
Very nice work! More mill pics please! it looks very nice!
Most switches are of the cookie cutter/Lego variety. Check how they are configured on the back as was mentioned PA has some or DigiKey has much better selection if you have something that is not generic, but they are pricey. Good luck with the restoration.Some missing or broken switches. If anyone has a source for these I would appreciate it.
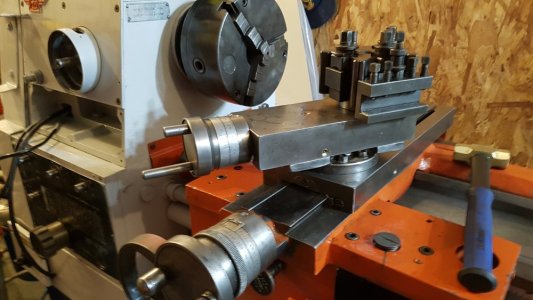
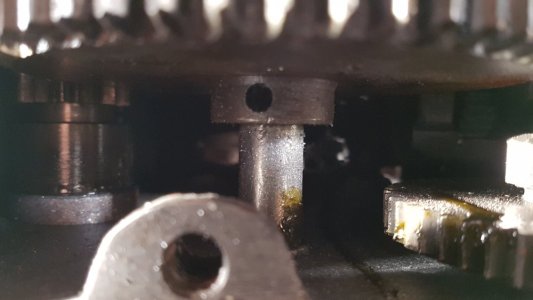
Well everything was going so well you know it can’t last. Started back on the lathe putting stuff together and back on yesterday and today. All the slides were moving so nice until the apron stopped but the handle kept moving. I sheared a pin on one of the gears?? One of the few pins or bolts I didn’t replace. So the picture is my triumphant celebratory pic of a great day. It’s apart again and the gear has turned on the shaft so having a terrible time finding the hole. I quit, maybe I’ll drill half out so I can turn the shaft and see the hole. Darn
Attachments
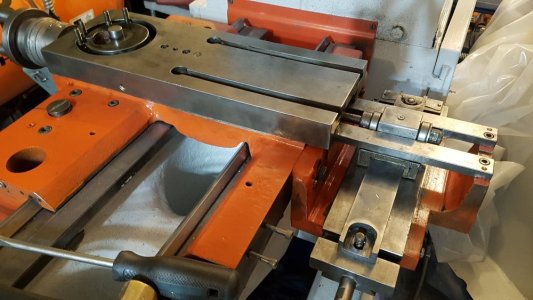
I got that pin out, had to drill. Must have sharpened that bit 6 or 7 times so it stayed true. It took quite awhile . Drilled the first half then located the hole and still had to drill till I was through shaft. As you can see in photo lots of fillings to clean out, think I’ll flush it.
Ended up taking the bottom off apron and flushing. Need to cut another gasket and get a new pin for gear.
Ended up taking the bottom off apron and flushing. Need to cut another gasket and get a new pin for gear.
Attachments
Last edited:
I think it started with a little paint settling around the forward/reverse bar. I thought I had cleaned everything but must have missed some. Anyways the pin must have been ready to fail since I wasn’t overly forceful. After getting the pin out I put a temporary pin in and it still wouldn’t move till I cleaned around bar.
Chipper5783
Super User
Hi Randy, how are you making out on the Enterprise lathe? David