How wide is your press ?That technology is fascinating!
-
Scam Alert. Members are reminded to NOT send money to buy anything. Don't buy things remote and have it shipped - go get it yourself, pay in person, and take your equipment with you. Scammers have burned people on this forum. Urgency, secrecy, excuses, selling for friend, newish members, FUD, are RED FLAGS. A video conference call is not adequate assurance. Face to face interactions are required. Please report suspicions to the forum admins. Stay Safe - anyone can get scammed.
-
Several Regions have held meetups already, but others are being planned or are evaluating the interest. The Calgary Area Meetup is set for Saturday July 12th at 10am. The signup thread is here! Arbutus has also explored interest in a Fraser Valley meetup but it seems members either missed his thread or had other plans. Let him know if you are interested in a meetup later in the year by posting here! Slowpoke is trying to pull together an Ottawa area meetup later this summer. No date has been selected yet, so let him know if you are interested here! We are not aware of any other meetups being planned this year. If you are interested in doing something in your area, let everyone know and make it happen! Meetups are a great way to make new machining friends and get hands on help in your area. Don’t be shy, sign up and come, or plan your own meetup!
You are using an out of date browser. It may not display this or other websites correctly.
You should upgrade or use an alternative browser.
You should upgrade or use an alternative browser.
DavidR8's shop shenanigans
- Thread starter David
- Start date
12" exactlyHow wide is your press ?
What size are the columns at the corners ?12" exactly
(Those supports define a lot of the capacity of the press)
They are 5/8” rod.What size are the columns at the corners ?
(Those supports define a lot of the capacity of the press)
Oh wait are you asking about the press or the brake?
If it’s the press, it’s a 20-ton press. The columns are 3/16” C-channel with 19-1/2” between them
I did something similar. I imagine with much smaller holes repeated you can simulate the knurling but for all intents and purposes I found what you did more than adequate for the drawings.I have an Incra box joint jig that is missing some 1/4-20 knobs.
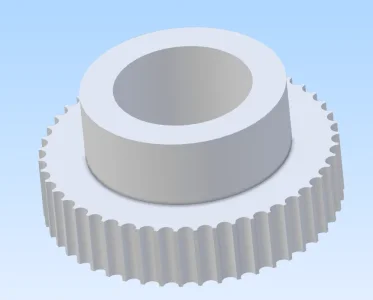
Drew this in Alibre but was stumped on how to draw the knurling.
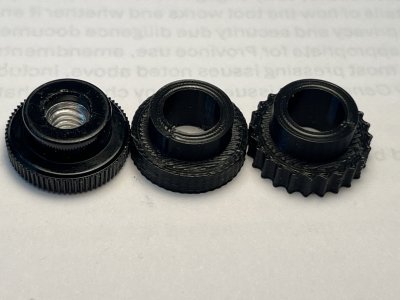
The knob is 19mm across the largest diameter so I made a circular pattern of 1mm holes centered on the edge and trimmed off the excess.
View attachment 48484
The challenge is printer resolution. After I printed the first one with 1mm holes I found the 'knurl' is not aggressive enough to adequately grip.I did something similar. I imagine with much smaller holes repeated you can simulate the knurling but for all intents and purposes I found what you did more than adequate for the drawings.
Trying again with 2mm holes.
Thanks Len!Looks good David !!
Did you insert a ‘threaded‘ sleeve into the printed knob ?
Yes, I have some inserts on order.
That's not really possible because there's no clearance above the print bed for the nut. My print nozzle runs above the bead about the thickness of a sheet of printer paper.I don’t know much about 3d printers, but couldn’t you print the knob around a rivet nut to get your 1/4-20 insert?
The inserts I use are heat set into the plastic with a soldering iron, works really well and is very quick to do.
Add MACH3 to your new press brake. I love the two guides for his corner notcher.
Hard to believe these drawings for the computer controlled back fence for my 3:1 tool are dated 2007. Not yet completed because the project for the bench for the tool to sit on is incomplete. I was going to write some new software for my ELS to control the back fence position so I could jog through a series of positions. Bend. Jog to the next one. Bend. (or shear).
The bench was to hold the corner notcher, 3:1 tool and the 3 Ton press with XY positioning for CNC controlled hole punching or nibbling.
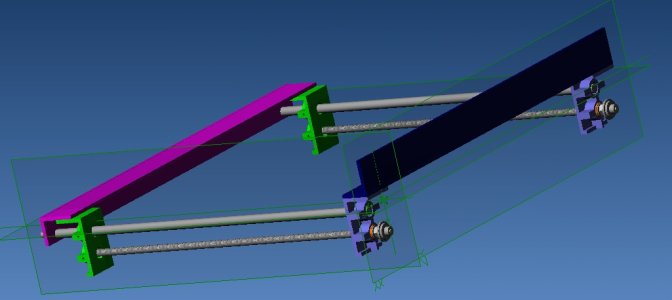
So many things to do...
The bench was to hold the corner notcher, 3:1 tool and the 3 Ton press with XY positioning for CNC controlled hole punching or nibbling.

So many things to do...
This is the drive assembly that has a sprocket on the RHS and couples to the lead screw on the LHS. The two sprockets will be connected with a chain and a stepper motor that drives the chain. The lead screw pulls the the other two brackets and the fence. The fence has an upper and lower part for the shear or the bender.Hard to believe these drawings for the computer controlled back fence for my 3:1 tool are dated 2007. Not yet completed because the project for the bench for the tool to sit on is incomplete. I was going to write some new software for my ELS to control the back fence position so I could jog through a series of positions. Bend. Jog to the next one. Bend. (or shear).
The bench was to hold the corner notcher, 3:1 tool and the 3 Ton press with XY positioning for CNC controlled hole punching or nibbling.
View attachment 48515
So many things to do...
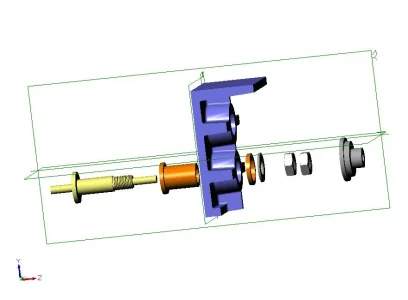
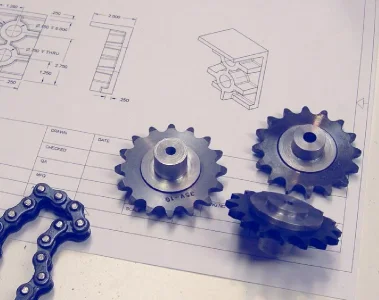
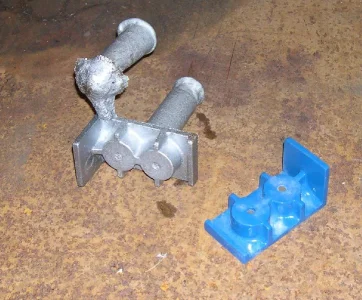
The brackets are cast but not machined. The sprocket hubs are complete but never did get to the couplers or drive shafts etc.
140mower
Don
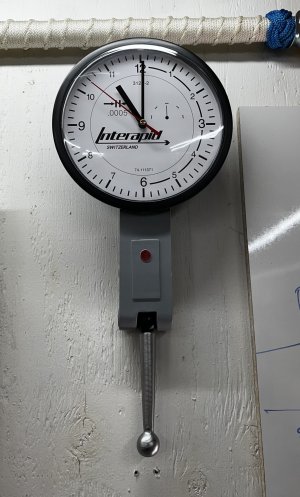
..... looks to be good to half a thou of a second ... Be careful, if you tell the wife that you will be back in half a second, she's going to know that you are bs'ing....🙄My new, precision shop clock.
View attachment 48584
Be careful David.
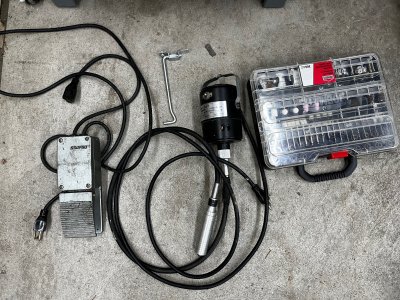
Those rotary tools can be dangerous !!
We don’t want to read about any accidents.
Hopefully that foot-switch does not act like an accelerator pedal - LOL.

