I think so, we usually test out some of our new purchases pretty quickly after getting them AND Tom always tends to hand me the less expensive tools to use when I am unsupervised. I do know this is not the usual DTI Tom uses and doesn't typically let me use if he is not hovering over me.
He also handed me that case of carbide insert end mills to use to cut the slot.
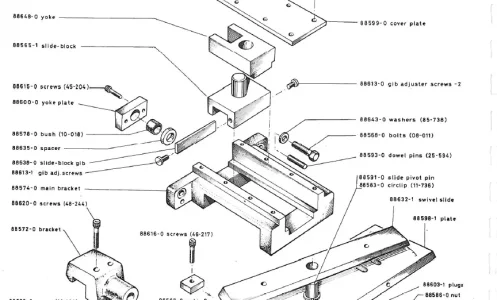
OK you guys, what is so special about the dti holder? I can't tell from looking at the photo.
Could you please share a better description and photos?
Ps - mine will need a very short table extension too. Just enough to reach over the sensor mounted on the back side. My plan was to add the extension before milling the shallow slot for the mag strip so they could both be done at the same time.