From the seam at the Lime Plant. Pretty much the same area. Filthy garbage!Was that out of Hat cr.?
Spent far more time hooking snotballs of clinker out of the pot than actually working metal!
From the seam at the Lime Plant. Pretty much the same area. Filthy garbage!Was that out of Hat cr.?


So, Jr and I lit the forge for the 2nd time today and had some fun for a bit.
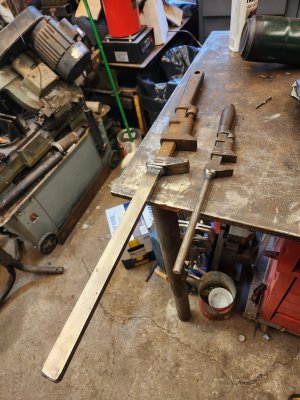
L-R are the only things I have forged in chronological order so far.
#1 A coal rake. 1st thing I forged with my propane forge, Daughter did the loop on the handle. Made a few months back.
#2 A fire poker 1st thing I forged with my coal/coke forge, Son did the loop on the handle
#3 A small "damascus" billet of a portaband blade, and steel strapping. This was my first forge weld and it went well. I still need to cut and stack it again. Probably only going to do that once more before turning it into something yet to be determined. Probably a better version of the next item.
#4 A divot tool for my FIL for fathers day.
That was a challenging one. I took way too many heats on this, and I burnt up some steel in the process (when I was in the garage trying to find punches.....), but it was pretty fun to get an idea I had earlier in the week out of my head and into steel. I REALLY need to make some tooling to help make future projects like this easier. I need some hardy tools to start with, A hot cut, a bending jig, A variety of proper punches.....Then I need to make some tongs.....vise grips are a PITA......
New hobby should keep me busy for a while. 😀
I also want to make a new, smaller propane forge too.....I have a forge building problem....
Ya, it's something to do with Imgur links. They used to work just fine. They show up when I write the post, then disappear when I post it. For the way I post it's a PITA to upload pictures to the forum. I usually post the same build thread on other forums, and use their editing features, then copy and paste it here. Having to connect my phone to my computer and download the images to my laptop, then upload them to the forum, is another layer I frankly just don't want to deal with. I gave it a shot for the start of this thread, but tried to get the old way working for this update with no success. 🙁.
Then I have to type on a touch screen, hard no. What was working before was a great system. I'm hoping it's just a glitch in the matrix that can be fixed.


Cutting grass with the sand wedge by chance?🙄Thanks. I've had a productive couple of weeks. Struggled to peel myself off the couch today though. Got stuck in a youtube blacksmithing rabbit hole, but had to force myself to go cut the grass for 3 hours so I wouldn't feel guilty about golfing later 🙂


Very nice work indeed,Well.....I didn't think it would be this long until I got back to this, but life got in the way......
Spent this weekend getting a bit farther on this and a few other projects. I can't say "finished" yet, because it isn't, but I made some major headway.
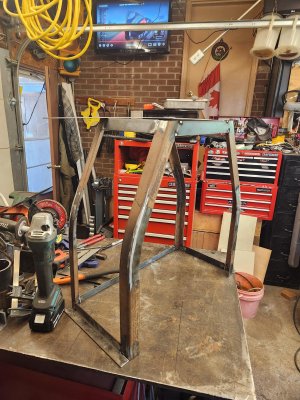
We last left off with all the curved uprights done, so I setup some angle guides on the welding table at 12" apart so I could start building the frame.
View attachment 38570
View attachment 38568
View attachment 38564
Pretty nice having the new shop computer and tv out there with the MotoGP practice one in the background. I got it all tacked up, then welded every joint solid, and ground them all smooth
View attachment 38567
One of the reasons I hadn't got to finishing this, is because I needed some sheet metal. I didn't like my original plan of using the scraps of this galvanized I had laying around, so I kept checking marketplace and kijiji for some used stuff. I lucked out earlier this week by snagging two of these 24x71" sheets of 10ga for $20. Enough to finish this, and another unfinished project that's also been hanging around too long (hard to believe eh?)
View attachment 38559
I traced out all the sides, and cut them out with the plasma. Then cleaned them up with my new to me big boy grinder and wire wheel. What an awesome tool.
View attachment 38563
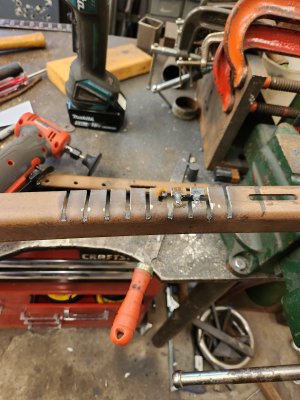
My original plans has some light duty sheet metal making this curve on the sides, but I was able to bump bend the 10ga every 1/2" or so with some molson muscle and over bent a bit so I could clamp it tight to weld. Worked better than I thought it would.
View attachment 38562
View attachment 38572View attachment 38571View attachment 38558
View attachment 38561
Satisfied with the look and fit, it was time to flip the hood down and weld it out.
View attachment 38565
View attachment 38557
I just happened to look out the back door at the right time and catch this Mom and her daughter walking across the back treeline behind the barn. Always nice to see.
View attachment 38566
And here it is all "done" for now.....
View attachment 38569
View attachment 38560
I still have to weld the top on, ring roll a flange for the exhaust pipe, and cut the opening, but that will have to wait for a while. I have a busy next couple of weeks.
Hopefully it won't be another 2 months before the next installment. I really want this installed and working by the first snowfall......