• Scam Alert. Members are reminded to NOT send money to buy anything. Don't buy things remote and have it shipped - go get it yourself, pay in person, and take your equipment with you. Scammers have burned people on this forum. Urgency, secrecy, excuses, selling for friend, newish members, FUD, are RED FLAGS. A video conference call is not adequate assurance. Face to face interactions are required. Please report suspicions to the forum admins. Stay Safe - anyone can get scammed.

Cheapo Router & Engraver Set-Up

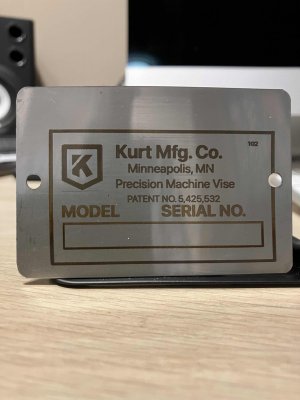
And here's it done in stainless, same caveat that I didn't spend much time getting it set up perfect. I think it looks pretty good, but that's just me. My laser is low power, so this took 4 hours on the machine. But it's set and forget, it's not like I needed to be there. Started it, left, came back every hour or so just to check on it.

IMG_3314.jpeg
 
I've never had any trouble drilling them out. I just use a hand punch to make a center and then drill them out with a pilot drill first and then bigger till they are out. The biggest problem is finding the right size drive screw, so I often tap the hole and add a regular stubby screw. It's the one and only time I ever use flat blade screws. For some reason they look better for plates.
This never works for me! All the drive screws I ever run into are made of hardened steel and the drill bit will hardly even scratch them never mind take them out.
 
This never works for me! All the drive screws I ever run into are made of hardened steel and the drill bit will hardly even scratch them never mind take them out.

All the ones I've seen are aluminium! Go figure!

If I had to do a hardened steel drive screw, I'd prolly try a carbide drill, but not till I tried putting a collet on the head and spinning it out. If none of that worked, I'd give in and mask the plate.
 
Back
Top