• Scam Alert. Members are reminded to NOT send money to buy anything. Don't buy things remote and have it shipped - go get it yourself, pay in person, and take your equipment with you. Scammers have burned people on this forum. Urgency, secrecy, excuses, selling for friend, newish members, FUD, are RED FLAGS. A video conference call is not adequate assurance. Face to face interactions are required. Please report suspicions to the forum admins. Stay Safe - anyone can get scammed.
  • The 2026 Calgary Area Meetup is set for Saturday May 30th at 10am. The signup thread is here! Robinhood has graciously offered to host the meetup again this year. Please note that you MUST RSVP to the notice linked above if you wish to come.

Building a telescope pier

Make a sub plate for the hold down bolt and mount that on 3 standoffs to allow you to tighten that bolt. I will post a photo of mine after I finish my steak.
Pierre

IMG_2097.jpeg
 
Last edited:
In my case I also use this to level my mounting plate.
Pierre
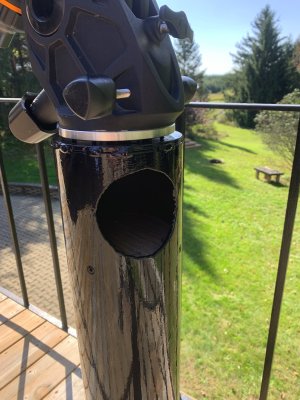
That is the whole point of the hole in the side of the pier, so I won't have to have the mount supported by threaded rods.
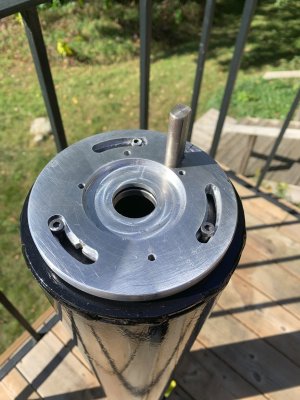
The leveling adjustment and polar alignment will all be done on the aluminum adapter plate using push/pull machine screws.

Could you mount your contraption in the lathe chuck?

I could but then have to come up with a way to secure the pier onto the cross slide of the lathe probably with the pier standing on one end. At least doing the job on the mill I would have the pier to laying down on the X cross slide with more surface to mount it to.
 
So I did have to drill dozens of separate holes around the circumference of the access hole to get the job done.
Painted it all up and installed it yesterday, it seems to be working well, still have to pour the sand in.
 

Attachments

  • IMG_1022.JPG
    IMG_1022.JPG
    3.8 MB · Views: 7
  • IMG_1023.JPG
    IMG_1023.JPG
    1.6 MB · Views: 7
  • IMG_1024.JPG
    IMG_1024.JPG
    1.7 MB · Views: 7
So I did have to drill dozens of separate holes around the circumference of the access hole to get the job done.
Painted it all up and installed it yesterday, it seems to be working well, still have to pour the sand in.

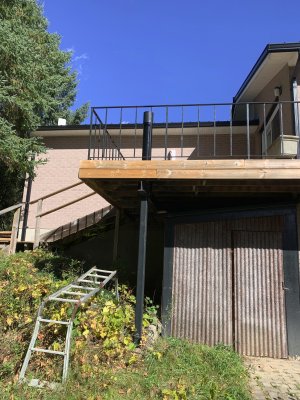
Looks amazing Skippy! Can we get a photo or two of the big picture? It's hard to imagine myself using it without seeing the context. It looks like it's up on a tower?
 
I know this isn't an astronomy forum, but if you are so inclined and you are into astrophotography, I wouldn't mind seeing some of your photos.

What? It isn't? Are you sure about that?

Machining is like art. It covers all topics including many that are not allowed. But just cuz they are not allowed doesn't mean we can't think or wonder about them.

In this case, astronomy is a science that requires machining. We often build tools for our tools for our tools. And our tools have tools that have tools. Astronomy photography is just an outcome of making astronomy tools. The astronomy tool making is not complete without evidence that the tools are working and that the work was done well.

Lots of us want to see pictures too! I'm certain that some will disagree, but they are probably in the wrong place.

So yes please, show us what you have done so we can see for ourselves how your metal working has made that possible.
 
Looks amazing Skippy! Can we get a photo or two of the big picture? It's hard to imagine myself using it without seeing the context. It looks like it's up on a tower?
Thanks,
IMG_1032.JPG
I know this isn't an astronomy forum, but if you are so inclined and you are into astrophotography, I wouldn't mind seeing some of your photos.
I'm not much of a photographer, I tried my hand at astrophotography back in the day when film was king but it wasn't very good. Besides there are so many amateur astrophotographers that produce stunning images, I couldn't hope to get satisfactory results.
I'm just a visual guy, although I have to admit that my eyes are what they use to be, harder and harder to make out the faint fuzzies.
 

No, Thank You!

It's not at all what I imagined!

Damn nice to be able to step outside onto a balcony to look at the fuzzies!

I'll be interested to see how much the fuzzies shake when the wife walks across the house to try and distract you. I swear mine stomps deliberately for that purpose. I'd prolly be getting up at 2am to take a boo.

Well done! I love it!
 
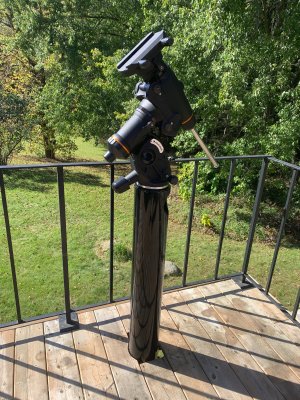
The pier doesn't touch the deck or the joists, that's why I wanted it right over top of the 4" steel post.
It shouldn't even pick up my walking around the deck.

I hope you are right. Mine is out in the yard and it picks up trucks driving by a half mile away as well as the beat of the big wind turbines over a mile away. I've gotten used to it though and my brain filters it out. I don't take photos either. There are enough professional ones out there that I could never compete with.

More than anything, I just like to show others what is there and leave them with a little taste of how amazing our night sky is.
 
Photos of extraterrestrial visions!
I have been playing with a new toy.
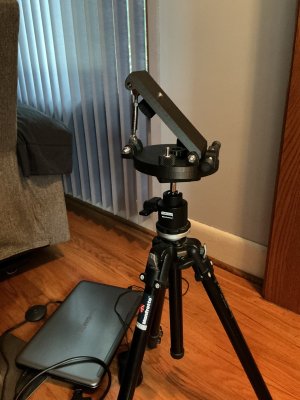
Seestar 30 Pro about the size of a shoebox! Small aperture 30mm! I stick it onto my 3d printed wedge and tripod.
Pierre
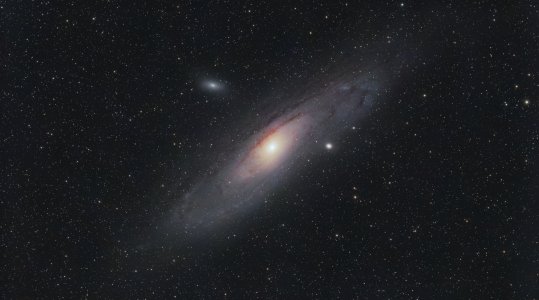
2048 exposures @ 60 seconds each. M31 Andromeda
IMG_2233.jpeg

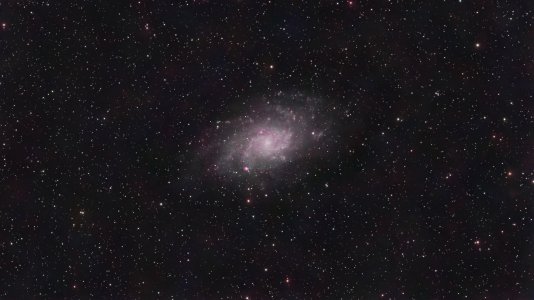
481 X 60 seconds each M33
IMG_2265.jpeg

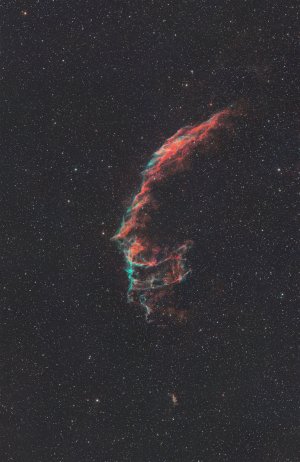
202 X 60 seconds Eastern Veil NGC 6992
IMG_2256.jpeg

IMG_2139.jpeg
 
Photos of extraterrestrial visions!
I have been playing with a new toy.
Seestar 30 Pro about the size of a shoebox! Small aperture 30mm! I stick it onto my 3d printed wedge and tripod.
Pierre
Beautiful! I'm jealous! The magic of stacking!
 
Back
Top