• Scam Alert. Members are reminded to NOT send money to buy anything. Don't buy things remote and have it shipped - go get it yourself, pay in person, and take your equipment with you. Scammers have burned people on this forum. Urgency, secrecy, excuses, selling for friend, newish members, FUD, are RED FLAGS. A video conference call is not adequate assurance. Face to face interactions are required. Please report suspicions to the forum admins. Stay Safe - anyone can get scammed.

Tips/Techniques better suggestion for holding thin sheet metal for milling?

Tips/Techniques
Hmm.. not so fast there Skippy. As the mill exposes internal cavity profiles (yellow holes) we now have massive vacuum leak & greatly reduced holding power

1731949516922.png
 
Luddite reply.

1000 tiny holes? No big deal. Recent project involved fabricating an air bubbler with fairly accurate hole size and spacing. 6” long piece of 3/4” Sch40 pipe, with rows of #60 holes spaced 3mm apart, located every 20 degrees around the pipe. Made a mandrel to hold the pipe in a 5C spin indexer, lined it up on the mill and drilled holes. Broke two drill bits and a couple of holes were a tiny bit out of line. Took maybe an hour to complete. No electronics involved.

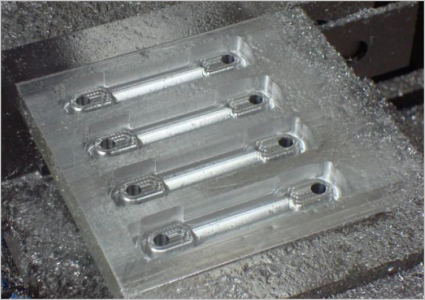
As for the vacuum idea, assuming this is being done by CNC, there’s no need to completely pierce the work pieces. Even my crappy 3018 CNC router can locate Z-axis within a couple of thou. Just machine most of the way through, leaving a few thou intact. Trim with an Exacto knife and a deburring tool. Like trimming the flash on a plastic model kit.
 
For most of my itty bitty parts a vacuum system would be useless. Consider that at best you get 14.7 pounds per square inch of force from the vacuum so for a 1/2 sq in piece it is only 7 pounds.

Unless the required holes in thin stock are really small (smaller than #55 or so) I make them with an endmill rather than drilling. Using a drill tends to create a bulge on the back before it completely penetrates and the bulge separates the stock from the base plate.

I've successfully used the double sided tape to make tiny flexures of 0.005 steel shim stock. All cuts and drilling holes for #4 screws was with a 0.0625 carbide endmill. Separation was not especially worse than with thicker plastic parts.

For cleanup I mostly separate from the base plate using a sturdy putty knife with a sharp edge (https://www.amazon.ca/gp/product/B000I1TGUG/) and then peel any tape remnants from the back of my piece with a fingernail. Brake cleaner removes stubborn bits. Yes, the putty knife bends the part but with care it then flattens without permanent deformation.
 
That's a good observation. Looks like the adhesion strength of double stick varies quite a bit by model/manufacturer. I didn't search too hard but according to this link, low is 29 oz/in2 (1.8 psi). High is 400 oz/in2 (25 psi). By accident I used what I discovered later was actually a thin foam core tape but wicked adhesive. I sliced through the core revealing the back side & it was much easier to peel the tape off from the surface. But having a slightly squishy core is not good for machining. I thought my eyes were deceiving me.

 
Just machine most of the way through, leaving a few thou intact. Trim with an Exacto knife and a deburring tool. Like trimming the flash on a plastic model kit.
That's a good point.

One of the guys on model engineering forum uses a technique where he does front side 3D milling, pots the gap with epoxy, then the back side milling but slightly deeper into the epoxy which is still encapsulating the part. Then heat with a gun to 'demold' as I described above. (18 cylinder 1/4-scale radial plus spares in case you were wondering).

1731962020174.png
1731962040537.png
1731962068591.png
 

Attachments

  • 1731961997281.png
    1731961997281.png
    846.6 KB · Views: 2
Back
Top