• Scam Alert. Members are reminded to NOT send money to buy anything. Don't buy things remote and have it shipped - go get it yourself, pay in person, and take your equipment with you. Scammers have burned people on this forum. Urgency, secrecy, excuses, selling for friend, newish members, FUD, are RED FLAGS. A video conference call is not adequate assurance. Face to face interactions are required. Please report suspicions to the forum admins. Stay Safe - anyone can get scammed.

Tips/Techniques better suggestion for holding thin sheet metal for milling?

Tips/Techniques

Mike R

Well-Known Member
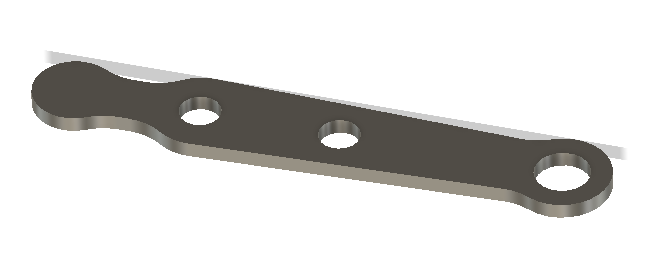
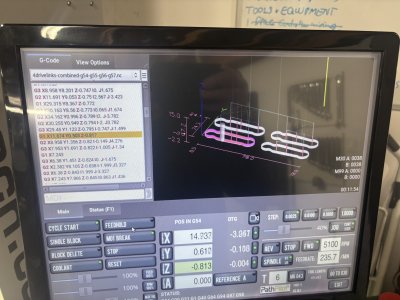
I want to mill some pretty small sheet metal parts ( 1.25" long , up to 3/8" wide and from 0.032" sheet stainless (unknown pedigree).
I tried the painters tape with super glue between them, but it started to let go cause of coolant.
I saw a video by Datron, they used vacuum but said won't work on small parts (not enough area), but then in comments they mention using hot melt glue.
Tried that too and it worked for the first part, but by the time I got to the second it too let go. I think I'm missing a few details with how I applied the glue and the part.

For my next attempt I'm trying epoxy. Any better ideas?
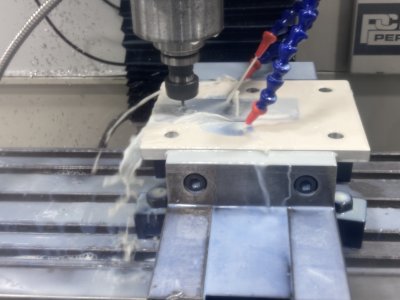
I want to use coolant for the stainless steel.
tapping hold down holes - not super interested as 2 holes are 3/32" , end one is 1/8".

I only need 4 pieces, but this is a learning experience. I regularly need something like this and need to find a better way. Having the part come undone halfway through a program is un-nerving me.
 

Attachments

  • link.png
    link.png
    15.1 KB · Views: 10
I am assuming the hot melt glue let go as the part got warm? If this is the case there are higher heat hot melt glues available you could try them. In woodworking instead of the painters tape and super glue I have had a lot better luck using double sided carpet tape it holds much stronger and is thinner than painters tape.
 
I struggle with this too. CA can make good bond for withstanding machining using a sacrificial MDF platen, but the issue is removal. Its often difficult to get solvent into the joint. MDF helps a bit because it absorbs liquid so can conduct solvent to glue layer that way. It also swells which might give it a bit of push. Time consuming & messy. If you insert a blade/shim/putty knife type tool, chances are good you bend it. That's what the tape methods are all about & I do think it works with the right kind of tape & adhesive. Heat does not play well with CA, generally turns it into a gooey black mess that sticks like crazy to the part.

Epoxy is more predictable in heat release. Once it turns a light caramel color, it is at a rubbery stage where it distorts & typically releases clean with no residue on part. The issue is has thicker viscosity so thicker glue line. Fine for cutting 2D parts but less predictable if you are machining the face of the stock & referencing from the platen surface (ie. must account for glue layer thickness).

I've used sandwich method too, mostly to get better quality edge cutting with scroll saw. Its relying on friction so it tends to work well with larger parts, but can also slip with teeny stuff.

I have seen where people CNC mill the shape from solid, lop it off, pot the part face down using epoxy or low melting point allow or... & anyway mill the slab off the back. Doesn't seem like much time savings to me though

Laser or water (or EDM if you can afford it) is really the way to go, but usually only makes sense with many parts, not hobbyist oney-twosey
 
Sorry if I'm slow, but are you trying to make multiple identical parts and want to machine them at the same time to guarantee that they will be identical? And worried about how to clamp them together?

Or are you worried about how to clamp a single small part?
 
Machinable wax. Make a wooden box to hold your workpiece, support the workpiece up off the bottom of the box, melt the wax, submerge the workpiece, let the wax cool.

 
Laser or water (or EDM if you can afford it) is really the way to go, but usually only makes sense with many parts, not hobbyist oney-twosey
Actually, Send Cut Send might be worth checking out.

 
So I'm trying to learn how to do this for onesies or handfull of parts. My interests are hobby machining not production so its usually about making some parts for a multi cylinder engine etc.
The part didn't get hot cause I ran flood coolant. I think what happen was that the sacrificial plate I had was contaminated with coolant before I applied the hot melt glue, cause it just peeled the whole sheet off the aluminum while profiling the 2nd part. The glue was better adhered to the stainless but did peel in places from it. I think another factor was the material pushed out the bottom when drilling and raise a burr, this may have lifted the part as well.
These are 2D parts - I'm not trying to change the thickness of the raw material, just hole drilling and profile cutting.
As I have a cnc I thought that I could just make 4 pieces at once, put a piece big enough in and just cut 4 times, offsetting over for each piece. No need to load a blank per part. Not like its a lot of material (2" square is enough for all 4 pieces.)

My issue with cutting half the part and then clamping, cutting the other half is figuring out how to make a CAM program to do that.
 
This isn't quite your application (its actually a bit worse haha). I had to make these little aluminum tubes which have a compound miter angle. That's what the angle setting pins are about. Anyways no matter how you traverse with the end mill, at some point it wants to grab an edge & throw them on the other side of the shop. The tube segments are bonded into the jig plate with cheapo 5-min epoxy & also some external fillet for extra support. Impervious to cutting fluid. Once machined, I just warmed the assembly with a heat gun until epoxy visibly softens indicated by off white, then a tan color on this stuff. Then just remove the part & 90% of it peels away right then. If everything goes right the epoxy kind of gives the part up like a silicon mold. Anything more stubborn you can re-heat & typically get off with XActo or whatever. I have done this same thing on sacrificial MDF wood blocks but the heat goes to the metal which can sometimes cook the epoxy prematurely. You don't want it to go black & charred, its a sticky mess.

I also noticed using this same jug was having difficulties where they were just popping out before. The difference was low grade hardware store epoxy works better, it has a lower HDT (heat distortion temp) whereas my good stuff put up a fight.

There are other ideas like double stick tape (sheet) but have yet to find a reliable release - either heat or solvent. Old school use to use shellac flakes or specialty waxes which would probably work for thin 2D sheets, drilling & profiling but I don't think milling with any kind of material removal. Apparently this stuff is available at jewelers suppliers. If you find a trick let me know. Meanwhile I'll look for my parts pics which used 0.005" shim stock.

1731820107025.png
1731820134723.png
 
Can you laminate the thin metal between say two pieces of thin micarda or phinaIic. Or even aluminum plate. Then cut out the thin parts. Heat to release the glue?
 
I epoxied down the ss sheet last night with some really old epoxy that I had laying around.
First though - I cleaned with acetone the aluminum spoil board and the ss sheet.
I'll try again today sometime. Also watched a Stefan Gotteswinter Youtube video and I'm going to reduce my cutting depths even more. I thought I was being conservative at 0.5mm but he talks about 0.1 or 0.2mm passes.
Anyways, I have about 16" x 6" of this material so I have a lot of material to learn with going at it 1 or 2 square inches at a time.
 
So I'm trying to learn how to do this for onesies or handfull of parts. My interests are hobby machining not production so its usually about making some parts for a multi cylinder engine etc.
The part didn't get hot cause I ran flood coolant. I think what happen was that the sacrificial plate I had was contaminated with coolant before I applied the hot melt glue, cause it just peeled the whole sheet off the aluminum while profiling the 2nd part. The glue was better adhered to the stainless but did peel in places from it. I think another factor was the material pushed out the bottom when drilling and raise a burr, this may have lifted the part as well.
These are 2D parts - I'm not trying to change the thickness of the raw material, just hole drilling and profile cutting.
As I have a cnc I thought that I could just make 4 pieces at once, put a piece big enough in and just cut 4 times, offsetting over for each piece. No need to load a blank per part. Not like its a lot of material (2" square is enough for all 4 pieces.)

My issue with cutting half the part and then clamping, cutting the other half is figuring out how to make a CAM program to do that.
For a one off part, maybe you can cut out the profile you want from a thicker piece of stock, and then saw off the part close to the thickness that you need. Then grind flat and finish.
 
It really depends on what cuts you intend to make. Are you facing it to a thinner profile? Are you drilling holes? Are you machining a profile on the edge or a chamfer? All these would influence how you hold the piece, and also what your cutting strategy should be.

If the finished part is 12" long, it needs a very different approach than a piece 2" long. Just too many variables to give you 'one solution'.

Machining very thin stock is considered part of advanced techniques, and is not usually in a beginners repertoire.

Work holding is one of the funnest parts of this hobby!
 
Use a larger piece, drill a couple holes, and screw it down to wood or plastic. Mill your part like a plasma table, inside features first, then your outside last. When you get to the last piece of adjoining web, use a hold down stick to keep it from moving into the cutter.

Used to do lots of sheetmetal guards etc this way on a CNC mill.
 
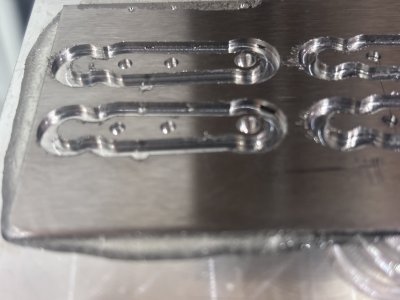
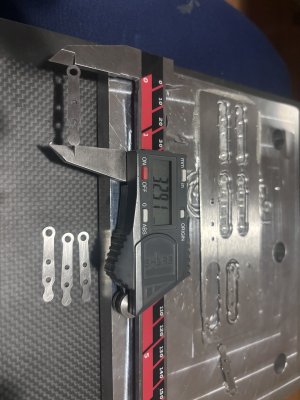
Success! As mentioned before, these are small items. The epoxy worked - barely! My fault - it just didn't fully cure and that is cause its ancient and one part was far less runny than the other and I probably got the mix wrong. Regardless it worked. I'm happy and I learned. Thanks for the advice given and links to various resources, will be referring back to this in the future I'm sure.IMG_1666.jpegIMG_1663.jpegIMG_1668.jpegIMG_1662.jpeg
 
A little late to the discussion but I've had good results with double sided tape (https://www.amazon.ca/gp/product/B000QC48UU/).

The tape isn't immune to letting go when heated but with small cutters heating is not much of a problem. Like MikeR, my usage is mostly for small/tiny parts perhaps 1x2 inches and much smaller. Cover the entire back of the part with tape and press down very firmly. If you need multiples, cut all from a single piece of stock. If possible, use clamps or screws in the waste area to a MDF backing. Cut internal features before the final cuts to separate part from the waste. Leaving tabs between the part and the main stock is often helpful.

Below are some typical parts in 0.125 Delrin(R):
_DSC8957.JPG
 
@kstrauss I probably have that exact tape (and about another dozen variations haha). If the part is strong enough to not distort by wedge removal, they are a great solution. But for example delicate profiles made from 0.005" shim stock, present new challenges removing the parts from the tape without distorting them. I have yet to find a combination where the tape has an aggressive adhesive but magically lets go with submersion into some kind of solvent. Any comments in that regard?

BTW I have successfully made a sandwich of say 5 alternating shim + double stick and milled / drilled through the whole package. The tape can kind of ball up on the endmill so I used soapy water instead of a typical hydrocarbon cutting fluid. Again, making the parts was uneventful. But it took 5x longer to carefully separate & de-goo. Lacquer thinner worked the best but it was dissolving the tape itself the same time as adhesive so not ideal. Acetone is kind of hit & miss depending on the tape. I even tried drilling pilot holes in the MDF backing board to gently blow some compressor air from behind, but it has the power to distort too once it lets go.

I'm almost of the opinion that a micro vacuum platen is the way to go. Just needs a tiny array of tiny holes proportional to the part size. I bet you could draw sufficient vacuum with a standard auto squeeze handle type. I just don't feel like drilling 1000 holes. But if you had a CNC.......:)
 
Back
Top