• Scam Alert. Members are reminded to NOT send money to buy anything. Don't buy things remote and have it shipped - go get it yourself, pay in person, and take your equipment with you. Scammers have burned people on this forum. Urgency, secrecy, excuses, selling for friend, newish members, FUD, are RED FLAGS. A video conference call is not adequate assurance. Face to face interactions are required. Please report suspicions to the forum admins. Stay Safe - anyone can get scammed.
  • Several Regions have held meetups already, but others are being planned or are evaluating the interest. The Calgary Area Meetup is set for Saturday July 12th at 10am. The signup thread is here! Arbutus has also explored interest in a Fraser Valley meetup but it seems members either missed his thread or had other plans. Let him know if you are interested in a meetup later in the year by posting here! Slowpoke is trying to pull together an Ottawa area meetup later this summer. No date has been selected yet, so let him know if you are interested here! We are not aware of any other meetups being planned this year. If you are interested in doing something in your area, let everyone know and make it happen! Meetups are a great way to make new machining friends and get hands on help in your area. Don’t be shy, sign up and come, or plan your own meetup!

4140 crankshaft modifications - propeller hub build

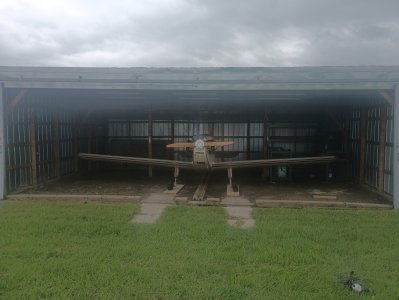
well hangar might be a stretch, its more of a shed that's big enough for a small airplane
A roof is a roof, there is always free paving stones and stuff around from someone doing a yard reno, cheap flooring.

Good to see more of the bird in the air. Next year will be the flight plan for Chestermere International.

One exercise I used to do in the Luscombe was to set the throttle to 1800 and slowly pull back on the stick and see how high the nose would go before she tumbled. Dad and I would make a competition out of it. lol

yep for sure, im not sure how long the situation will last, Chestermere is right there, it may get gobbled up in the next few years and then i will have to move. It will work for now while i save some bucks to put up my own shed big enough for an airplane

i was pretty surprised how high the nose went before it tumbled on the mono, it indicated 20mph, which cant be accurate (speed wise), but it indicates 20 every time, so even though i dont think that airspeed is correct, it is consistent, and i know where the line is so to speak. I also thought of the possibility that because it only idles down to 800-1000rpm, combined with the bigger prop, i may be getting some thrust, and its not really a true power off stall
 
The weather was questionable for a third flight today figured I would make a second identical work bench for the hangar, i still had a partial stick of that 2x2 hss 1.5 angle so you know....I did have to buy 1 more stick of 2x2hss and 1.5 angle (i ordered it previously in the week)

I Thought i should take some photos this time

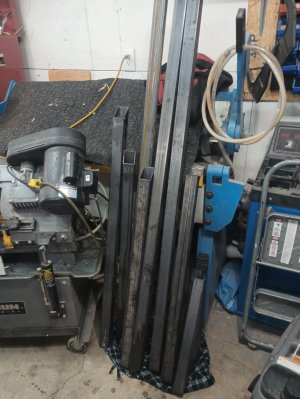
Cutting it up, and the stack of cut pieces ready to go
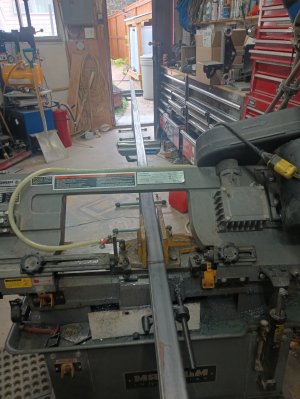
IMG_20250718_175825446_HDR.jpgIMG_20250718_181910614.jpg

Took a trip to the shop of my main contractor, i don't have a table large enough or a flat enough spot on the floor, there are ways to do it with stands....but for what its worth might as well head over to the shop
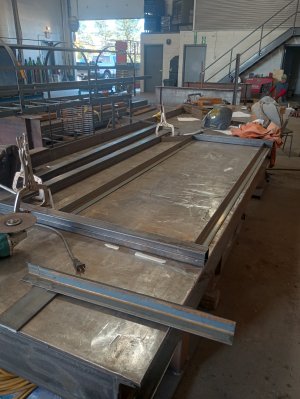
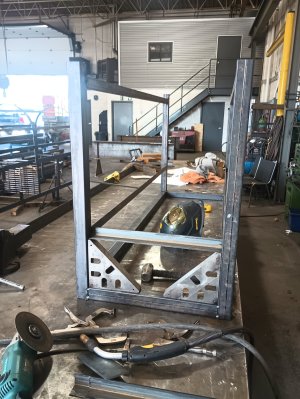
IMG_20250719_110043921_HDR.jpgIMG_20250719_111854026.jpg

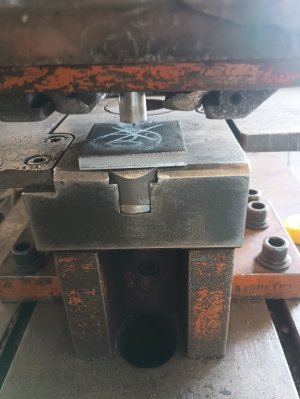
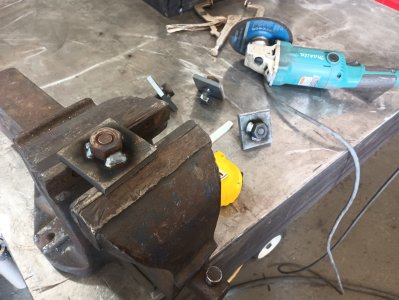
Ironworker is great for rough stuff like the foot plates, chunk up the lengths on the shear, and pop the 11/16 holes using the punch
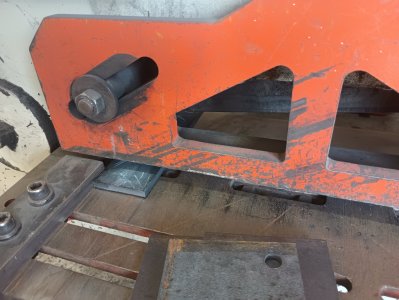
IMG_20250719_112456993.jpgIMG_20250719_113000134.jpg

Welding nuts in for the adjustable feet, using 5/8 structural bolts, because there is a big bin that no one will ever use. Yea there is no guard on that grinder, it's one of the shop guys, not mine, I hate running them without guards (modified that is) for various reasons
IMG_20250719_113504985.jpg

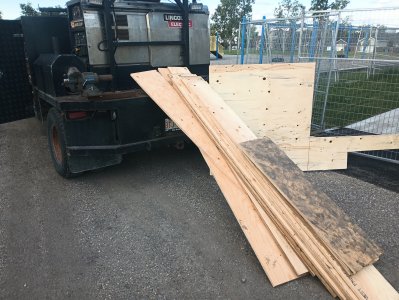
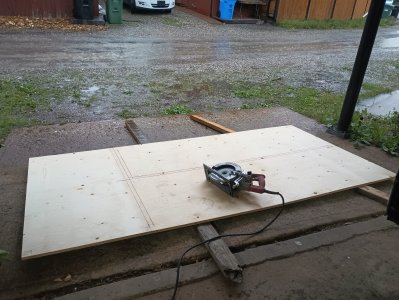
made it to home depot before tonight's monsoon for a sheet of plywood, cutting it up under the overhang i built in another thread, hurray for that!
IMG_20250719_200958871.jpg

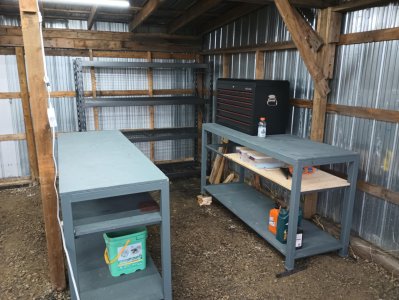
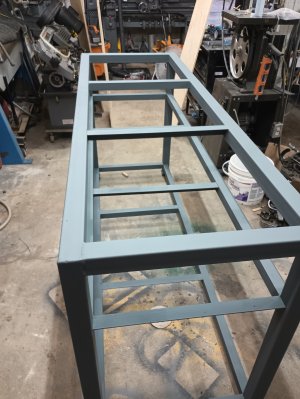
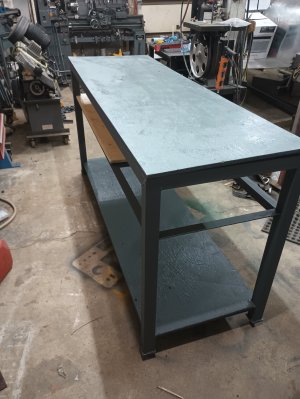
Welded out, painted, it looks a lot bigger in the garage than in the shop or at the hangar, funny how that works. Ran out of paint, so for now the intermediate shelf gets nothing, and im going to scavenge for the chunk of 5/8 to fill out that hole (in both benches)
IMG_20250719_202504643.jpgIMG_20250719_210415845.jpg

total material for the 2 benches (including the left over, but new, i already had), 2 1/2 lengths of 2x2 (at 40$/pc), 4 lengths of 1.5 angle (25$/pc), 2 sheets of plywood (50$/pc), and 1 qt of paint (40$), total of 340$, I still need to screw the tops down, so lets add 10$ for that, 350$, or 175$ for each bench. I probably could have bought something for around that cost each, but i don't think they would be very stiff (important for the gravel floor), and probably not last as long

And scored this little cart at princess auto for 35$ and the tool box on marketplace for 200, I think its time to stop spending money on hangar stuff for a bit
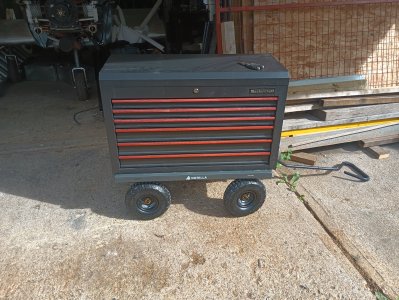
IMG_20250717_174851428.jpg
 
Wow, I've seen flimsier lathe stands LOL. Looks great. What did you end up selecting for metal paint (and primer if that preceded it). How did you mount the ply top to the frame (if replacement comes one day).

One idea I've brain filed is a framed table top with open cells. Costs another sheet of plywood but you can pack a lot of stuff in there. This is the general idea, more popular with the wood guys for some reason. Doesn't have to be those rounded aircraft spar look.
1752989745554.png
 
Wow, I've seen flimsier lathe stands LOL. Looks great. What did you end up selecting for metal paint (and primer if that preceded it). How did you mount the ply top to the frame (if replacement comes one day).

One idea I've brain filed is a framed table top with open cells. Costs another sheet of plywood but you can pack a lot of stuff in there. This is the general idea, more popular with the wood guys for some reason. Doesn't have to be those rounded aircraft spar look.
View attachment 67515

I have seen a bench like that on a house site before! it was super cool, it was either trim carpenters or cabinet guys who had built it, i don't recall. The guy was very excited to tell me about it when I commented on it. I think the rounded spar looking holes are somewhat a matter of pride in workmanship, and it adds some form to the function of the table.

For the paint i just used tremclad, its easy to get, and with some prep it does seem to hold up reasonably well. I did scuff it up with a red scotch brite and use wax and grease remover before hand. No primer, just paint, more for looks than anything else.

I was planning on using countersunk self drilling or if i cant find any of those i will go with countersunk self threading screws right into the hss frame and cross members, nothing to crazy.
 
I was planning on using countersunk self drilling or if i cant find any of those i will go with countersunk self threading screws right into the hss frame and cross members, nothing to crazy.

Or maybe pre-drill the holes in the frame & screw it from the underside. Probably same end result but might be easier if you ever flip it over one day or change your mind & replace it.

I am still TIG-less but I was thinking about this aspect for a future bench - how to integrate a metal welding plate on a portion of the table top so the entire thing doesn't have to be a big, heavy, expensive 'all metal' plate top like a welding/fixture table. The trouble is matching the height of say 5/8 or 7/8 or whatever plywood thickness. I suspect welding tables are heavy duty for a reason especially for fixturing slots/holes. Maybe trying to combine this functionality with a workbench is not a good idea especially with a wood top on one side? I thought about a metal plate mounted on little legs or tube frame you just drag out for welding & put away again. Seen any ideas on this front?

I suspect the screws would pull out if i just went from the underside, its only 5/8 plywood, so might have 1/2" into the plywood, i found some wafer head self tappers, ill give that a go

there are lots of ways to build a welding table, if you wanted to have plywood on one side and steel on the other it would be as easy as shimming the plate up with flat bar, 5/8 ply on one side, 1/4 plate with 3/8 flat bar on your supports to shim it up. 3/4 ply 1/4 plate and 1/2" flat bar, etc etc. Mig or stick you would end up with little burn marks from the sparks and spatter, but i wouldn't be concerned about a fire, it takes quite a bit to get plywood going.

Most shop welding tables dont have slots or holes for fixturing, just a chunk of plate on a frame of some sort, normally at least 3/8 thick, ideally 1/2+, the constant tacking of tabs and other things to the tables warps the top other wise. Many things are also built on the floor or horses, you will never have a big enough table, thats just reality.

I have yet to see a fixturing table "in the wild", im sure in some very high end shops that do lots of one off expensive fabrication (Bikes, bicycles, aerospace, etc) probably employ them, but its not something ive seen, so not really something you have to have, but nice to have for sure.

How heavy you build your table is totally up to you, the advantage to a big thick piece of plate is that it is already quite flat and requires minimal framing, and will likely stay flat, but it is big, heavy and expensive. If you just plan to use it more as a ground plane, then just about anything will work, a chunk of 10g with some framing would serve in a hobby shop for many years, it wont be as flat and sturdy as a piece of 1/2", but it would be 1/5the weight, and probably 1/4 the cost. So look at your budget, what you realistically want out of the table, and go from there, lots of ways to skin that cat.
 
One idea I've brain filed is a framed table top with open cells. Costs another sheet of plywood but you can pack a lot of stuff in there.
That's a torsion box bench. Generally a plywood top and bottom that sandwich a vertical square grid making a very sturdy and flat work surface. Handy storage too.
 
That's a torsion box bench. Generally a plywood top and bottom that sandwich a vertical square grid making a very sturdy and flat work surface. Handy storage too.

Yup, my own shop tables are made that way. This is the smaller one when I upgraded to a bank of Ikea drawer units. When I built the top I didn't think to open up the side rails for storage. Thinking about this some more, there probably is something about cutting cell openings, leaving some top & bottom meat to maintain rigidity like the fully enclosed peripheral plywood provides.

1753062180331.png
 
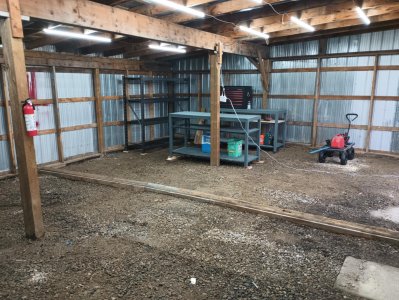
starting to look like a little workshop over in the corner, I think next up is a couple of "duck boards" for between the benches and in front of the shelving and ill have to keep an eye on marketplace for a few shop tools, bench grinder, vise, drill press, etc, that'll round things out

240w of led lighting seems to be enough, i think i will still need some task lighting, once monsoon season finished up here i will hopefully get the little taylor moved over to its new home, that should give me a better idea of what lighting is still required

235f0069-eadb-4230-9521-2a657736fb61.jpg3b0301f0-8540-4744-9882-a813405da4e8.jpg
 
Where's the fun in that ?
The fun is you keep trying to control the airplane and as the nose rises and the airplane slows and slows and slows until it literally snaps at the top and you spin out of it. Keep in mind that the rpm is 1800 the whole time so when it snaps over the top it really snaps, WAHOO. :D:D
 
Canada Post must be trying to set some records! it's just Edmonton to Calgary, but even that normally takes 2 days at least !

Thanks again @John Conroy

View attachment 51384
FYI, USPS "changed" a couple years ago, to "cut out $$$$ expenditures", So, a Eugene Oregon letter, Package Any Mail, TO EUGENE Oregon travels 100+ Miles NORTH to Portland to "get Sorted" To then Return to EUGENE: THREE DAYS, to go Three Miles, honest I can't make up crazier stories!!!!

philip from the Great Pacific NorthWET, Oregon USA
• • • • • • • • • • • "(The) rights of some will be eliminated • • • • • • •
• • • • • • • • • • by the neurotic “feelings” of others".
~ Mark W. Smith35
 
had a break in the weather and flew the mono over to chestermere today, finally in its new home, out of the sun, rain and snow

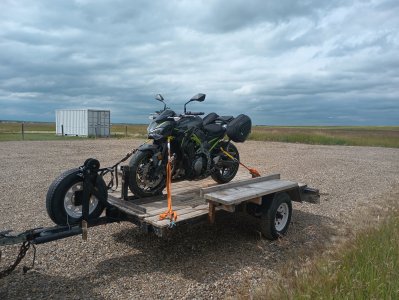
That short little 30-40 minute move took a full 8 hours to complete, drive to Vulcan with the trailer (1h5m), fill up the plane, preflight, warm up, 2 circuits and off for the the 30 minute flight, with pattern entry 40 minutes total (for the x country, 20 minutes in the circuit at Vulcan) land, talk with people there until the wife shows up....talk some more, wife gets antsy...continue talking, oops! Haha. Eventually pack the bird away and 35 minute drive home, hop on the motor cycle cruise back down to Vulcan, talk to some guys on the ramp...(There does seem to be a pattern here), load up the bike, drive back to Calgary, unload the bike, unhook the trailer....5.30, started at 9am :D

IMG_20250726_130045662.jpgIMG_20250726_155616364.jpg

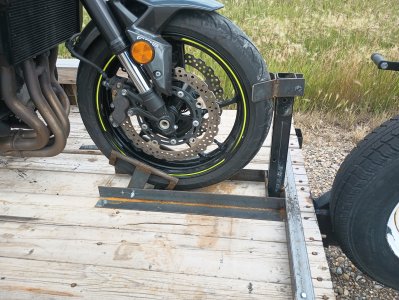
Made this little wheel chock for the trip... not really worth building at 120ish$, but I had the material and didn't want to spend the money for a likely 1 time use..it did work pretty well however, I'll have to squirrel it away some place

IMG_20250726_154304734.jpg

Now I get to unload the spare parts and tools from the truck into the hangar, it's been loaded up with all maner of airplane bits and tools for the last 3 months, don't want to forget something after driving an hour to vulcan...
 
Back
Top