Tool 20ton Hydraulic press mystery

Tool

Dan Dubeau

Ultra Member
Do some reading about "K factor" for bends, and how it is calculated. It has to do with the thickness of the material, and calculating the Bend allowance, so you can get the end dimensions you want, without always making it too long and cutting it down every time...

IMO, you did well to get that thick of material, that far bent, before a blowout. Even if the material is dead soft. Eventually the stretch on one side, or the compression on the other, plus work hardening from the metal movement, does the part in.

You can soften the bend area, by drawing a line where the bend will go, with a Sharpie marker, then heat that line with a torch until the line fades away. A useful way to make tight bends on -T3, -T4, and -T6 sheet stock, when bending in a brake.

Usually, you either use thinner material, or you "pack" the nose of the press die with material to provide a larger radius around which to bend.
Thanks. Bending is another facet of this trade I have no experience in, but with help from the internet should be able to figure it out. I'm aware of kfactor, as in I know kinda what it is, and how it applies, but have never done any appreciable bending to have a practical need to apply it. Moving forward with a couple sheet metal projects in the queue I will be sure to pay more attention to it, and try to figure it out. I'm going to make some radiused shoes on an as needed basis for bending some thicker stuff to hopefully solve that issue. Maybe even a few complete radiused punches. Thanks for the sharpie tip too.
 

Susquatch

Ultra Member
Administrator
Moderator
Premium Member
Makes for a fun time when you're bush hogging in and around the trees.....Need to be an octopus to drive it :D.

I had an 8N with the live PTO. Bush hogging with it was death on wheels waiting for your octopus to make a mistake. When I got the Deere with a built in overrun, it was amazing. I'd never go back.
 

Dan Dubeau

Ultra Member
Live PTO is a dream compared to the old ground speed ones while for bush hogging......A lot of inertia built up in that spinning blade can make it exciting in tight quarters. I can say the one good thing about mine I like is the Live pto. During cutting season I'd just take the loader off to make it more manageable in the trees and stuff. I might have to run the bush hog a few more times to reclaim some ares of neglect from the past couple years, but once done I'll probably sell it, as I won't need it anymore. I picked up a flail mower for the front of my Kubota f2400, so the days of looking back over my shoulder poking a bush hog in and around trees are over. Now I can sit on a 4wd sure footed mountain goat with power sterring and go wherever I want around my hilly property with ease. Makes quick, fun work of stuff that used to be an all day adventure.

I hope one day to get a new (er, to me) tractor with a few more niceties though. Mainly a bigger beefy loader for lifting and pushing some dirt around. Always looking for that unicorn of low purchase price, and close proximity.
 

Bandit

Super User
A good number of the older tractors did not use hydraulic oil, it was gear oil as the pump and oil were in the transmission/rear end case, often the pump is worn lots and hydraulic oil is to thin. Poor control of the 3 point is in part thin oil, worn pump, and worn control rods, levers, springs etc. in the case.
One of the worse killers of the hydraulic/3point pump was the oil filter/screen. It is often on the pump or a tube running lower in the case, the screen had a "steel" mesh covered by a fabric?, the steel mesh would/will eat up, rust away, and bits of rusty steel, fabric, dirt etc. go through the pump along with the so called "oil".
A lot of water could get into the oil, water, rain, snow melt runs off the dash onto the gear shift lever and into trany case. Rubber boots last seen 40 years ago. A certain amount of dirt etc. also enter this way too, in hand with not cleaning quick connects if used. I often drained litres of water out the old girls, followed by"oil??" that was "rotten". The replacement of the pump, filter, oil, often returned an old worn out tractor into a old worn out tractor with near new hydraulic systems and somewhat worn controls.
Dam, the fun I had!
Just seen Dan Dubeau's post, remember how to use 4 wheel drive, keep it in 2 wheel drive, then when your stuck, put it in 4 wheel, back out and go home! Remember, 4 wheel drive gets shuck, life gets interesting, in hand with remembering what neighbours have bigger tractors and long, big tow cables!
 
Last edited:

Susquatch

Ultra Member
Administrator
Moderator
Premium Member
A good number of the older tractors did not use hydraulic oil, it was gear oil as the pump and oil were in the transmission/rear end case, often the pump is worn lots and hydraulic oil is to thin. Poor control of the 3 point is in part thin oil, worn pump, and worn control rods, levers, springs etc. in the case.

My old 51 8N had hydraulic oil in the tranny/rear end no problems except that damn PTO. There was no filter in mine. Just change the hyd oil and go.

My newer 5210 has hydraulic oil in the tranny / diff too. Also has a filter. That beast is unstoppable. Can lift the tractors own weight with the bucket if you have a heavy impliment out back. I love it.

A lot of water could get into the oil, water, rain, snow melt runs off the dash onto the gear shift lever and into trany case. Rubber boots last seen 40 years ago.

That turned out to be water in the shifter box on mine. I added a drain petcock. Problem gone.

Dam, the fun I had!
Just seen Dan Dubeau's post, remember how to use 4 wheel drive, keep it in 2 wheel drive, then when your stuck, put it in 4 wheel, back out and go home! Remember, 4 wheel drive gets shuck, life gets interesting, in hand with remembering what neighbours have bigger tractors and long, big tow cables!

Nah, I leave it in 4 out working. Too much of a pain to shift in/out. Too much slippage without it. Besides, my tractor couldn't get stuck in a mud lake. No worries about calling neighbours. They all call me. I have a big strap and lots of chains.

The only time I ever got stuck was out plowing snow. I bellied her trying to break a path into the field through the big piles beside the driveway. That was fun!
 

Tecnico

(Dave)
Re: post #35:
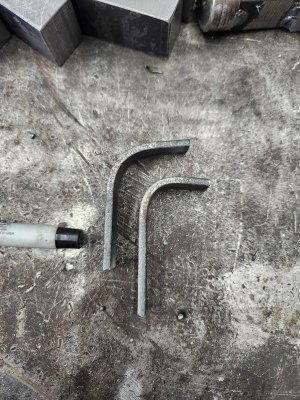
Perfect lol. Not sure what happened here. Too sharp of a punch?

If you consult the reference library of the internet you should be able to find tables of minimum bend radius for materials & material thicknesses. If I recall, a typical inside bend radius (nose of the die) should be somewhere near 1.5X thickness but really it depends on the material. E.g. in aluminum, you can get away with a tighter bend radius with 5052-H32 than 6061-T6 just because 5052 has a greater elongation before break property.

Usually, you either use thinner material, or you "pack" the nose of the press die with material to provide a larger radius around which to bend.

Good hands-on advice right there!

Nice work on the bender by the way.

D :cool:
 

trevj

Ultra Member
In the shops I last worked in, we usually had access to brakes with a selection of nose radii to pick and choose from. In the odd occasion that we did not have the radius desired, or if we were deployed and only had the basic brake to work with, with a square edge on it, we used strips of 1100 Aluminum (pure Al), usually 1/16 inch or .063 thou, by a couple inches wide, and built up a set of liners that could be stacked to get the Rad. desired. You could get some life out of a set of strips, and when they got too worked out to be convenient, they got turfed in the can, and a new set made up.

FWIW, the Sharpie annealing trick comes in really handy, when you want to bend a tight angle on higher temper sheet (6061-T6, for eg.). A variation, when gas welding aluminum, is to 'soot' the surface with an acetylene flame, then heat it until the soot burns off. Handy for annealing stuff that you are hammer-forming, or otherwise work-hardening.
 

Dan Dubeau

Ultra Member
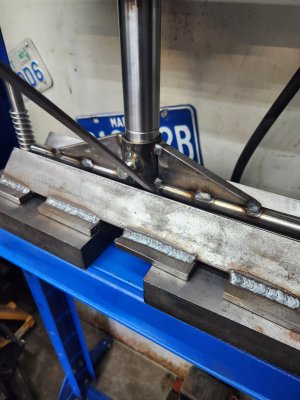
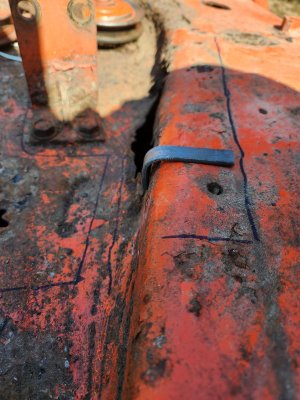
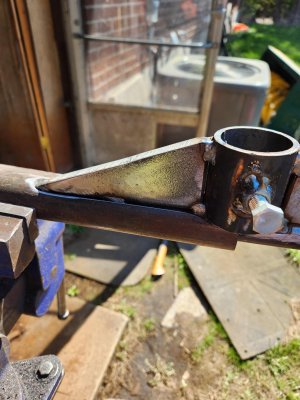
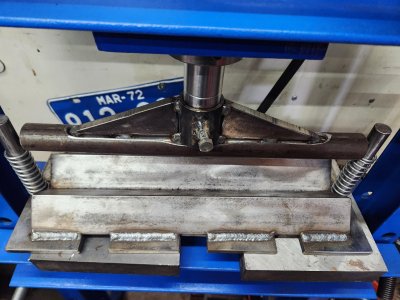
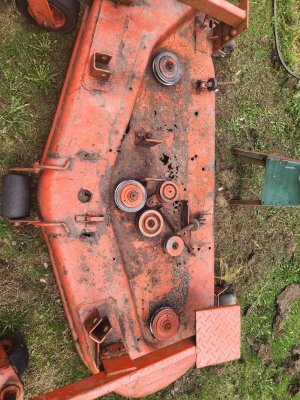
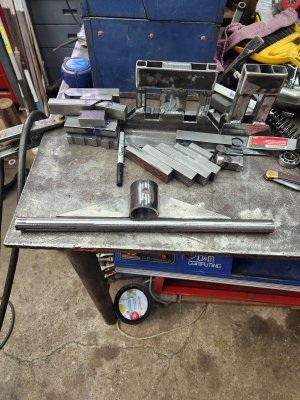
Well the time came that I needed to make some more tooling for this. I need to weld in a few patches to my mower deck, and needed a radiused punch. Some scrap pile brainstorming and I came up with this.

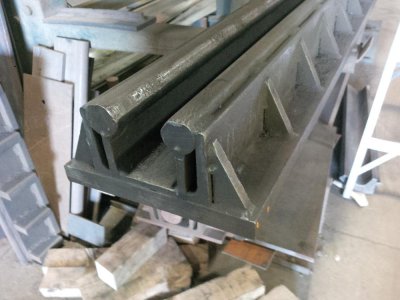
The gussets are from my "bucket o gusets" left over from my forge firepot I think. I can't throw anything away lol.
cCiBXwI.jpg

Quick weld job and it was time to test it out.
CHQi0mb.jpg
qatkTqo.jpg

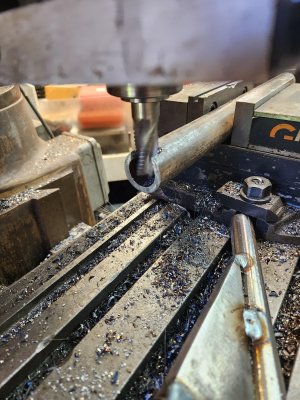
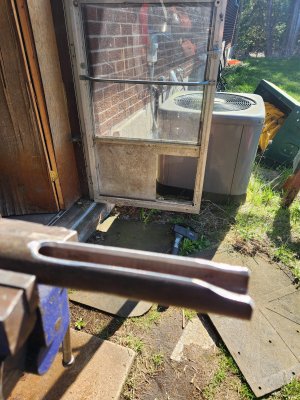
Damn....To small. If only there was something I could slip over this to make the radius bigger.....

LuFUBjL.jpg 7F9oDVY.jpg gnNSJSh.jpg
IHQfTOV.jpg

Another test bend. I have an idea for guides, but not sure I'll even need them. Will hold off machining them for now. The slip on pipe was planned from the start. Trying to make it as versatile as possible.
gSPOuQp.jpg
pS3dP1M.jpg

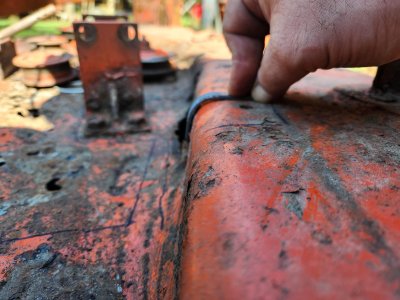
Close enough. It's a mower deck, not a Concours Bugatti.

Now the fun part......
IaBhzBd.jpg

Ughhhh. Will get started after dinner. I've been searching for a better deck for a while (was supposed to do this LAST winter), dreading having to patch this one up, but there's not much out there around here. It's not toooooo bad, but I'd rather start with something better. I know one will present itself on marketplace for $100, a week after I finish this one, and it'll be right down the road no doubt. I have another one in the barn, but it's rotten in all the same places too lol. This is fun right? Right?
 
Last edited:

Mcgyver

Ultra Member
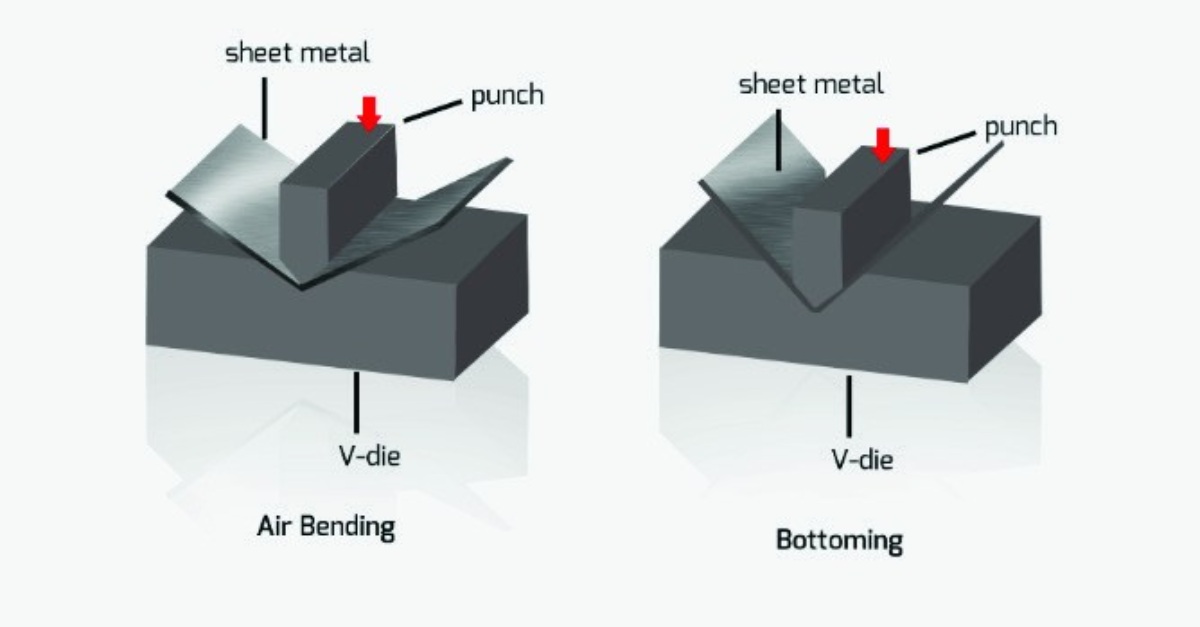
In saying you have no experience with this stuff, I didn't notice this before, or would have piped up earlier on the die design. Most brake work is air bends, meaning the material touches at the two edges of the die (usually rounded over) and the punch. Ergo, you want a die that is acute not 90. Its also best with round bar at the apexes rather than a sharp corner.


You can over bend to account for spring back and it takes less force. The coining action of a bottom bend (so you don't get spring back) is afaik more for really thin stuff and takes a precise die with lots of tonnage. Never done it, all ours, and all other fab shops I've seen use air bending (afaik). (Ours is cnc on the back gauge and down stroke, but really fancy ones sense the bend angle and compensate in various ways including pre-loading the bed into an arch and altering the ram depth). An air bending die will have a large radius in the bottom so as to not have a stress riser ..... can't have that with a bottoming die, at least not more than the bend radius which is usually not large.

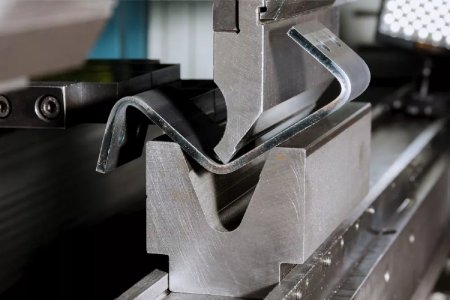
We occasionally make one for some special requirement, like the 2nd photo below, which could be scaled down. There is no angled side to the die as with an air bend, material doesn't touch there.


getting-back-to-air-forming-and-bending-basics-on-the-press-brake-1666890018-1300x867.jpg

IMG_00001355-1000x750.jpg
 
Last edited:

Dan Dubeau

Ultra Member
Thanks for the pics, and explanation,makes sense. I actually wanted to build a die like shown in your bottom picture. Probably will at some point. Or maybe just when I need it. I have an idea for something that will sit in my current lower die and work similar. I'll play around with it tomorrow, as I have the whole day to fix the mower deck and bend up some patch panels.
 
Top