• Scam Alert. Members are reminded to NOT send money to buy anything. Don't buy things remote and have it shipped - go get it yourself, pay in person, and take your equipment with you. Scammers have burned people on this forum. Urgency, secrecy, excuses, selling for friend, newish members, FUD, are RED FLAGS. A video conference call is not adequate assurance. Face to face interactions are required. Please report suspicions to the forum admins. Stay Safe - anyone can get scammed.

Working on my South Bend 9C

I lazily cleverly planned around the same pitch for all parts. I have one banjo with my turning gears and another with the threading gears so I "just" have to swap the banjos. It's pretty quick actually.

Sounds similar to what I had in mind.

I CAN do the tapers, just adjusting the compound and tool holder between taper and other work is a little annoying.

Like the gear banjo, you could make or buy taper gauge blocks to help you set the required tapers. It's easy to do. Heck, a 3D printed block might even work. You set the block against your chuck face and then set the compound on the angle face. The right angle face can be used to set 90 degrees.

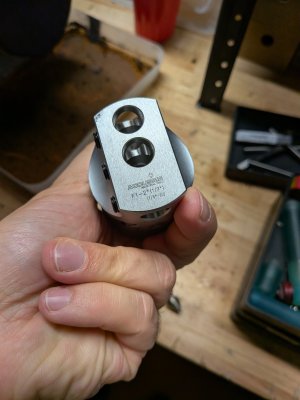
Re: boring head, do you mean for tailstock offset tapering? I do have a boring head, not sure about a live center to fit in it though.

Yes, I mean tailstock offset. Small live centers the same size as boring bar shafts are available on Ali and elsewhere.
 
Sounds similar to what I had in mind.


Like the gear banjo, you could make or buy taper gauge blocks to help you set the required tapers. It's easy to do. Heck, a 3D printed block might even work. You set the block against your chuck face and then set the compound on the angle face. The right angle face can be used to set 90 degrees.


Yes, I mean tailstock offset. Small live centers the same size as boring bar shafts are available on Ali and elsewhere.
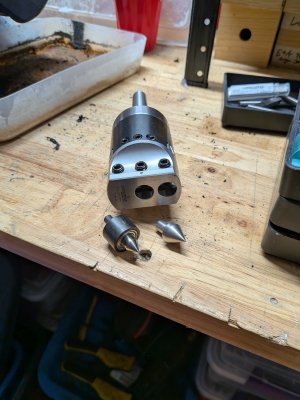
Ahhh yeah taper gauge blocks might be the play...
 
Sounds similar to what I had in mind.


Like the gear banjo, you could make or buy taper gauge blocks to help you set the required tapers. It's easy to do. Heck, a 3D printed block might even work. You set the block against your chuck face and then set the compound on the angle face. The right angle face can be used to set 90 degrees.


Yes, I mean tailstock offset. Small live centers the same size as boring bar shafts are available on Ali and elsewhere.
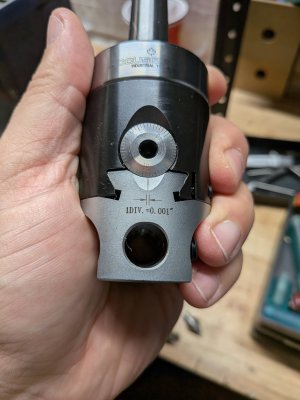
Don't forget dead and half dead centers.
 
I do have a boring head and a tiny live center (and dead center). Will need to make a bushing for those to fit but that should be simple.
 

Attachments

  • PXL_20261101_165009817.jpg
    PXL_20261101_165009817.jpg
    1.8 MB · Views: 2
  • PXL_20261101_165024936.MACRO_FOCUS.jpg
    PXL_20261101_165024936.MACRO_FOCUS.jpg
    1.7 MB · Views: 2
  • PXL_20261101_165032530.jpg
    PXL_20261101_165032530.jpg
    1.5 MB · Views: 2
You're too kind, and have been instrumental in said progress!

I lazily cleverly planned around the same pitch for all parts. I have one banjo with my turning gears and another with the threading gears so I "just" have to swap the banjos. It's pretty quick actually .

I CAN do the tapers, just adjusting the compound and tool holder between taper and other work is a little annoying.

Re: boring head, do you mean for tailstock offset tapering? I do have a boring head, not sure about a live center to fit in it though.

@140mower if it's pieces I can hook into my existing machine, I am always happy to experiment.
Hi Michael,
Make a ball centre for it ! I did that for my tailstock offset tool.
I did post a picture of the one that I made, not that I can find it at the moment.
 
Hi Michael,
I used a 6 mm steel ball from a bearing race and glued it to a small ball race that just happened to be 10 mm diameter.
In order to fit your boring head, which I think takes an 8 mm diameter cutter, just turn up a short coupling to fit the hole in both the bearing and the boring head. The actual bearing that I used came from a defunct computer hard disk drive.
 
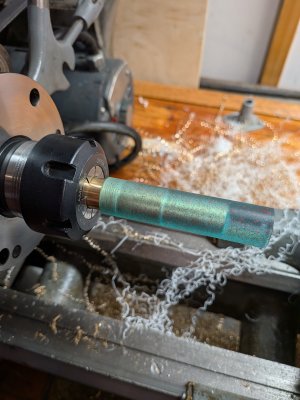
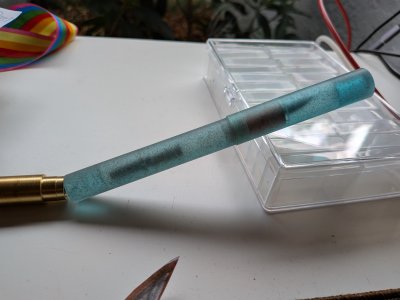
It needs tapers and end caps but it looks pretty good straight off the lathe before any polishing. However after getting the parts down to diameter there is definitely a slight concentricity discrepancy between the cap and body. I suppose my mandrels have more runout than I thought...
 

Attachments

  • PXL_20261105_182303053.jpg
    PXL_20261105_182303053.jpg
    935 KB · Views: 5
I suppose my mandrels have more runout than I thought...

If so, this is a real problem. Most likely it's caused by collet runout. You should measure it and figure out where it's coming from. Most likely it's from runout in the collet system. If you can't fix it, you might have to index it. Even with a really good collet system you have to do that sometimes. It's good practice to do it if you ask me. Sometimes you can index off the decimal on the collet size marking, and sometimes you have to make a mark.
 
If so, this is a real problem. Most likely it's caused by collet runout. You should measure it and figure out where it's coming from. Most likely it's from runout in the collet system. If you can't fix it, you might have to index it. Even with a really good collet system you have to do that sometimes. It's good practice to do it if you ask me. Sometimes you can index off the decimal on the collet size marking, and sometimes you have to make a mark.
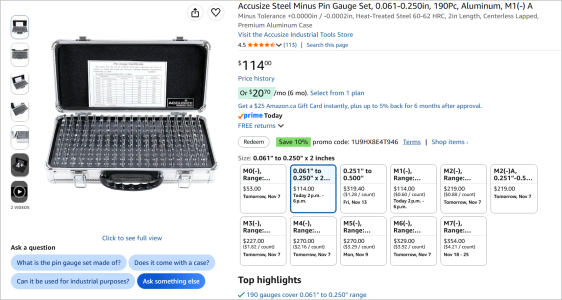
Would something like this kind of precision ground gauge be the best route for assessing that? https://www.amazon.ca/gp/aw/d/B004THB090

Juat wanging the pieces in I was getting like .030" TIR. Using the the mallet adjustment method I was getting it down to .010"
 
Would something like this kind of precision ground gauge be the best route for assessing that? https://www.amazon.ca/gp/aw/d/B004THB090
Thats a lot of money for a single gage pin. If you are in the 0.010" TIR range (thats a lot!) almost anything in your shop will be more accurate. You could turn yourself a 2" long stick between centers & it will probably be 0.0005". It should be smooth so the indicator isnt getting tricked by machining bumps & ideally should be hard so less effected by dings or clamping forces. But really, you could use brass for that matter & it would last years. Something like 12L14 will machine & finish very nicely. Obviously not hardened 7 ground but if you are just indicating off of it, perfectly fine using the scrap pile.

Not sure if you can make use of a set but they come in handy. Just pointing out the price discrepency to the single pin you showed. The small dia sets cost less than big for obvious reasons. But sometimes you can used find broken sets for a song if you just want a bunch of random dowel pins.
1793979539967.png
 
Would something like this kind of precision ground gauge be the best route for assessing that? https://www.amazon.ca/gp/aw/d/B004THB090

Juat wanging the pieces in I was getting like .030" TIR. Using the the mallet adjustment method I was getting it down to .010"

Ya, that will work but I'm with @PeterT - way too much $ for the benefit. I use gauge pins like Peter shows. You can get used sets really cheap on FBMP or kijiji. Who cares if the set is missing a few pins. Look for a set that includes the same diameter as your arbours and pen bodies.

You can also make your own or even use the shaft of a broken end mill.

I think the most important advice I can give you is to get a good Dial Test Indicator (DTI) and learn how to use it. Then learn how to align your chuck and index your parts.
 
All good info, thanks Peter and Sus.

I've got some 12l14 so I could certainly give that a go.

No convenient scrap endmills etc here.

You know I did check this with my plunge dial indicator, I'll run it again with my DTI.
 
You know I did check this with my plunge dial indicator, I'll run it again with my DTI.

Plunge indicators influence the part more than DTIs do. I prefer to use a DTI. Make sure you place it so the tip is parallel to the surface of what you are measuring.
 
Back
Top