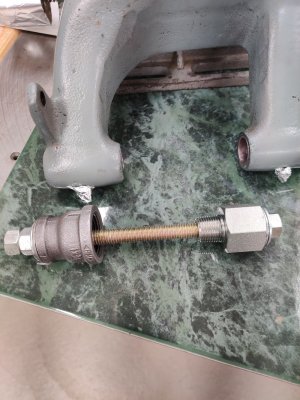
@ Darren, I too "collect" bearing races. Long ago I found they helped when installing a new replacement bearing in a recessed bore or a bearing over shaft, I cut the race with angle grinder, torch, etc. This allows the race to contract or expand slightly allowing easy removal from shaft or bore after pushing new bearing into place. Chamfer the edges of the cut you made before using. Using an old race allows pushing farther away from bearing seals and races, less trying to find the "perfect" piece to machine/make something to install a bearing.
-
Scam Alert. Members are reminded to NOT send money to buy anything. Don't buy things remote and have it shipped - go get it yourself, pay in person, and take your equipment with you. Scammers have burned people on this forum. Urgency, secrecy, excuses, selling for friend, newish members, FUD, are RED FLAGS. A video conference call is not adequate assurance. Face to face interactions are required. Please report suspicions to the forum admins. Stay Safe - anyone can get scammed.
-
Several Regions have held meetups already, but others are being planned or are evaluating the interest. The Calgary Area Meetup is set for Saturday July 12th at 10am. The signup thread is here! Arbutus has also explored interest in a Fraser Valley meetup but it seems members either missed his thread or had other plans. Let him know if you are interested in a meetup later in the year by posting here! Slowpoke is trying to pull together an Ottawa area meetup later this summer. No date has been selected yet, so let him know if you are interested here! We are not aware of any other meetups being planned this year. If you are interested in doing something in your area, let everyone know and make it happen! Meetups are a great way to make new machining friends and get hands on help in your area. Don’t be shy, sign up and come, or plan your own meetup!
South Bend 10K Horizontal Drive Bushings Replacement
- Thread starter Elektrishun
- Start date

