• Scam Alert. Members are reminded to NOT send money to buy anything. Don't buy things remote and have it shipped - go get it yourself, pay in person, and take your equipment with you. Scammers have burned people on this forum. Urgency, secrecy, excuses, selling for friend, newish members, FUD, are RED FLAGS. A video conference call is not adequate assurance. Face to face interactions are required. Please report suspicions to the forum admins. Stay Safe - anyone can get scammed.

Re-surfacing a D1-6 spindle nose

RobinHood

Ultra Member
Premium Member
This has come up from time to time: can one re-grind a spindle nose if it is messed up? The short answer is yes. It is not the easiest thing to do and a little reduction of the taper requires quite a bit of face grinding to make the system work properly after reconditioning.

MrCrispin shows us how he did it…

 
That's why you gotta clean everything before installing chucks. That nose was beat up pretty bad. I wonder about the runout numbers before and after.
 
I wonder about the runout numbers before and after.
Since it was ground 'in place' I suspect the runout was quite good -- at least a huge improvement from the oval taper and damage...

I'd like to see the old chucks get the same treatment so they also can have lower runout. No way the chucks that caused that are running true :eek:
 
Good video. That spindle nose looks abused, as in beat. If chips caused that I wonder what the guy on the end of the wrench was thinking. Must have taken a lot of force to compress swarf to make those kind of divots in hardened steel.

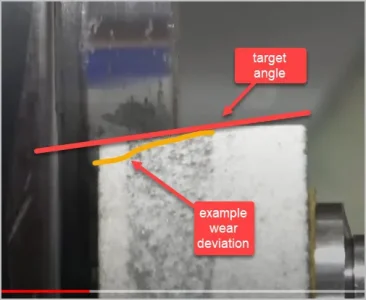
I wonder why he ground the nose angle on the stone & plunged axially? To my thinking, if the dress angle is off a teeny bit, or the stone wears/degrades different based on spindle conditions or grinding dwell time as the job progresses, the stone angle could drift off & therefore spindle angle not be (as) true. ie. why not pre-set the compound using a sine bar or whatever, leave the stone cylindrical & axial & parallel to spindle axis. The corner of the wheel would do the cutting & any wear would not matter as its always traversing in the correct angle.

He made some very good points about how the D-system is supposed to fit to both surfaces simultaneously. And at some point there can be adverse issues as to the camlock fit. I'm not quite sure how one could tune them after the fact. Taking material off them might be doable, but the reverse would not be as straightforward.
 

Attachments

  • EDT-2022-10-27 10.07.13 PM.webp
    EDT-2022-10-27 10.07.13 PM.webp
    15.8 KB · Views: 6
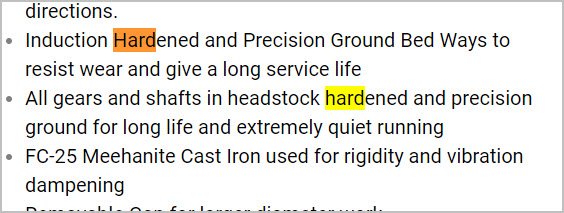
huh, maybe I've always incorrectly assumed or incorrectly read between the lines. Just pulled a random offshore 1440. Gears, bed ways, 'shafts in headstock' hardened in some form but it doesn't say spindle nose.

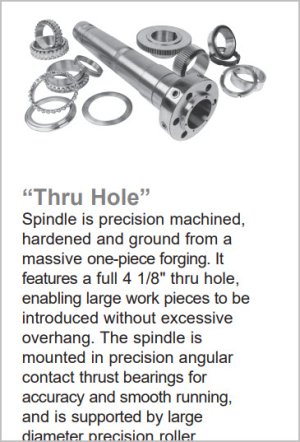
Maybe like this big boy is? Although again they don't categorically say the nose

I'm good without the file test thanks haha

I'm curious why would adhesion be compromised if nose was harder? Wouldn't the softer mating chuck/backplate conform anyways as its drawn in?
 

Attachments

  • SNAG-2022-10-27 10.44.31 PM.jpg
    SNAG-2022-10-27 10.44.31 PM.jpg
    31.7 KB · Views: 1
  • SNAG-2022-10-27 10.48.02 PM.jpg
    SNAG-2022-10-27 10.48.02 PM.jpg
    47 KB · Views: 1
The noses on my SM and Emco are either hardened or were extraordinarily well taken care of, as there is not a mark in either of them. I'd actually like to know, but I won't be taking a file to them to find out.

I think in Crispins case, somebody just beat the crap out of it. Perhaps using a collet without nose protection coupled with carelessness?
 
Crispin's day job is machinist at Rolls-Royce, I thought related to specialized grinding but not sure where I got that.

On an unrelated note, now this would be a good show to wander around.

 
Maybe like this big boy is?
OK so there is hard and there is HARD. My leBlond spindle is 4140 hardened to Rc40-Rc44. but that is soft enough to get beat up by swarf in the taper. When there is even a little swarf, the D1-6 cams bring about 2 tons of force *each* to draw the chuck into the taper, pressing that piece into both the headstock taper and the chuck mating taper.-- i suspect if it were a lot harder, putting an unbalanced force like swarf and drawing the cams in might crack the nose... D1-4 might be a little less per pin, but you get the idea.

I think in Crispins case, somebody just beat the crap out of it.
I'm sure that also happened. The long lines might be swarf, but the spots might be another kind of abuse...
 
I wonder why he ground the nose angle on the stone & plunged axially? To my thinking, if the dress angle is off a teeny bit, or the stone wears/degrades different based on spindle conditions or grinding dwell time as the job progresses, the stone angle could drift off & therefore spindle angle not be (as) true. ie. why not pre-set the compound using a sine bar or whatever, leave the stone cylindrical & axial & parallel to spindle axis. The corner of the wheel would do the cutting & any wear would not matter as its always traversing in the correct angle.
I wondered about that, as well. A possible explanation is that he wanted to be able to go back and forth between grinding the angled portion and the flat portion. The way he did it, he could grind a little on either one, test the fit, and then grind whichever needed it without having to reset the angle to precisely zero or 7.125 degrees as needed.

As presented in the video, he did all the grinding on the spindle and then ground the flat portion to sneak up on the desired fit. He did say that he ended up grinding far more off the flat section than he expected (7 thous?). I guessing that beforehand, he thought that he would need to go back and forth.

I was interested in this video but my issue is slightly different. My 3-jaw and face plate fit the spindle nose nicely. My 4-jaw is tight. It is not crazy-tight--it just takes a few taps with a brass hammer to get it off. In an ideal world, I'd like to dress the fit of the 4-jaw a little. Not a high priority at this point, however.

Craig
 
A possible explanation is that he wanted to be able to go back and forth between grinding the angled portion and the flat portion. The way he did it, he could grind a little on either one, test the fit, and then grind whichever needed it without having to reset the angle to precisely zero or 7.125 degrees as needed.....As presented in the video, he did all the grinding on the spindle and then ground the flat portion to sneak up on the desired fit.

After he dressed the stone to the spindle nose angle, it appears to me he then dressed the the end of the stone to a slight cup profile so that it would present an edge to the subsequent spindle rear face job. But to my thinking if he did the exact same cupping to the end but but left the stone cylindrical & set the compound, he could use the same stone and setup alternately for nose angle & rear face.

Anyway it was interesting to see someone do this work. I'd be chicken without seeing it done & knowing the ramifications. If the job went sideways & the spindle nose ended up undersize or incorrect geometry, a replacement spindle would be a sad face day. Maybe there is some kind of remedial process like spray welding to build it up again, I dunno. Sounds like a credit card melter either way.
 
@Dabbler comment about lack of spindle nose hardening makes me think of another aspect. I have seen examples where people had a slightly ill fitting back plate adapter. So they put some lapping compound between the 2 surfaces & gave it the rub-a-roo until they fit. Presumably thinking the spindle nose is harder & abrasion would take place on the adapter only. This operation seems dodgy at best but knowing the spindle might be roughly the same or potentially softer than the CI adapter, chances are better that you mess up the spindle profile DUE to the adapter. Now you have 2 problems, backplate & spindle. But the newly added spindle problem is a lot more significant.

Actually I had this issue with a back plate which was too tight. But I only worked on the plate taper & just used the spindle to check progress by blueing similar to Crispin
 
I'm good without the file test thanks haha

I kinda figured that would be your first line. I could almost see @Dabblers smirk from here when he said it.

FWIW, I always assumed mine was hardened too. But his comment swiftly changed my mind without a test or research.

Funny how that works sometimes. No further research or testing needed.... LOL!
 
It is not crazy-tight--it just takes a few taps with a brass hammer to get it off.

I used to use a brass hammer too. But I won a plastic hammer at an agricultural event and thought it might work as well and also save some wear and tear on my brass hammer.

I was surprised by how well it worked. One light tap was all that was required. I recently misplaced the plastic one in the jungle of tools in my shop - not quite enough organization in that chaos. I was shocked by how many taps and how hard I had to hit the chuck using the brass mallet again.

Then I found the plastic mallet and now I'm back to easy peasy.

I'm thinking the plastic (not rubber) introduces a vibration that the brass does not.
 
Last edited:
Coincidental recent YouTube post grinding TS live center using more basic methods. But he did pre set the compound angle

 
Back
Top