Meh. I taught apprentice tradesmen and women in the Forces, how to grind their own HSS tools, for about 8 years. If your grinder does not have an adjustable rest, make one! It'll make things SO much easier. Once you have a few hours of tool grinding under your belt, it becomes a lot easier to freehand grind a nice edge, but until then, the rest helps prevent your grind from looking like it was done by a blind guy following instructions over the phone...
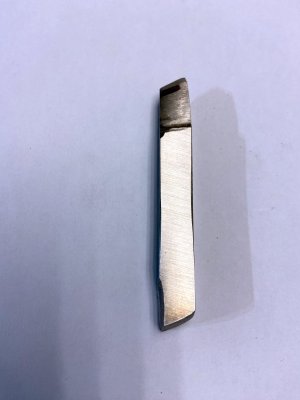
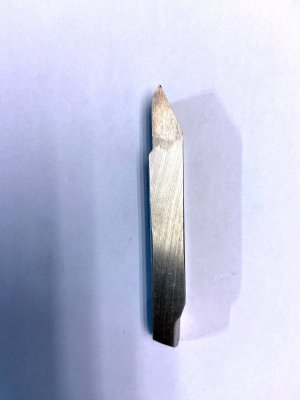
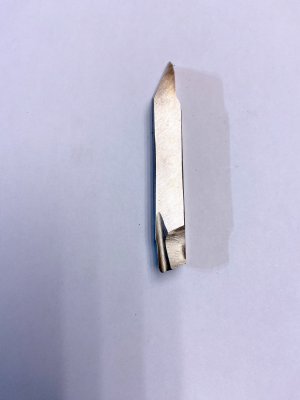
For threading tools esp., but for almost all HSS tooling, I found that having a fine tip Sharpie marker, and a protractor with a moveable rule attached to it, were the key tools to have. See how the guy that ground that threading tool had to grind away a bunch of the side of the blank, for clearance? Don't do that! Instead, use your protractor and Sharpie, to draw a series of lines at 30 degrees (or half the included angle of the thread) which reaches the front LH corner of the bit blank. It makes for a very long, straight edge to create, and when you grind the other angle to make it a threading tool, all you have to do is remove a VERY small amount of material, as well as if you duff the tool, you only have to grind one side (usually) to be back in business.
Drawing out your intended tool geometry on the bit blank, is pretty close to the first thing I went over, sometimes drawing it out on a parallel bar, as a giant easy to see substitute. I only ever caught one apprentice about to grind the Parallel Bar... You learn something from every single person you teach stuff to, eh? LOL!
When setting up the rest, set it so that the radius of the wheel, provides a 'hollow' about at the half height of the bit blank, while also providing the clearance angle (a couple-five or so degrees, not real critical, keeping in mind that the tool bit is going to be all or at least mostly, below the center height, so it won't have much there to bump in to!. By setting the height of the rest, and it's angle, you then only need to have a steady hand as you pass the blank across the wheel, and you get a really nice, clean grind. The 'hollow' makes it a super simple matter to stone your final cutting edge (I REALLY like the Eze-Lap Diamond hones, cheap and effective!) as only the lowest and uppermost parts of the blank will be in contact with the stone or lap. It's like one or two strokes, not an ordeal that needs to be lived with! Like, feel that the two edges are in contact with the lap or stone, then slide it upwards (top of tool leading), and take a look at it. You should be able to see a very clear line lapped on to the edge of the tool, as well as at the bottom, as both edges contact the abrasive. Marking the whole surface of the tool bit with Sharpie can make it even easier to see where material is removed.
We had an Optical Comparator that gave us 25X magnification, and we could measure angles and radii with, in the shop, and we inspected almost all the hand ground tools using it. Esp. threading tools that were not available as inserts, like the UNJ series threads. You can learn a LOT, when you can see the details. Even a hand magnifier is a great start!
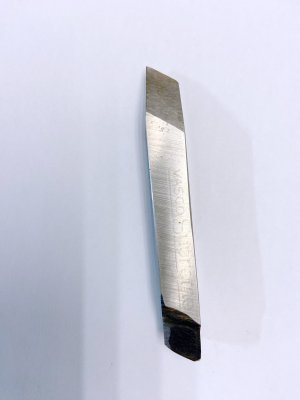
Watch the sales at places like Busy Bee or KBC Tools, buy a whack of the cheapest blanks you can find, and practice. You won't get better without putting hands on! And the super cheap Chinese HSS blanks are a pretty decent value, in my experience, esp when they are a buck or two each. I liked the 1/4 square bits for general use, the 1/4 x 3/8 blanks are great for making boring bars and internal threading tools.
I used to 'break in' the new apprentices with what I called the High Speed Grinding Demo. It is entirely based on reading both the heat treating cycle required to anneal HSS, and an understanding that the pot of water usually found, is for the comfort of the user, not to keep anything from going wrong with the HSS bit blank! Almost every warning you ever saw or read, or were told, about 'do not overheat the tool bit', is directly and only, related to using hardened Carbon Steel Tooling! High Speed Steel, is called that, because it will maintain a cutting edge, at red heat!
Draw out you lines, and add a couple extra of each, so you have a visual reference when you reach the actual target line. Clamp the blank in a decent pair of vice grip type pliers. Start the grinder. Make gentle contact, then lean on the damn thing like it owes you six months back rent! Watch the material vanish! Depending on the power of the grinder, one of two things will happen. You will stall the grinder (back off the pressure enough to keep it running), or you will see your tool blank go red hot and lots of the material goes away (resist the urge to plonk it in water, at that point, as the shock of sudden cooling can cause micro-fractures on the surface of HSS, though even those go away when you do your final 'for pretty' grinds. Let the red hot HSS cool in air, down well below black heat (no glow), before quenching. Old school days, the same folks that made lathe tool holders for on the lathe, also made and sold holders to hold the blanks in while grinding them. They had long handles for control, and a ball end on the holder, so you could lean in on it with your hip, and get the job done in a time that would not have your shift supervisor throwing a fit!
I LIKE HSS tooling, as I can make what I want or need, any time I want or need to! Carbide has it's place, but also a great long list of expensive frustrations while getting used to using it. Need an oddball thread, HSS is cheap and easy. Want a 0.015 width parting tool? You can make that! Like riding a bicycle, yer gonna crash a couple times. Try not to keep making the same mistakes, and yer gonna be good! You can't learn a new skill without practicing it!


")