Christer_Wallin
New Member
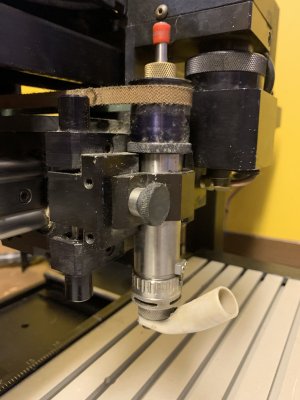
Hi, just joined the group. Basically since i found out there is some Dahlgren owners here!Welcome from Vancouver! Just finished my most recent mod to my Dahlgren Series 300 engraver, now running a hybrid Estlcam CNC controller & software with a slightly hacked pneumatic spindle actuator. Also have an original New Hermes manual engraver, a 3018 cnc, and a Squink pick&place SMT soldering station modded as a laser engraver. Definitely not an expert, but more than willing to help with my meagre engraving knowledge.
I found a Dahlgren System 300 with no controller, but seems in quite decent contition.
Not sure what I want to do with it. What is your take on bringing it back to life with a missing controller? I am looking for an affordable (cheap) way and yes I am a hobbyist yet unsure what I want to use it for at the end.
The machine just looks appealing to me and I want to use it somehow.
Best regards,
/Christer