• Scam Alert. Members are reminded to NOT send money to buy anything. Don't buy things remote and have it shipped - go get it yourself, pay in person, and take your equipment with you. Scammers have burned people on this forum. Urgency, secrecy, excuses, selling for friend, newish members, FUD, are RED FLAGS. A video conference call is not adequate assurance. Face to face interactions are required. Please report suspicions to the forum admins. Stay Safe - anyone can get scammed.

Mitutoyo like finish

Robin’ “Magic Plate”. https://www.instagram.com/robinrenzetti/reel/CqIj6eLAM8b/


Abrasive paper on a plate. Robin does a great job, my version is dumbed down a bit (just some ground plate and a regular size sheet abrasive from KMS) - easy to do and works very well for surface finishing.

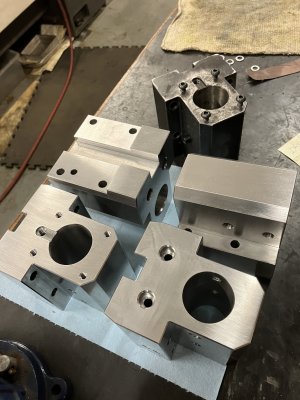
Here are some tool holder blocks that I finished on my plate. In fairness, my starting point for milling was to grind the 4 to the primary dimensions, equal size block to block and as square as I could get them (+/- one rolling paper) - I marked the reference surface, strictly speaking every surface was a legitimate reference.

In milling the details, the some surfaces were scratched and some were further milled from the rectangular blank. A final cleanup on the abrasive plate (plus some stoning ) took about an hour.
 

Attachments

  • IMG_1707.jpeg
    IMG_1707.jpeg
    2.1 MB · Views: 9
I'm using abrasive belts (scuff pad type material) in my Milwaukee belt sander, another good technique for some kind of work. Not really for larger planar surfaces.

1737331507319.png
 
Robin’ “Magic Plate”. https://www.instagram.com/robinrenzetti/reel/CqIj6eLAM8b/


Abrasive paper on a plate. Robin does a great job, my version is dumbed down a bit (just some ground plate and a regular size sheet abrasive from KMS) - easy to do and works very well for surface finishing.

Here are some tool holder blocks that I finished on my plate. In fairness, my starting point for milling was to grind the 4 to the primary dimensions, equal size block to block and as square as I could get them (+/- one rolling paper) - I marked the reference surface, strictly speaking every surface was a legitimate reference.

In milling the details, the some surfaces were scratched and some were further milled from the rectangular blank. A final cleanup on the abrasive plate (plus some stoning ) took about an hour.
This is almost exactly what I do except my plate is a large flat granite rather than steel... It does give a great finish with the right grit emery paper. but it's work
 
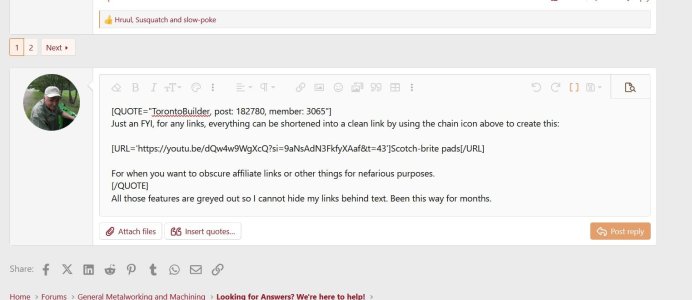
Just an FYI, for any links, everything can be shortened into a clean link by using the chain icon above to create this:

Scotch-brite pads

For when you want to obscure affiliate links or other things for nefarious purposes.
All those features are greyed out so I cannot hide my links behind text. Been this way for months.
 

Attachments

  • Screenshot 2025-01-19 203302.jpg
    Screenshot 2025-01-19 203302.jpg
    98.4 KB · Views: 4
uhhhhh, first the link button, now the BB code button. I am a Duffer! What does BB code toggle do? I'm afraid to click it now haha
 
uhhhhh, first the link button, now the BB code button. I am a Duffer! What does BB code toggle do? I'm afraid to click it now haha

Basically BB code allows you to write the code instead of using the drop down selectors.

 
Alrighty Then!! Thanks...why in hell would that damn button be allow to be visible in the first place?:eek:
:)

Because lots of guys on here are quite adept at programming such things. It's good to remember that the software itself was written by programmers. They get to choose what they want it to be able to do. For my part, I am grateful to them for what is mostly great software. I put up with the negatives.
 
Side track, but I thought the initial Mitutoyo reference was going to be replicating their typically green marble swirl paint jobs one sees on other machine tools & instrumentation, so I'll throw this in discussion.
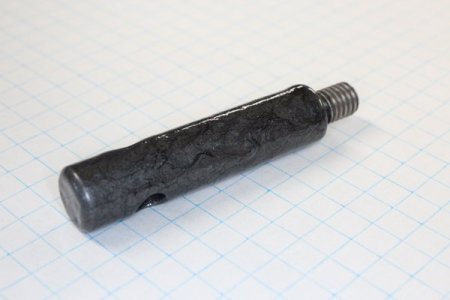
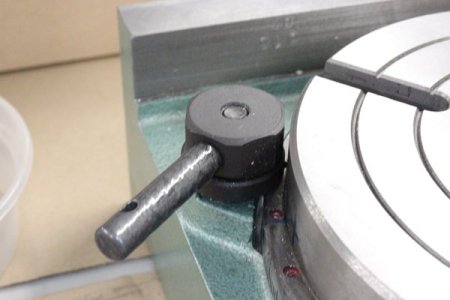
These are simple replacement handles for my RT. The stock ones have a plastic spherical knob which does not allow a table to overhang.

This is Hammer finish via RustOleum spray bomb. Came out OK for what it is. Smaller objects are a bit more challenging for the swirls to do their thing while drying. The overspray board to hold them upright actually looked better (larger planar area). So might be good for castings or surfaces where you are trying to trying to hide defects & unconformities & meanwhile give it some protection. You can see the RT itself has a similar finish in green. And you start to notice a few machine items around the shop with similar texture finish. This RustOleum spray bomb has a trigger type mechanism. They say 'sprays at any angle' but I have my doubts. The hammer spray is a bit thicker so maybe they sized the orifice on that basis? Don't get me started on the number & variety of spray caps these days, drives me mental. But in hindsight I probably wanted to start out with comparable Hammer product by Tremclad with a more ordinary looking cap. Assuming its the same resin base, I have used Tremclad on other items & found it survives typical rough & tumble & oily finger shop world for the little time it takes to apply. So just to be clear, not for a surface you need accuracy on, but for bodies or frames or ancillary components.
 

Attachments

  • 011904.jpg
    011904.jpg
    26.1 KB · Views: 3
  • 011902.jpg
    011902.jpg
    30.3 KB · Views: 3
Back
Top