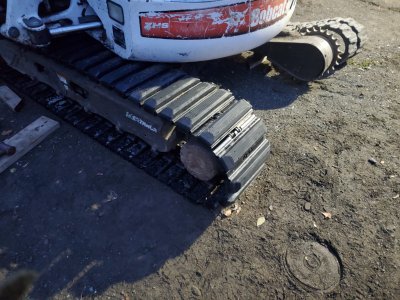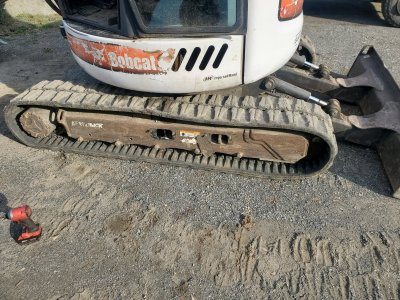
Mini excavator needs new tracks

20231031_134148.jpg

20231031_135417.jpg
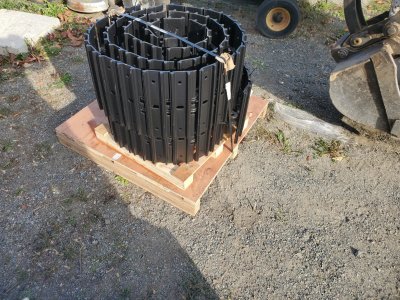
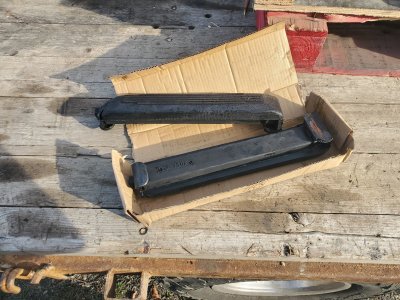
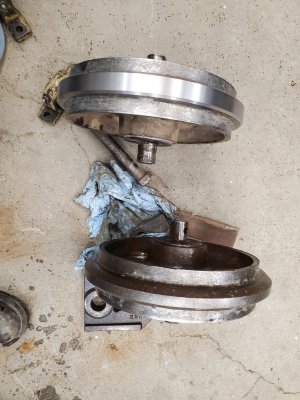
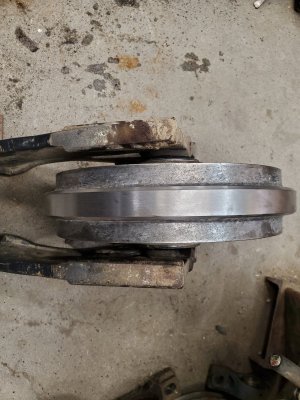
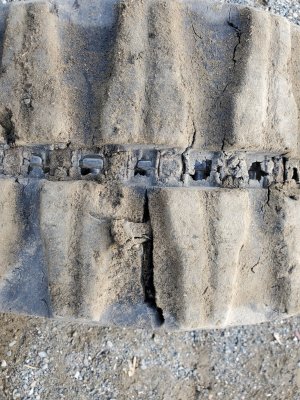
A few weeks back, I partially severed one of my tracks, and in typical fashion I was a long way in from the road and in some very steep terrain. Well, I limped it out of there when I was done and have been using it on light duty while I formed a plan to replace them. I have a spare that I have been packing around, but I have been reluctant to swap it out if I am going to turn around and replace them. The question became whether to stay with rubber or convert to steel with bolt on pads at a little over double the price. One little hiccup is that the front idlers need replacing as part of the conversion, and at $1500.00 it was a pretty big hiccup when one rubber track is about that. So, I grilled the salesman some to do a bit of digging into the difference between the two. Well, it turns out that the center rib is too tall on the rubber track version and the steel tracks take one with a shorter rib...
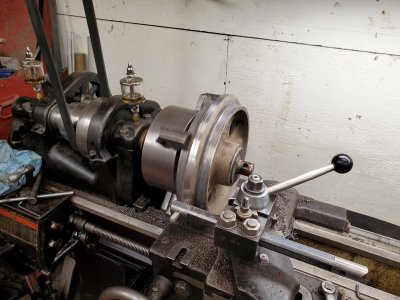
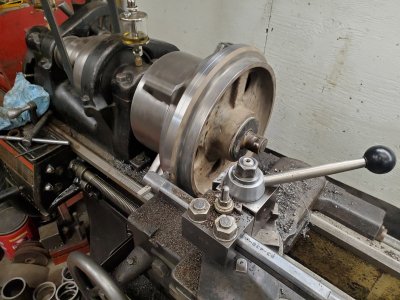
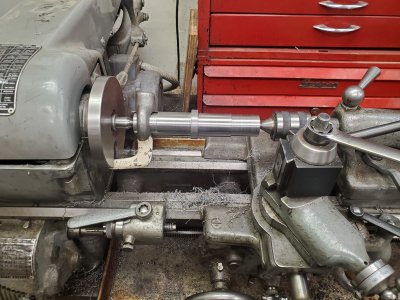
So out with a file and tape measure, yup it's soft enough, and yes, it fits in the lathe, barely.... Yee-haw, I have myself a justifiable shop project, and it is not even quite shop season yet. Better yet, I am saving $300 more than I paid for the lathe.
 
20231031_134155.jpg 20231031_134212.jpg
New tracks have arrived! These are supposed to last up to 4 times as long as the rubber ones, and something that I am liking, is that they are supposed to be around 500 lbs heavier per pair than the rubber ones. They should give a little better traction and stability.
 
20231031_153049.jpg 20231031_155737.jpg

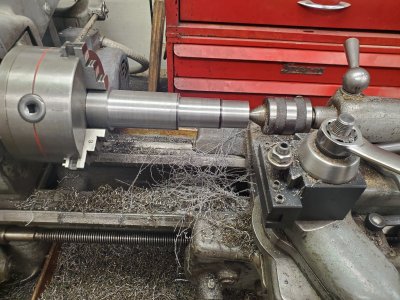
I am still working on the first one, due to the excessive jaw stick out etc., I am running it in back gear and taking light cuts. No going back now, the finish is really quite nice, not that it's going to be seen once installed....
This is the first time using the Aloris BX tool post I recently purchased from a forum member and the Armstrong boring bar he threw in because it was too big for his lathe.
Thanks again Barry!
Wife had surgery yesterday, so not getting too carried away with shop stuff today, besides what good Canadian boy doesn't get distracted with a hockey game.....
 

jorogi

Well-Known Member
Not sure about Bobcat but in my experience with Kubota I always check for component pricing. Called for price and availability of part for an idler, 1600 or so, should have been 60. Checked a bit more and found I could get a complete new idler and assembly for 600. The factory buys parts as components so they're cheaper often than when they have to handle an individual part.

John
 
I was a little bit pissed off with Bobcat going into this, so I didn't even offer them a phone call. I made sure that I let them know that as well when I had to go in and pick up some parts that they "forgot" to order a couple times....
I had a couple questions about their grader attachments and pricing, 7 days and still waiting. I'm starting to think that aftermarket might be for me. If I didn't already have more projects than I will ever get to, I would try my hand at making my own, but, I want it sooner than that. Lol.
 

Darren

Ultra Member
Premium Member
I have a Cat 302.5 mini ex and it needed some new shoes too. I called a good friend of mine at cat service and inquired, and promptly ordered a set of predator skins off ebay. I took the leftover cash and built my 36x50 shop.

EDIT: i'm joking, but the difference covered the framing lumber/sheathing and was a bit of a joke for a while - 23k from cat for tracks and a few rollers Vs 4500 off ebay for the same items.
 
Last edited:

Susquatch

Ultra Member
Administrator
Moderator
Premium Member
I took the leftover cash and built my 36x50 shop.

Ain't it the truth!

I prolly posted this a while back. Deere wanted a King's ransom for new fuel injectors. So I bought brand new ones from a supplier for pennies and machined the caps for easy future remove/install without their solid gold special tool.

The shed I could build with the savings would be a few square feet smaller than yours though!
 
.....so, the first one went just as slick as snot, isn't that always the way. This second one has been a real bugger right from the get go. After a few hours of heating and beating, and some colorful language the last of the side plates were liberated from the axle.
Then into the lathe it went, no change in the setup except for the idlers. Same stick out of the boring bar, same speed and feed...... Only now I have more chatter than a 3 year old eating chocolate coffee beans. After pissing around with everything else, I re-ground the tool bit for a little less nose radius and I think I finally got past that..
20231101_143126.jpg
A side by side of the finished one beside the idler from hell.
20231101_155757.jpg
Side plates back on and first side ready to go back in...
I'll pick away at it a little bit more this evening, but probably won't get my full attention for a couple days.
 

cjmac

Active Member
Thanks for posting this. I Have a JD35 where one of the idlers has a ridge on the side that is breaking away one small piece at a time. I have thought a few times about just welding and machining a repair to see if it holds. Anyway, your posts have encouraged me to think more about repairing idlers instead of just replacing them.

Chris
 
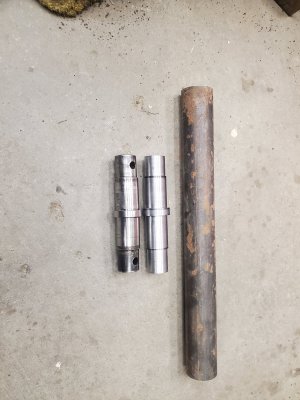
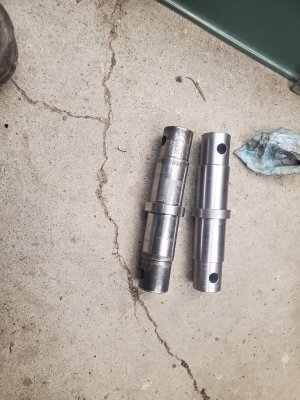
...... So, in full disclosure, there's a little more to the idler fiasco. While I was turning the idler from hell I noticed that the axle had a little bit of wobble, yup, it's bent. Now, I considered putting it together as it was as I am behind the 8-ball a little bit, and then fixing it properly this winter. Well, with rain in the forecast for the next few days I figured now is the time...... One of the two bearings is just starting to rumble a little bit, but the other is still silky smooth, so, at a couple hundred each, I only ordered the one, plus two seals.
20231103_112142.jpg
One side roughed out, I then flipped it around and roughed out the other end in the 3 jaw, leaving enough to finish up between centers.
20231103_135425.jpg
A chunk of the rough barstock, the new, roughed out shaft, and the bent one. It's nice having a big chunk of raw stock hanging around....
 
20231103_160743.jpg

Left it alone for a while to cool, then put it between centers to finish it out..... Next time I will leave a little more meat on the bone, I had enough, but barely.....
20231103_165427.jpg
And, here's where I sat when I stopped to make dinner (pretty sure that the wife will be all healed up for two weeks before I find out). I'll head back down in a bit and see if I can't drill the holes in the wrong places and trim the one end to length......
 
Between centers, I love it, Nice work!
Thanks. There was very little runout just by turning in the 3 jaw, surprisingly little in fact, but by finishing between centers it's pretty much eliminated. I was going to leave .010" for finishing, but decided that .015" might be better........ Next time I will leave .020" or more, it was pretty warm, and it shrunk quite a bit.....:rolleyes:
 
20231104_151207.jpg
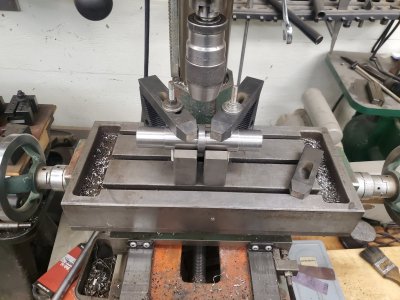
........Damn it! I was supposed to drill the holes in the sides. :oops::eek::rolleyes:

20231104_144446.jpg
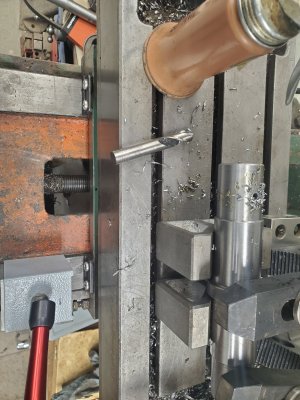
One thing that drives most people nuts about these little round column mills, myself included is you can't get into the bigger sized bits without raising the head. A while back I got frustrated and just cut one of my drill bits in half and re-ground it. I have a tobacco can full of spares that I have collected and just modify them as required.....
 

YYCHM

(Craig)
Premium Member
One thing that drives most people nuts about these little round column mills, myself included is you can't get into the bigger sized bits without raising the head. A while back I got frustrated and just cut one of my drill bits in half and re-ground it. I have a tobacco can full of spares that I have collected and just modify them as required.....

A set of stubby drill bits solved most of my drilling dilemmas. They are about the same length as an endmill.
 
It's going to be another day or two before the bearing and seals get here, but I got the one side on and all its rubber pads bolted on. Sadly, they don't clear the extra counterweight that is bolted to the bottom at the rear. I'm going to try removing that tomorrow and see what the clearance looks like. With the added weight of the steel tracks, I don't think I will need it. Famous last words, I am sure......:rolleyes: 20231105_165643.jpg
 

Susquatch

Ultra Member
Administrator
Moderator
Premium Member
Sadly, they don't clear the extra counterweight that is bolted to the bottom at the rear.

Can you make extension brackets to move the weight rear ward and upward? That should actually help its function if it's doable.
 
Can you make extension brackets to move the weight rear ward and upward? That should actually help its function if it's doable.
Unfortunately, no. It's a steel plate that is bolted to the bottom under the engine compartment. I'm going to try and look at it again when the sun comes up, and see what I can do. It's possible that removing that plate still might not be enough.......
 
Top