• Scam Alert. Members are reminded to NOT send money to buy anything. Don't buy things remote and have it shipped - go get it yourself, pay in person, and take your equipment with you. Scammers have burned people on this forum. Urgency, secrecy, excuses, selling for friend, newish members, FUD, are RED FLAGS. A video conference call is not adequate assurance. Face to face interactions are required. Please report suspicions to the forum admins. Stay Safe - anyone can get scammed.

K o D's Korner

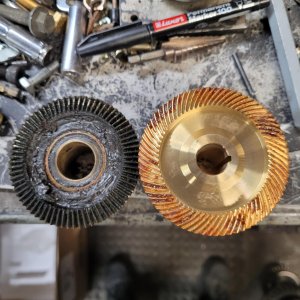
Oh look...apprentice marks...
20240901_152609.webp

20240831_170323.webp

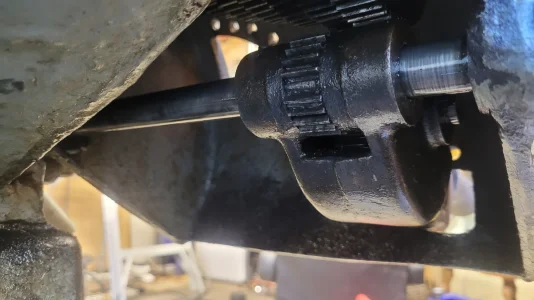
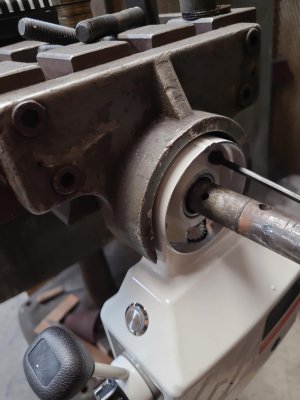
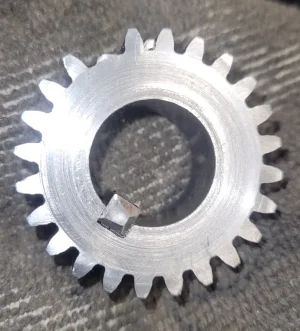
That gear came out of the speed change gizmo...the pin in the back for the gear pack engagement...not even locked in to place...
9d8eb667-0c64-4e1a-b560-ff8518144095.webp

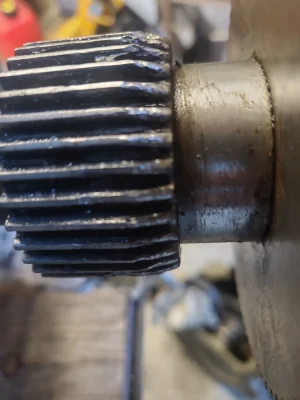
This tumbler looks like it was half engaged for a while
There's 2 of them on this unit...both in similar condition
fd40b136-4b92-4b7d-b0c8-c78fc7996664.webp

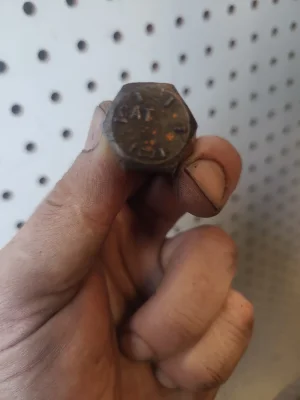
Equipment mechanic tell-tale sign...

I was successful with getting it wired up and running...VFD works good
The new cone drive belt from the local distributor works like a charm
But upon light up, the gear train was making some pretty hellacious noise...
So I started looking deeper...
Lots of loose fasteners...some chipped teeth...
Not surprised...it IS 100 afterall...
If anyone has gears in a box collecting dust...lemme know lol
The gear pack for the lead screw has 3 damaged gears in it as well...
So I guess it makes sense why the previous owner made the comment about scrapping it....he just didn't want to put in the effort to repair it...
It can still turn parts though
And I'm ok with that...
 
With 2 RPM meters, one on the spindle and one on the power feed, and variable speed feed control you could hit a RPM required for a thread. Then add a thead dial to your power feed gear train and you could repeatedly cut threads.
 
With 2 RPM meters, one on the spindle and one on the power feed, and variable speed feed control you could hit a RPM required for a thread. Then add a thead dial to your power feed gear train and you could repeatedly cut threads.

I don't think so John. How do you resync the shafts after the first pass....... I don't think a thread dial would resync them. So unless you can cut the whole thread in one pass, I think you are cooked.
 
I don't think so John. How do you resync the shafts after the first pass....... I don't think a thread dial would resync them. So unless you can cut the whole thread in one pass, I think you are cooked.
I think the challenges of set up would outweigh the benefit of cutting threads on this old girl.
Getting the timing just right would be a real PITA...

honestly gents, I'm just pleased my idea worked. I'm quite happy to turn parts and not have to hand crank that sucker...

Oh! I did try some passes using the power cross-feed in the apron....works great!
I admit I may have put a torture test to that gear headed drive motor, repeatedly making a cut, stopping the PCF, reversing it out at a higher feed rate, adding some depth of cut, and heading back in to make another pass...I kept that up for about 10 mins, playing with the feed rate to see how the finish would turn out.
That motor, and my setup, didn't complain once. The motor did get warm, but not as though it was too hot to touch.

So overall, I'm happy.
 
Finally got power to the Induma, it's been a floor ornament for way too long. Decided I'd rather have it running where it sits. Otherwise, it's moving most of the contents of this side of the shop out, just to get room to wiggle it down and around the corner.
Wiring it up took a little creative thinking, with more 4 wire, a knife switch, 45 feet of CAT6 cable, an ethernet splitter and the spare control panel that came with my VFD. Details on that can be seen on my YT...

I've had this block of steel make its way in and out of the forge a few times...mostly just to have something in the forge while I was playing with the air/fuel mixtures.
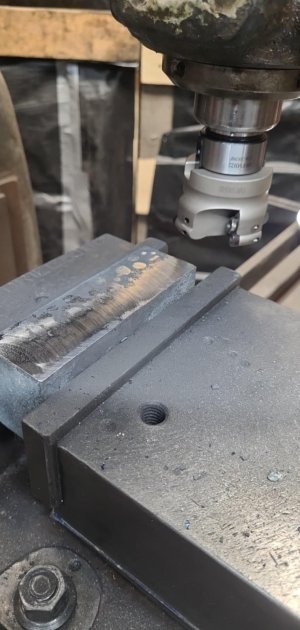
My intention was always, to clean it with a mill. So after knocking most of the scale off with a hammer n' the wire wheel, I clamped it into the vise.

79a82e4c-4ada-4601-a0f5-e1a24af31991.jpg


6e3a9098-a1d8-42a4-b75d-9e9d25b9aed2.jpg


I took a few light passes to get an idea of what noises the mill produces, then gradually ramped up the depth of cut.
Where this gets finicky for me, is it's ALL manual on the Induma (for now) eventually that power table feed unit of Vevor's will be hanging off the end.
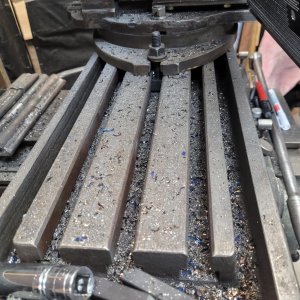
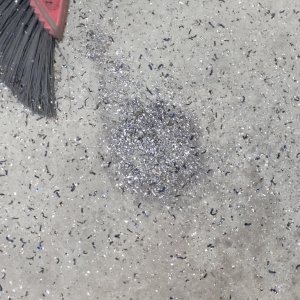
With the deeper cuts, the chips of course got larger, and hotter...

table swarf.jpg


floor swarf.jpg


Look at the pretty colours. <-- love it when Google says it's spelt color...NOT!
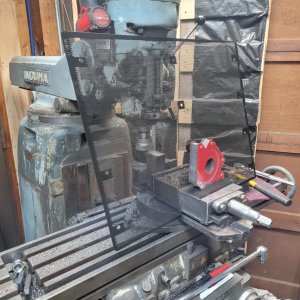
It only took a few moments to smarten up n put some kind of screen contrivance in the way of the flying debris..

1.jpeg

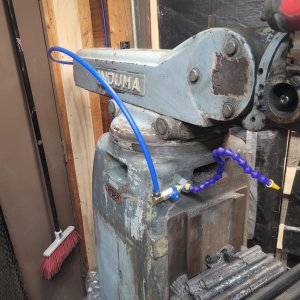
And then, last night, while listening to the game...I ran a Tee splitter off my outdoor supply to a ball valve air jet blower....thing.
The little base is magnetic...so I didn't have to drill holes or create a mounting fixture
Now I can use a little air and blow the chips away from my face n eyes...

2.jpeg

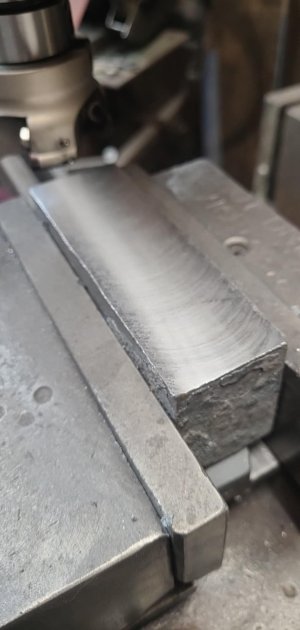
So with a machine potentially as old as I am, coupled with a vise of questionable origins and treatment, and using a basic level to get the head as close to tram as I could...I think the results are ok...
Where the face mill did it's work, is smooth to the touch, and not much for burrs on the edges...When I ran one of my KMS Magnum squares over the corners, once all 6 sides were done, the results look good...no obvious wonky angles that I can make out...
Then I realized I have got the stock to a close size to that of a BXA tool holder...
Just have to do some shopping now for the right size dove tail cutter...
 
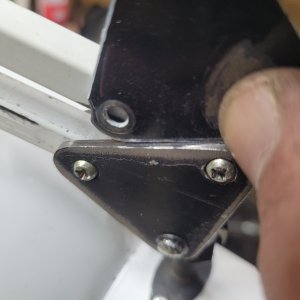
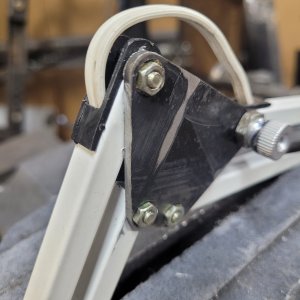
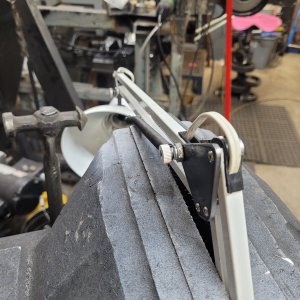
So a freebie gooseneck work lamp from MP made it's way home the other day. This one was up for grabs as 2 of the braces in it's hinge setup were asked to move in a direction that wasn't compliant with the design.
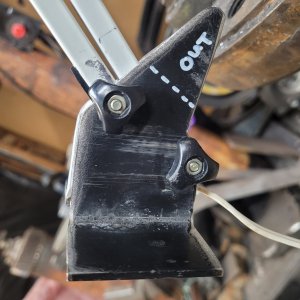
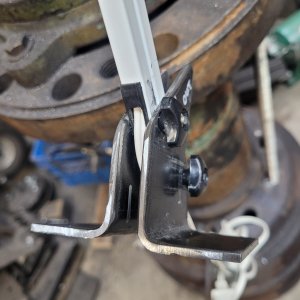
I got straight to using the existing hinge braces as templates, and fashioned up some new ones from my stock of "shipping bumper" metal...the first pic shows the old brace thickness, compared to the new material. It's close to 3 times as much.
Still have to tweak the base mounts, the ones marked with "out", so as to remind me which way they have to be bent.
Not shown, is where the pins for the lower tension springs go. Essentially, they'll end up round where the U in "out" is.
Next will be the swiveling bit that the base mounts will attach to.
Then I'll mount it to the mill, or close to it.
Right now, it's all just test fit together, to make sure it'll move freely. I plan on giving all the parts I made a "Craigslist Show n Shine" when I'm done.
Other than an hour or so of my time, this side project has cost me zero.
And I feel better about rescuing a perfectly useable lamp.

1000018486.jpg
1000018487.jpg

1000018488.jpg
1000018489.jpg

1000018490.jpg
 
Back
Top