• Scam Alert. Members are reminded to NOT send money to buy anything. Don't buy things remote and have it shipped - go get it yourself, pay in person, and take your equipment with you. Scammers have burned people on this forum. Urgency, secrecy, excuses, selling for friend, newish members, FUD, are RED FLAGS. A video conference call is not adequate assurance. Face to face interactions are required. Please report suspicions to the forum admins. Stay Safe - anyone can get scammed.
  • The 2026 Calgary Area Meetup is set for Saturday May 30th at 10am. The signup thread is here! Robinhood has graciously offered to host the meetup again this year. Please note that you MUST RSVP to the notice linked above if you wish to come.

I need to make a panel for the MGB

DavidR8

Scrap maker
Administrator
Moderator
Premium Member
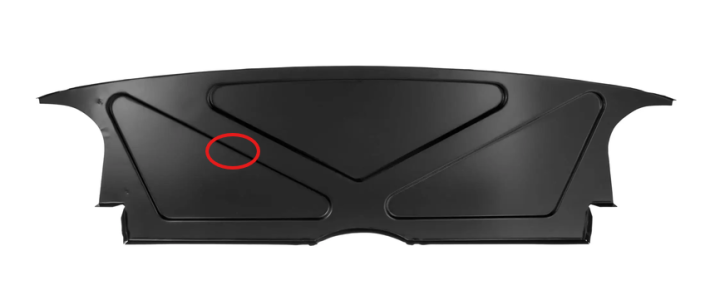
On my MGB someone cut holes in the rear bulkhead to mount 6x9 speakers. (insert massive eye roll here....)
I want to fill in the holes. If it were a flat panel it would be easy but the bulkhead has raised/embossed areas for strength.
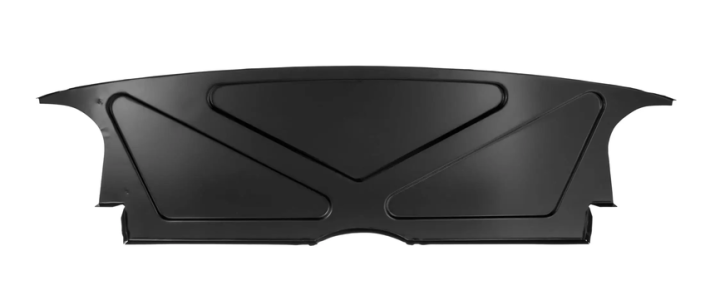
This is the entire panel with the red oval being where one of the holes is.
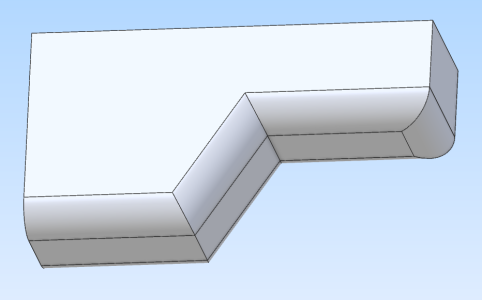
I'm trying to figure out how to make a panel with a Z-bend so that I can try and match the profile of the rest of the panel.
1790140302638.png
Lacking any sheetmetal tools my first thought is to make a pair of dies that fit on my 20-ton press to form it, maybe 3/4" at a time.
I'd start with a square piece of sheet metal, make the Z-bend. To fill the hole I'd line up the bend with the existing panel and trace the hole onto it.
Is this a fools errand or could it work?
1790140831231.png
 

Attachments

  • 1790140221873.png
    1790140221873.png
    75.8 KB · Views: 4
Maybe it would be easier to just add an entire flat acoustic board across the whole bulkhead. The shape is just there to add structural support. Adding a flat acoustic sheet across the whole bulkhead will actually improve that support, look more appealing, and function better too. The weight would be negligible.
 
A method I've used in the past is to make up the patch a little larger than the hole for an overlap.
Then weld the patch in on one end and start bending it as you get to the first crease, continue to bend and weld as needed until the patch is fully in place.
Don't be afraid to use a hammer to persuade it into compliance, the original metal is probably 20ga, using 22 or 24ga will make the bending easier.
 
That would be a repair similar to what is done on aircraft. Look up some techniques on aircraft related sites. Maybe look around for a place that does duct work. Explain what you want to do and ask about using their equipment. Where I live the small shops are pretty good about things like that. It's also highly likely that there are some homebuilt aircraft enthusiasts in your area. They can help or point you in the right direction.
 
Perhaps a set of dies milled out of MDF, into the 20 ton press, press a few inches at a time part way, move to next spot beside and continue. Don’t shape to much at a time or the distortion will be too difficult to work out. The thinner the sheet, the easier to shape. Work with 2 pieces, much easier, allow for the Z, about 8X12. A test strip, about an inch wide will give a good idea how wide a piece will be needed.
Did form a few pieces in one go with my little 10 ton press, but not over 6 inches long, however an 1/8 thick, took everything it would do and steel dies. A bit of tuning with a hammer, LOL. A piece for a motorcycle mount that could not be bought anymore. Guy was happy, back on the road.
Made me miss the 100 toner in the one shop, would rivet heads nicely on 5/8? rivets when putting new crown gears on differential carriers.
 
I’d go with a patch using a bead roller you have the lathe to make the dies, or forming it over a piece of hardwood. I believe you said you have a tig?
 
Back
Top