Place holder - photos coming tomorrow.
My quest to conquer lost-pla always came back to the PLA burnout step -- specifically how/where to do it. Fire pit? Kitchen stove (the smell will have you divorced)? Propane torch?
Being stuck at home (covid) and having the yard in shape, I have time to burn on projects. I decided to repurpose a bunch of scrap and made a 'add-on' for my electric furnace that would perhaps allow me to heat-treat/anneal/temper metal as well as do PLA burnouts.
My electric furnace was built from the lindsay/gingery series of books where they have you ruin a table-saw top by cutting hard fire bricks on it") The book calls for a range-switch to control the temperature, but after the first two days, you want ON or OFF. ON to heat, OFF before you reach in to avoid electrocution. I've been toying with adding a PID controller to the mix, so over the winter I source a set of 1300C thermocouples and a couple of PIDs to go with (SSR/relay type). I ordered two, one for @Janger , (he knows he'll want one).
The book calls for a range-switch to control the temperature, but after the first two days, you want ON or OFF. ON to heat, OFF before you reach in to avoid electrocution. I've been toying with adding a PID controller to the mix, so over the winter I source a set of 1300C thermocouples and a couple of PIDs to go with (SSR/relay type). I ordered two, one for @Janger , (he knows he'll want one).
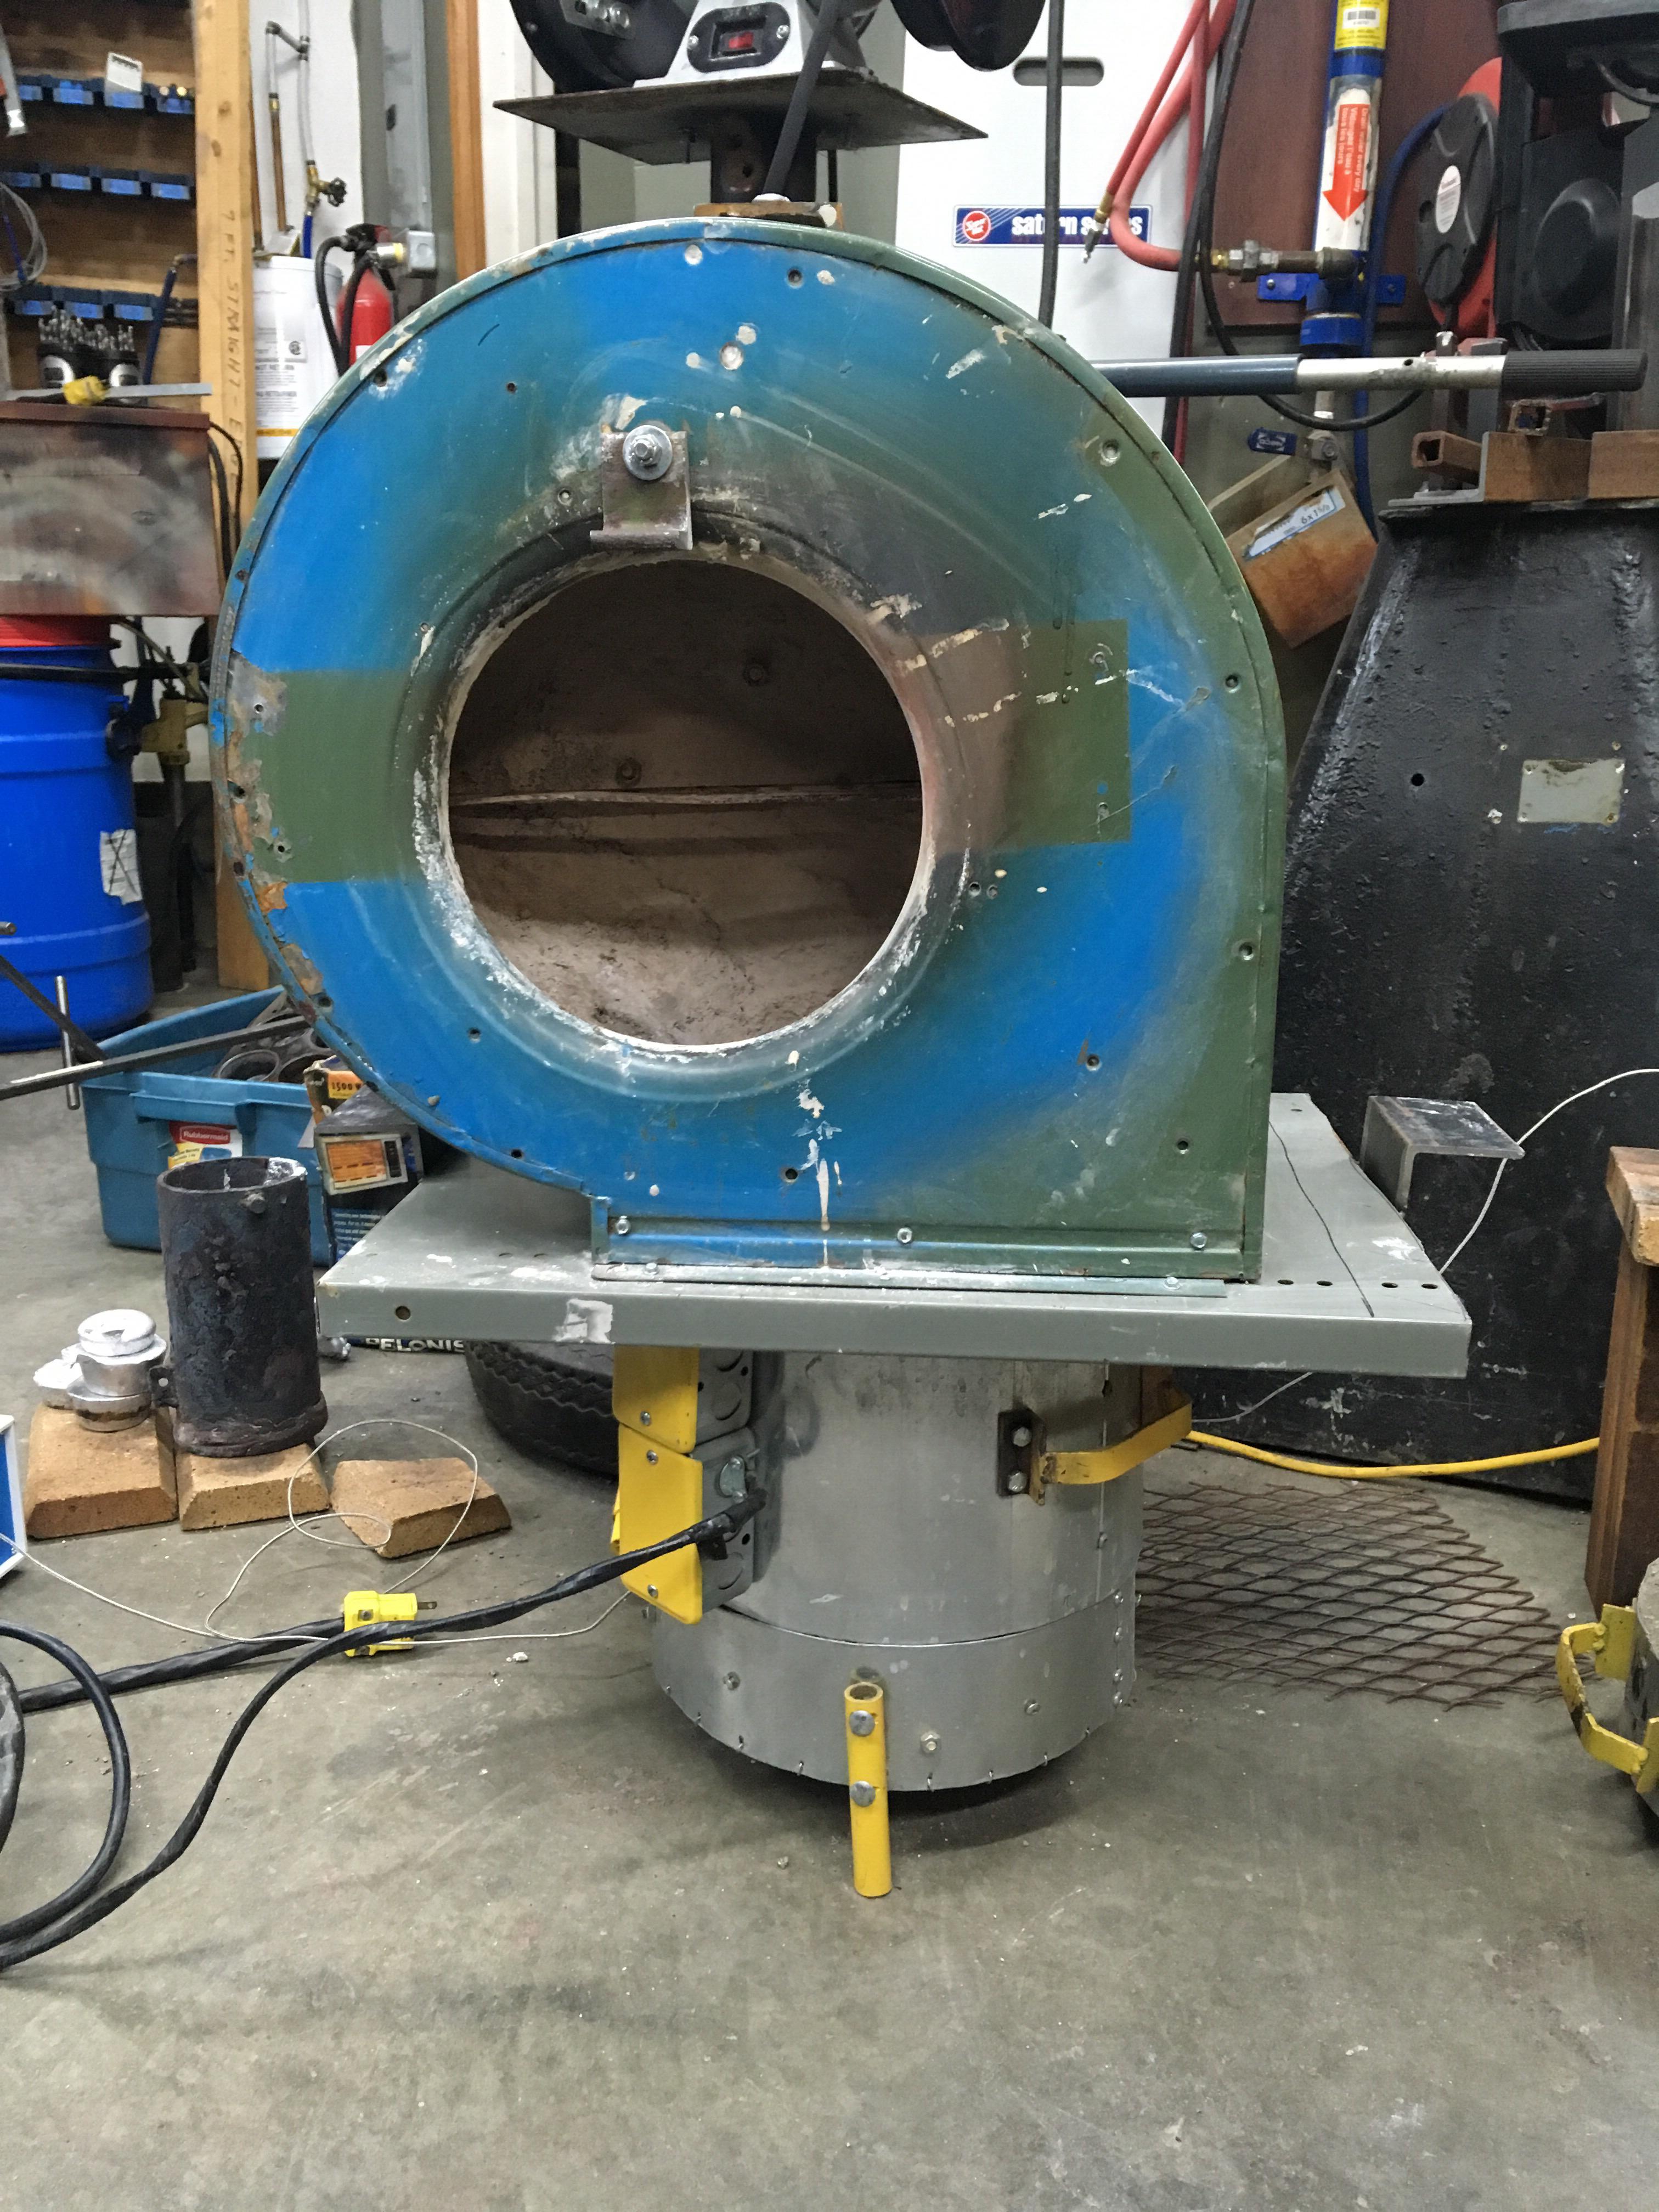
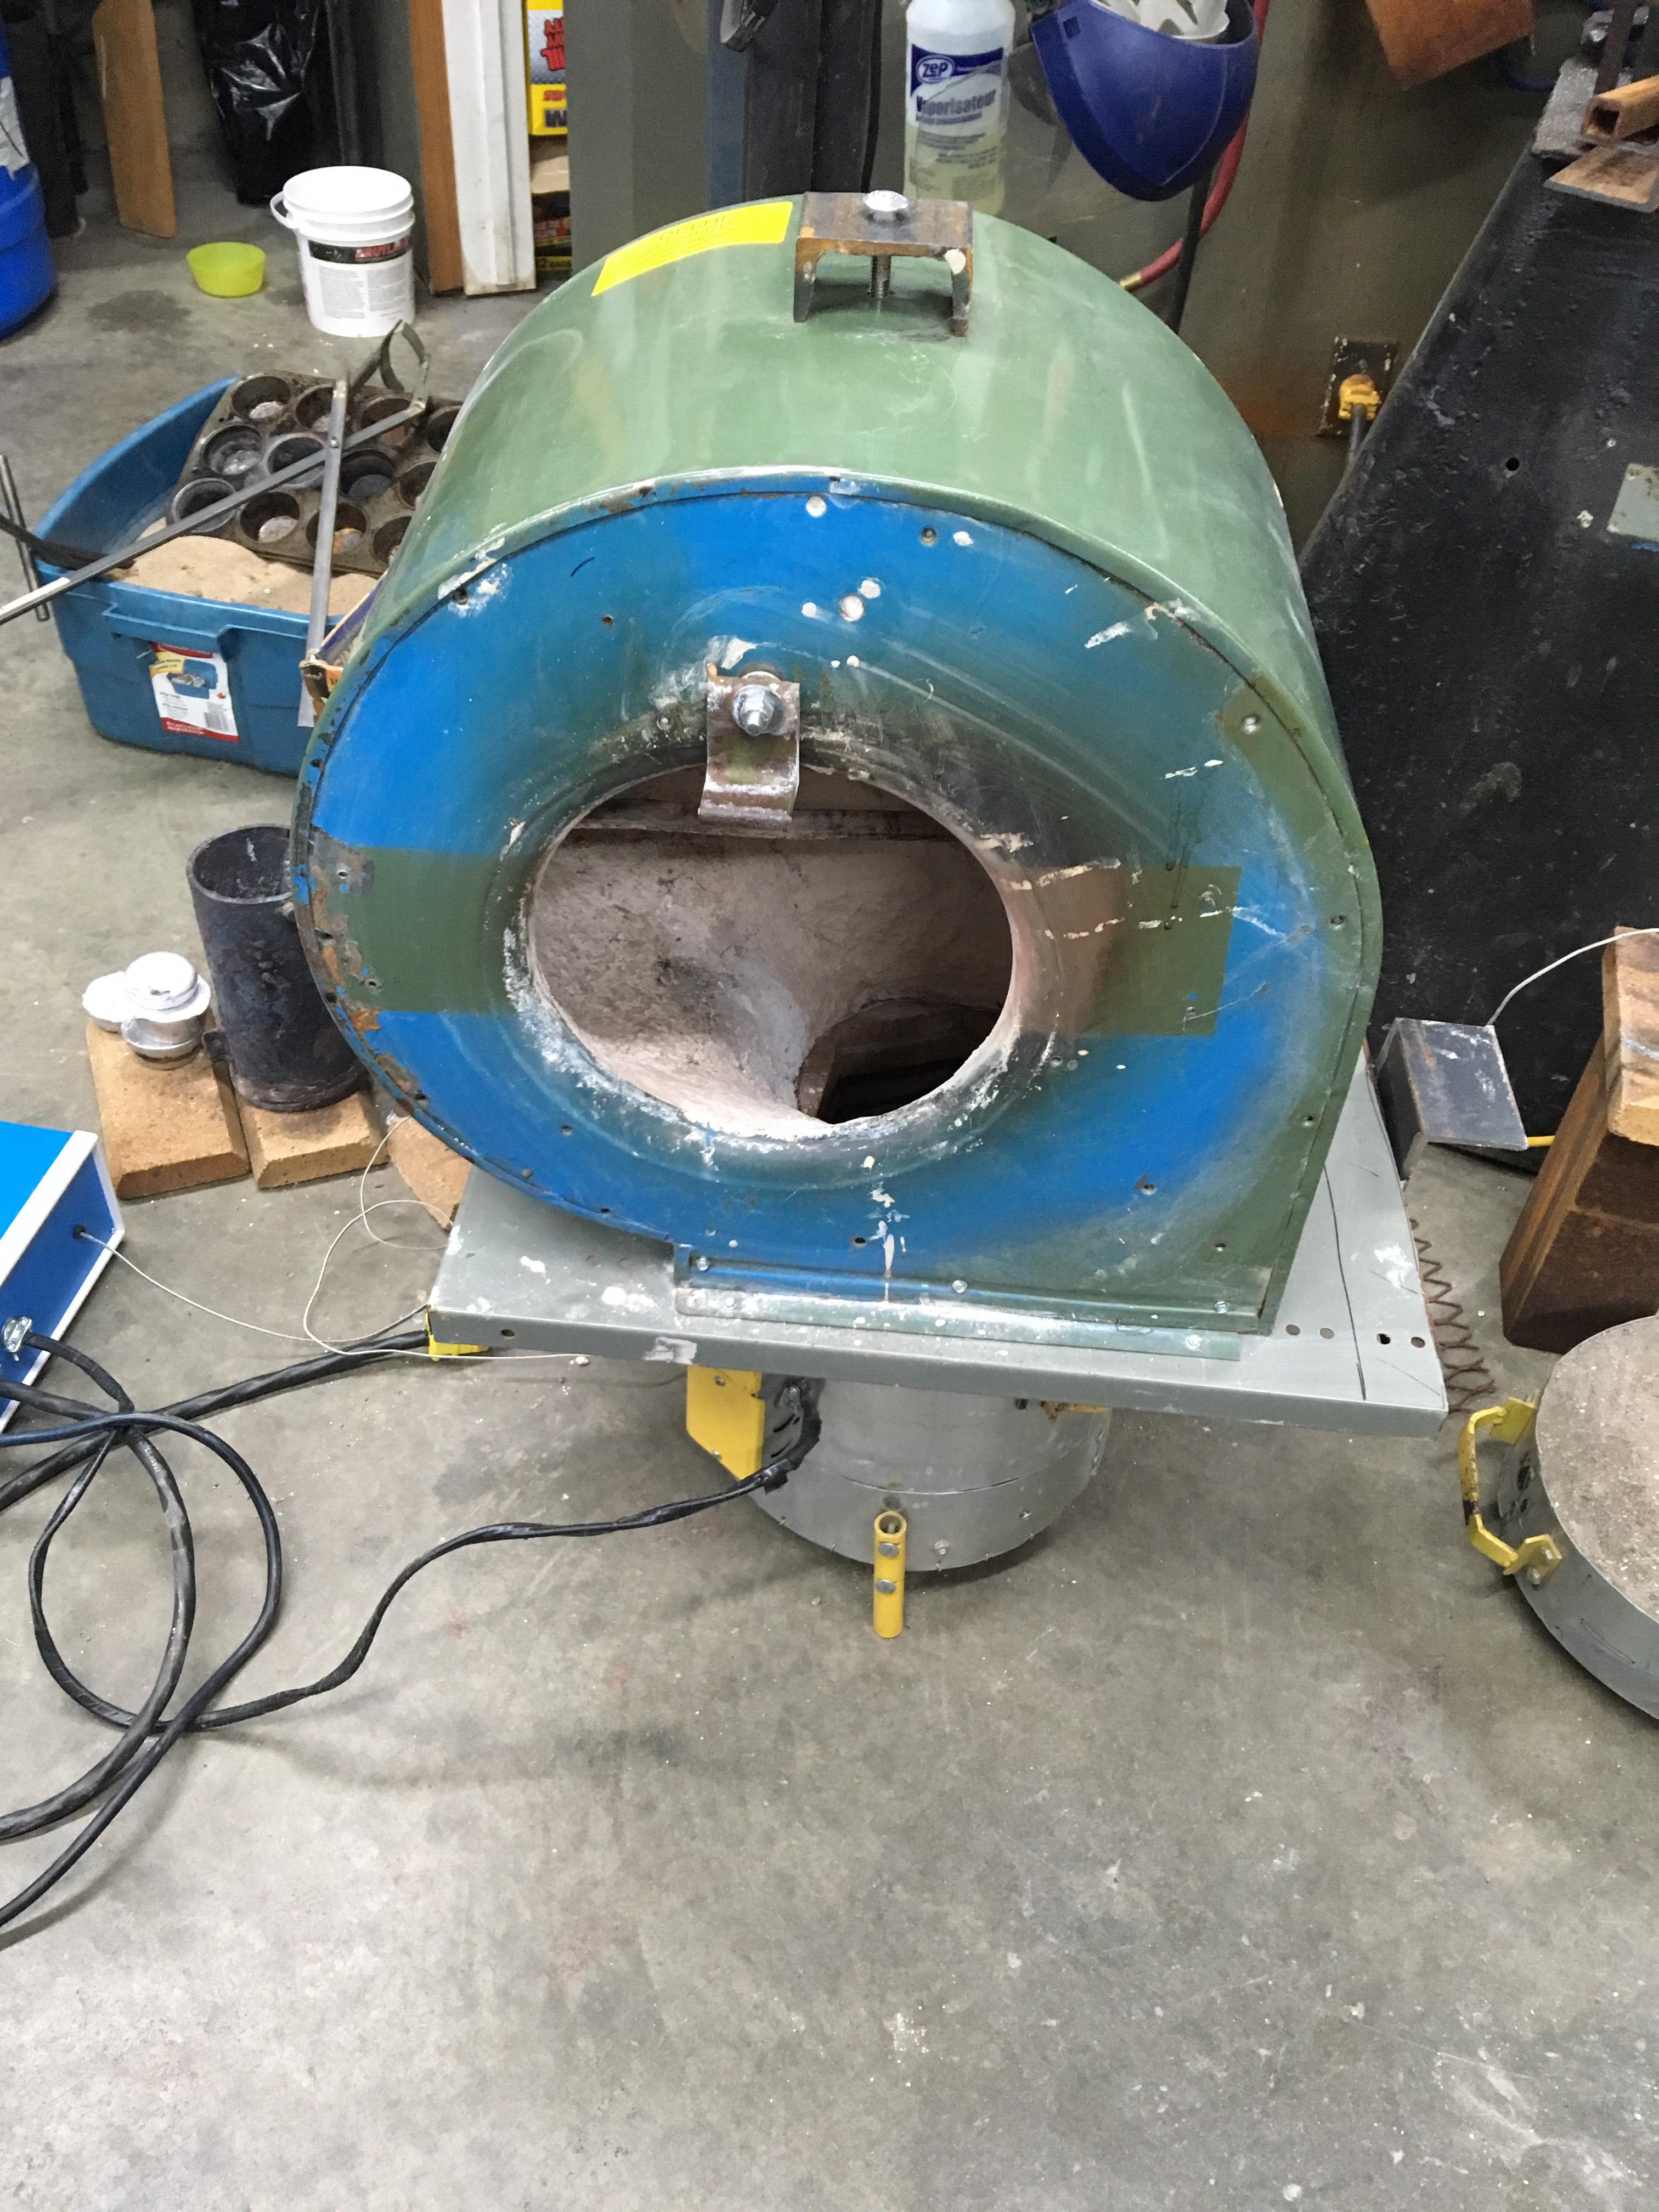
I rewired the furnance and then set out to build a 'hood' to sit on top. The idea is to have the heat radiate 'up' into a box, and have hooks/shelf etc. in there to put cans, knives and other on it. For this I repurposed an old HVAC squirrel fan (big sucker, 36" box). The shroud for the fan is shaped like a snail, so that became the start. I added a base, but a hole in the bottom.......
Ok - side conversation. If you don't own an air nibbler from Princess Auto, drop the cash and get one. Best money I spent. Good bye tin ships/shears, hello nibbler. Drill a pilot hold (1/2"), draw it with Sharpie, nibble it out. Nice finish, and it does curves like no-ones business. Air Nibbler, there, I said it.
Ok, back to the design. This 'snail' shell wasn't going to have any heat source of it's own, will radiate from the furnace. I started with a 1" thick ceramic blanket lining, then ordered up some 'Rutland Refractory Cement' from Amazon (12.5 lb pail). Well, that works well, it dries hard and needs no curing. I ordered 3 pails (pricey, 42/pail), one arrived, two made it to calgary and then I got a refund from Amazon saying my product was damaged beyond repair. I suspect they dropped it.
Rather than order more, I decided to break into my cache of 3600 degree refractor (I have 3 50lb bags) which I was saving to do a cast iron furnance. This stuff is not as easy to work with (does not cure hard). I have to get creative and go about it in 3 batches to fight gravity. I cured each phase for 7 hours at 230C.
After that, I've always been curious about what the ITC-100HD product looks/feels like. Princess Auto sells it online and they had free shipping so I picked up a 'pint' for 70 bucks. Yikes. It is basically like pre-mixed grout, very sandy/gritty. You mix it 2:1 with water and they recommend 'spraying' it.
Warning: An electric wagner sprayer is NOT the tool you want........ what a gong show. Plugged in 0.2 seconds.
I ended up brushing it on (fairly thick) and put the whole pint into it. Then I fired that.
So if you're paying attention, that is steel shell, 1" ceramic, refactory top coat (1/4 to 1/2"), ITC-100.
I put the thermocouple in about 1/2 way up and fired it on Sunday. I will hit 500C, but it takes time. This is expensive. The furnace is 3" of refractory and it sinks a lot of heat. But once it is hot..... it is hot. I think the thermocouple is 1/3 less than what the bottom is. I'm normally not phased by heat in terms of 'danger instinct', but my skin on my arm started to peel like a bad sunburn after a session. Gotta rethink that.
Looking back I'll be doing a formal heat treat furnace build with brick/heating element etc. This is the only way to keep the heat. But the hood is awesome for the PLA burnout, and will be a great 'temper' oven after heat treat.
Pictures coming soon.
My quest to conquer lost-pla always came back to the PLA burnout step -- specifically how/where to do it. Fire pit? Kitchen stove (the smell will have you divorced)? Propane torch?
Being stuck at home (covid) and having the yard in shape, I have time to burn on projects. I decided to repurpose a bunch of scrap and made a 'add-on' for my electric furnace that would perhaps allow me to heat-treat/anneal/temper metal as well as do PLA burnouts.
My electric furnace was built from the lindsay/gingery series of books where they have you ruin a table-saw top by cutting hard fire bricks on it
The book calls for a range-switch to control the temperature, but after the first two days, you want ON or OFF. ON to heat, OFF before you reach in to avoid electrocution. I've been toying with adding a PID controller to the mix, so over the winter I source a set of 1300C thermocouples and a couple of PIDs to go with (SSR/relay type). I ordered two, one for @Janger , (he knows he'll want one). I rewired the furnance and then set out to build a 'hood' to sit on top. The idea is to have the heat radiate 'up' into a box, and have hooks/shelf etc. in there to put cans, knives and other on it. For this I repurposed an old HVAC squirrel fan (big sucker, 36" box). The shroud for the fan is shaped like a snail, so that became the start. I added a base, but a hole in the bottom.......
Ok - side conversation. If you don't own an air nibbler from Princess Auto, drop the cash and get one. Best money I spent. Good bye tin ships/shears, hello nibbler. Drill a pilot hold (1/2"), draw it with Sharpie, nibble it out. Nice finish, and it does curves like no-ones business. Air Nibbler, there, I said it.
Ok, back to the design. This 'snail' shell wasn't going to have any heat source of it's own, will radiate from the furnace. I started with a 1" thick ceramic blanket lining, then ordered up some 'Rutland Refractory Cement' from Amazon (12.5 lb pail). Well, that works well, it dries hard and needs no curing. I ordered 3 pails (pricey, 42/pail), one arrived, two made it to calgary and then I got a refund from Amazon saying my product was damaged beyond repair. I suspect they dropped it.
Rather than order more, I decided to break into my cache of 3600 degree refractor (I have 3 50lb bags) which I was saving to do a cast iron furnance. This stuff is not as easy to work with (does not cure hard). I have to get creative and go about it in 3 batches to fight gravity. I cured each phase for 7 hours at 230C.
After that, I've always been curious about what the ITC-100HD product looks/feels like. Princess Auto sells it online and they had free shipping so I picked up a 'pint' for 70 bucks. Yikes. It is basically like pre-mixed grout, very sandy/gritty. You mix it 2:1 with water and they recommend 'spraying' it.
Warning: An electric wagner sprayer is NOT the tool you want........ what a gong show. Plugged in 0.2 seconds.
I ended up brushing it on (fairly thick) and put the whole pint into it. Then I fired that.
So if you're paying attention, that is steel shell, 1" ceramic, refactory top coat (1/4 to 1/2"), ITC-100.
I put the thermocouple in about 1/2 way up and fired it on Sunday. I will hit 500C, but it takes time. This is expensive. The furnace is 3" of refractory and it sinks a lot of heat. But once it is hot..... it is hot. I think the thermocouple is 1/3 less than what the bottom is. I'm normally not phased by heat in terms of 'danger instinct', but my skin on my arm started to peel like a bad sunburn after a session. Gotta rethink that.
Looking back I'll be doing a formal heat treat furnace build with brick/heating element etc. This is the only way to keep the heat. But the hood is awesome for the PLA burnout, and will be a great 'temper' oven after heat treat.
Pictures coming soon.