DRO install on a LC-30A mill (RF-30 clone)

DavidR8

Scrap maker
Administrator
Moderator
Premium Member
Thought folks here might want to see how I'm progressing on my DRO install.
One of the things I mused over was whether to put the X-axis scale on the fron or back of the table.
Front mean I keep all my Y-axis travel and it's easier to mount but I lose my table stops and a powerfeed auto-stop becomes a real challenge.
Rear means I lose about .45" of travel and have to pull the table to do the install. But it's out of harms way.

Any way, I decided to go with the rear mount as you'll see.
Some pics
Y-Axis first
Bracket 1
y-axis bracket 1.jpg
Bracket 2 and scale
y-axis end.jpg
Scale all in
y-axis scale in.jpg
Reader head
y-axis reader.jpg

y-axis reader 2.jpg
Y-axis all done!
y-axis complete.jpg

On to the X-axis!
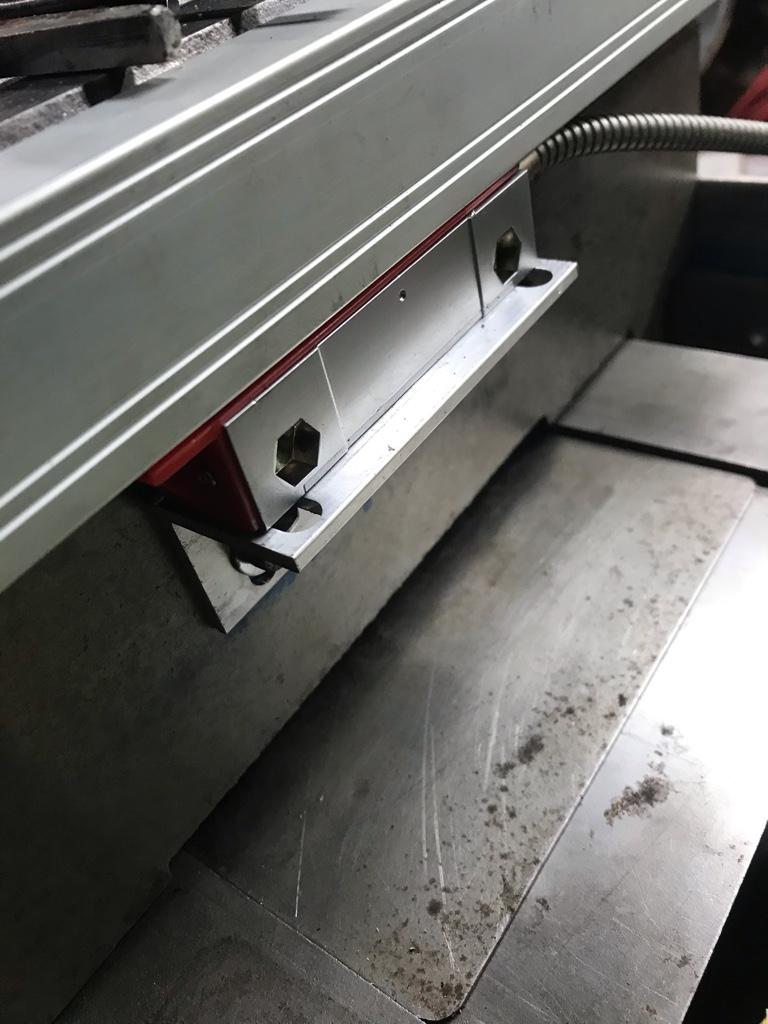
I didn't want to block access to the oil port so I decided to mount the scale high. This also reduces the amount of travel lost because the column slopes away from the table at the top.
X-axis location.jpg

Space for x-axis scale.jpg
X-Axis scale in place. I had to cut the scale as I mistakenly bought the wrong length. I just put it in the bandsaw and it cut fine, glass and all. Piece of cake.
x-axis installed.jpg

Then I pulled the table and cross slide so I could mark, drill and tap for the reader head.
x-axis drilled and tapped.jpg
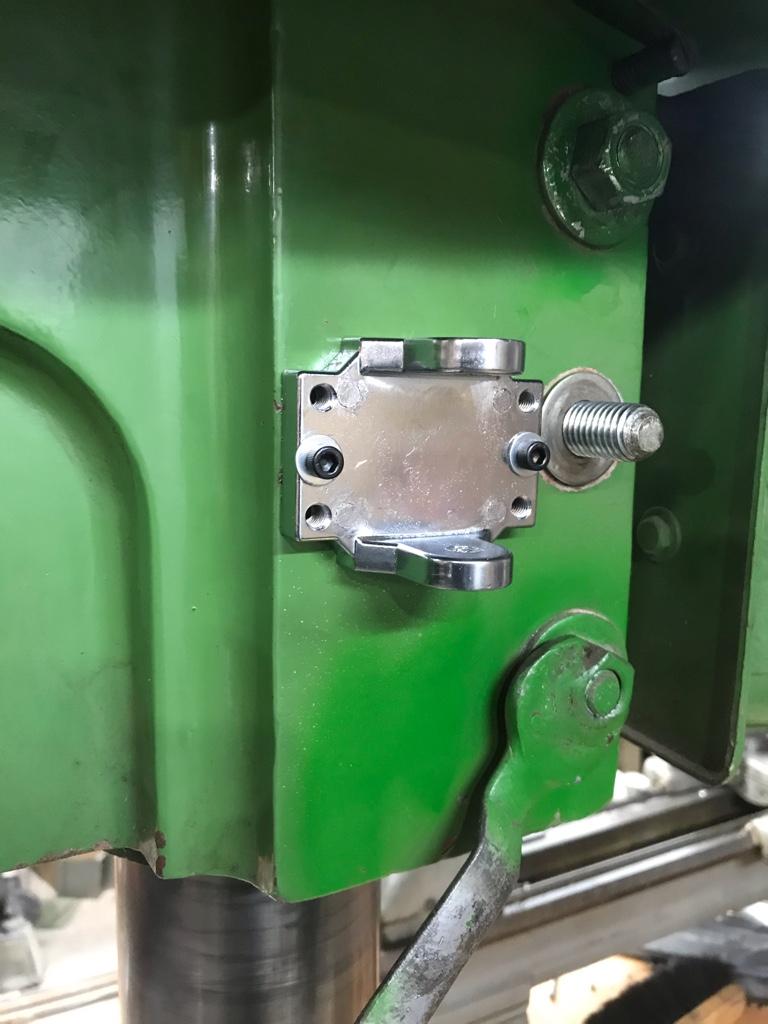
X-axis reader head in place.
x-axis readerhead.jpg

Next up is the Y-axis. I'm going to mount it at the rear of the spindle with the scale going up inside the hollow spot in the head.
 

YotaBota

Mike
Premium Member
Where did you get the DRO? I see the 3 axis online for about $320 but I wonder about the quality. So far your install looks pretty straight forward and no issues, fingers crossed that I haven't jinxed anything for you.
 

DavidR8

Scrap maker
Administrator
Moderator
Premium Member
That's the same unit I put on my mini-mill. You're going to love it.
Thanks Craig, question for you:
Did you have to provide some kind of support on the rear of the display so that it resists the pressure of pressing the buttons?
 

YYCHM

(Craig)
Premium Member
Thanks Craig, question for you:
Did you have to provide some kind of support on the rear of the display so that it resists the pressure of pressing the buttons?

I hold the display with my fingers and use my thumb to press buttons. Can do most things with one hand that way. The mount is not the greatest thing that's for sure. Also, the mounting arm on mine is attached to the electric box which isn't all that robust.

That aliexpress ad is a little confusing. Did you get the VM600-3?

You cut a scale down? I can't picture how you did that?

Craig
 
Last edited:

Tom Kitta

Ultra Member
That is the same one I am considering for my small lathe. I just have to figure out how to mount the Y axis scale - I am tempted to say from the front.
 

DavidR8

Scrap maker
Administrator
Moderator
Premium Member
I hold the display with my fingers and use my thumb to press buttons. Can do most things with one hand that way. The mount is not the greatest thing that's for sure. Also, the mounting arm on mine is attached to the electric box which isn't all that robust.

That aliexpress ad is a little confusing. Did you get the VM600-3?

You cut a scale down? I can't picture how you did that?

Craig
No I got the YH800 with the LCD display.
I cut the scale with my 4x6 bandsaw. Piece of cake really.
Here's a pic of the cut-off piece. The glass is broken because I was experimenting how to trim the glass back so I could re-install the end-cap. The glass is like a stale cookie and just crumbles.
IMG_5873.jpg

@Tom Kitta I'm going to put the Y-axis up into the empty space behind the quill.
 
Last edited:

YotaBota

Mike
Premium Member
I'm trying to find a video of a scale being shortened where the guy used a glass scriber and then the glass just snaps at the scribe line.
 

DavidR8

Scrap maker
Administrator
Moderator
Premium Member
I'm trying to find a video of a scale being shortened where the guy used a glass scriber and then the glass just snaps at the scribe line.
I thought about it but I wasn't confident that I could get the scale out without breaking it. I watched a couple of vids of people just cutting them. My scale was 6" too long so I had some length to experiment with. I'm happy with how it turned out. The hardest part was drilling the four holes to reattach the end cap. I used the cap as a guide and it turned pretty good.
 
Last edited:

YotaBota

Mike
Premium Member
Craig - if you search " shorten dro glass scale" there are a few video that show the procedure.
 

YYCHM

(Craig)
Premium Member
Sorry... I have VM on the brain today as I'm dealing with Virtual Machine issues for work :rolleyes:
I have the YH800 unit. Doh!

Huuu..... another IT type dabbling in metal working. There are probably 4 or 5 of us here in Calgary.
 

Tom Kitta

Ultra Member
Yes I said hi. After I scolded him few days ago for not wearing protection when welding - he had his whole forearms exposed. He did not like the comment - even through I tried to simply get him to let others know via text on video that he simply forgot his gear.
 

DavidR8

Scrap maker
Administrator
Moderator
Premium Member
Well after a long work week I took some time to progress the DRO install.
Got the table back on, reinstalled the Y-axis scale and reader and attached the X-axis reader.
Mounted the display unit.
Checked the display against the dials and it’s dead on which makes me happy.
Acid test will be with a DTI though.

All that’s left is the Y-axis.
8395126d10e382e898323a8bc4a3ca66.jpg

ab89e27c23e0284a34954923994183c6.jpg

d0b77a844b1b3a3c3482bc46006b280e.jpg


Sent from my iPhone using Tapatalk
 

YYCHM

(Craig)
Premium Member
I like the golf ball knob, did it come that way?

What are the two large screws behind the DRO display?
 
Last edited:
Top